
Introduction to White Chocolate Peppermint Cheesecake
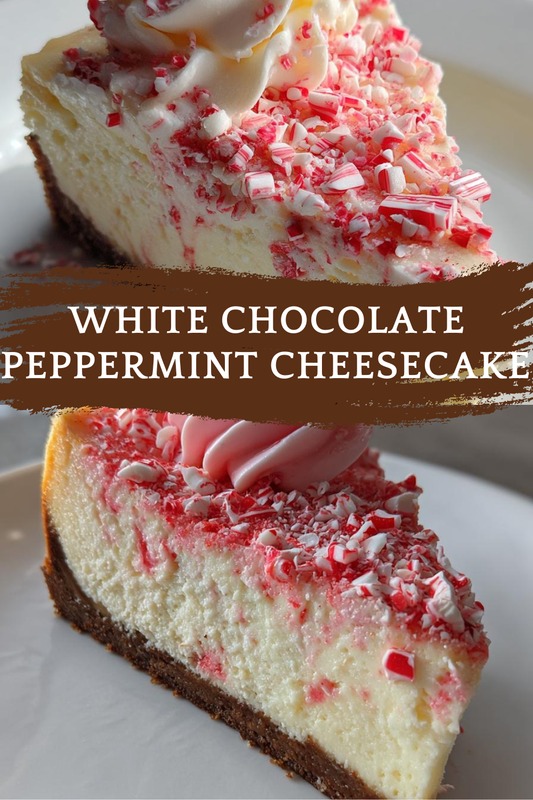
As the holiday season approaches, I find myself dreaming of festive treats that bring joy to my family. One of my absolute favorites is the White Chocolate Peppermint Cheesecake. This creamy delight is not just a dessert; it’s a celebration on a plate!
Whether you’re hosting a gathering or simply want to indulge after a long day, this cheesecake is the perfect solution. It’s easy to whip up, and the combination of white chocolate and peppermint creates a flavor that dances on your taste buds. Trust me, your loved ones will be asking for seconds!
Print
White Chocolate Peppermint Cheesecake: A Festive Delight!
- Total Time: 4 hours 20 minutes
- Yield: 12 servings
- Diet: Vegetarian
Description
A creamy and festive cheesecake infused with white chocolate and peppermint, perfect for holiday celebrations.
Ingredients
- 1 1/2 cups graham cracker crumbs
- 1/2 cup unsalted butter, melted
- 2 cups cream cheese, softened
- 1 cup white chocolate, melted
- 1 cup powdered sugar
- 1 teaspoon peppermint extract
- 3 large eggs
- 1/2 cup sour cream
- 1/4 cup crushed peppermint candies
Instructions
- Preheat the oven to 325°F (160°C).
- In a bowl, mix graham cracker crumbs and melted butter until combined. Press into the bottom of a springform pan.
- In a large mixing bowl, beat cream cheese until smooth. Add melted white chocolate and mix well.
- Gradually add powdered sugar and peppermint extract, mixing until combined.
- Add eggs one at a time, mixing well after each addition. Stir in sour cream and crushed peppermint candies.
- Pour the cheesecake mixture over the crust in the springform pan.
- Bake for 55-60 minutes or until the center is set but slightly jiggly.
- Turn off the oven and let the cheesecake cool in the oven with the door ajar for 1 hour.
- Refrigerate for at least 4 hours or overnight before serving.
Notes
- For a stronger peppermint flavor, increase the peppermint extract to 1 1/2 teaspoons.
- Top with whipped cream and additional crushed peppermint candies for garnish.
- Ensure all ingredients are at room temperature for best results.
- Prep Time: 20 minutes
- Cook Time: 60 minutes
- Category: Dessert
- Method: Baking
- Cuisine: American
Why You’ll Love This White Chocolate Peppermint Cheesecake
This White Chocolate Peppermint Cheesecake is a true crowd-pleaser! It’s not only simple to make, but it also comes together quickly, making it perfect for busy moms like us. The rich, creamy texture paired with the refreshing peppermint flavor is simply irresistible. Plus, it’s a showstopper at any holiday gathering, ensuring you’ll impress your guests without spending hours in the kitchen. What’s not to love?
Ingredients for White Chocolate Peppermint Cheesecake
Gathering the right ingredients is the first step to creating this festive masterpiece. Here’s what you’ll need:
- Graham cracker crumbs: These form the base of your cheesecake crust, providing a sweet and crunchy texture.
- Unsalted butter: Melted butter binds the crumbs together, ensuring a rich flavor without the extra salt.
- Cream cheese: The star of the show! Softened cream cheese gives the cheesecake its creamy, luscious texture.
- White chocolate: Melted white chocolate adds sweetness and a luxurious creaminess that pairs beautifully with peppermint.
- Powdered sugar: This sweetener helps achieve the perfect balance of sweetness without grittiness.
- Peppermint extract: A splash of this extract infuses the cheesecake with that delightful holiday flavor.
- Eggs: Essential for binding the ingredients together and providing structure to the cheesecake.
- Sour cream: This ingredient adds a tangy flavor and enhances the creaminess of the filling.
- Crushed peppermint candies: These not only add a festive crunch but also intensify the peppermint flavor.
For those looking to customize, you can increase the peppermint extract for a stronger flavor or swap out the graham cracker crumbs for crushed Oreos for a chocolatey twist.
All ingredient measurements are available at the bottom of the article for easy printing. Happy baking!
How to Make White Chocolate Peppermint Cheesecake
Now that we have our ingredients ready, let’s dive into the delightful process of making this White Chocolate Peppermint Cheesecake. Follow these simple steps, and you’ll have a festive dessert that will wow your family and friends!
Step 1: Preheat the Oven
First things first, preheat your oven to 325°F (160°C). Preheating is crucial because it ensures even baking. A hot oven helps the cheesecake rise properly and sets the texture just right. Trust me, you don’t want to skip this step!
Step 2: Prepare the Crust
In a mixing bowl, combine your graham cracker crumbs with the melted butter. Stir until the crumbs are fully coated. This mixture should resemble wet sand. Now, press it firmly into the bottom of your springform pan. A well-pressed crust provides a sturdy base for your cheesecake, so don’t rush this part!
Step 3: Mix the Cheesecake Filling
In a large mixing bowl, beat the softened cream cheese until it’s smooth and creamy. This step is key for a velvety texture. Next, add the melted white chocolate and mix until fully incorporated. The combination should be rich and luscious, making your mouth water just thinking about it!
Step 4: Add Sweetness and Flavor
Now, it’s time to sweeten things up! Gradually add the powdered sugar and peppermint extract to the cream cheese mixture. Mix until everything is well combined. Taste it! You want a perfect balance of sweetness and that refreshing peppermint flavor. Adjust if needed!
Step 5: Incorporate Eggs and Sour Cream
Next, add the eggs one at a time, mixing well after each addition. This helps to keep the mixture smooth and airy. Then, stir in the sour cream. This ingredient is a game-changer, adding creaminess and a slight tang that elevates the cheesecake to another level!
Step 6: Pour and Bake
Carefully pour the cheesecake filling over your prepared crust in the springform pan. Spread it evenly with a spatula. Bake in the preheated oven for 55-60 minutes. The center should be set but still slightly jiggly. This is the sweet spot for a creamy cheesecake!
Step 7: Cooling and Refrigeration
Once baked, turn off the oven and let the cheesecake cool inside with the door ajar for about an hour. This gentle cooling helps prevent cracks. After that, refrigerate for at least 4 hours, or overnight if you can wait! Chilling is essential for the flavors to meld and the cheesecake to firm up.
Tips for Success
- Make sure all ingredients are at room temperature for a smooth batter.
- Use a water bath while baking to prevent cracks and keep the cheesecake moist.
- Don’t overmix the batter; this keeps your cheesecake light and fluffy.
- Let the cheesecake cool gradually to avoid sudden temperature changes.
- Top with whipped cream and extra crushed peppermint for a festive touch!
Equipment Needed
- Springform pan: Essential for easy removal; a regular cake pan works too, but it may be trickier to serve.
- Mixing bowls: Use a large bowl for the filling; any size will do, just ensure it’s sturdy.
- Electric mixer: A hand mixer is perfect; a whisk can work, but it’ll take more elbow grease!
- Spatula: Great for scraping down the sides and spreading the filling evenly.
Variations
- Chocolate Peppermint Cheesecake: Swap half of the white chocolate for dark chocolate for a richer flavor.
- Gluten-Free Option: Use gluten-free graham cracker crumbs or almond flour for the crust.
- Vegan Version: Substitute cream cheese with vegan cream cheese and use aquafaba instead of eggs.
- Mint Chocolate Chip: Add mini chocolate chips to the filling for a delightful crunch.
- Caramel Drizzle: Drizzle caramel sauce over the top before serving for an extra layer of sweetness.
Serving Suggestions for White Chocolate Peppermint Cheesecake
- Pair with a dollop of freshly whipped cream for added richness.
- Serve alongside a warm cup of peppermint hot chocolate for a cozy treat.
- Garnish with extra crushed peppermint candies for a festive touch.
- Consider a side of fresh berries to balance the sweetness.
- Present on a decorative platter for an eye-catching display!
FAQs about White Chocolate Peppermint Cheesecake
Can I make this cheesecake ahead of time?
Absolutely! This White Chocolate Peppermint Cheesecake actually tastes better after chilling overnight. Just make sure to cover it well in the fridge to keep it fresh.
How do I know when the cheesecake is done baking?
The cheesecake is done when the edges are set, but the center is still slightly jiggly. It will firm up as it cools, so don’t worry if it looks a bit soft!
Can I freeze the cheesecake?
Yes, you can freeze it! Just wrap it tightly in plastic wrap and then in aluminum foil. It can last up to three months in the freezer. Thaw it in the fridge before serving.
What can I use instead of peppermint extract?
If you don’t have peppermint extract, you can use mint extract, but use it sparingly as it can be stronger. Alternatively, you can skip it and add a splash of vanilla for a different flavor.
How should I store leftovers?
Store any leftovers in an airtight container in the fridge. It should stay fresh for about 3-4 days, but I doubt it will last that long!
Final Thoughts
Creating this White Chocolate Peppermint Cheesecake is more than just baking; it’s about crafting memories. The joy of sharing a slice with family during the holidays warms my heart. Each bite is a delightful blend of creamy sweetness and refreshing peppermint, making it a true festive treat.
Whether it’s a cozy family gathering or a holiday party, this cheesecake is sure to be the star of the show. I hope you find as much joy in making and sharing this dessert as I do. Happy baking, and may your holidays be filled with sweetness and love!