
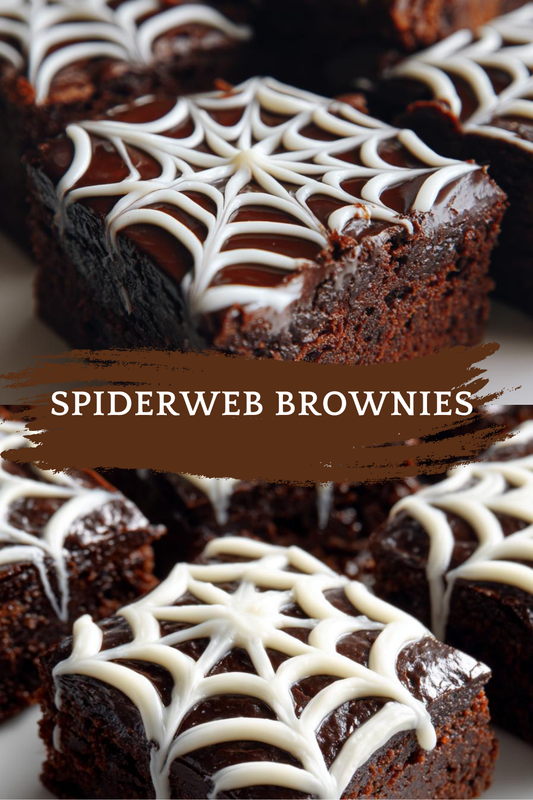
Introduction to Spiderweb Brownies
As a busy mom, I know how challenging it can be to whip up something special, especially during the hectic Halloween season. That’s where my Spiderweb Brownies come in! These fudgy delights are not only a treat for the taste buds but also a feast for the eyes. With a creamy white chocolate spiderweb design, they’re perfect for impressing your family or friends. Plus, they’re quick to make, so you can spend less time in the kitchen and more time enjoying the festivities. Trust me, these brownies will become a favorite in your home!
Print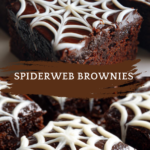
Spiderweb Brownies: A Spooky Treat You’ll Love!
- Total Time: 50 minutes
- Yield: 24 brownies
- Diet: Vegetarian
Description
Spiderweb Brownies are a delicious and spooky dessert perfect for Halloween or any festive occasion. These fudgy brownies are topped with a creamy white chocolate spiderweb design, making them both tasty and visually appealing.
Ingredients
- 1 cup unsalted butter
- 2 cups granulated sugar
- 4 large eggs
- 1 teaspoon vanilla extract
- 1 cup all-purpose flour
- 1 cup unsweetened cocoa powder
- 1/2 teaspoon salt
- 1 cup white chocolate chips
- 1/4 cup heavy cream
Instructions
- Preheat your oven to 350°F (175°C) and grease a 9×13 inch baking pan.
- In a large saucepan, melt the butter over medium heat. Remove from heat and stir in sugar, eggs, and vanilla.
- Mix in flour, cocoa powder, and salt until just combined.
- Pour the brownie batter into the prepared pan and spread evenly.
- Bake for 25-30 minutes or until a toothpick inserted in the center comes out with a few moist crumbs.
- While the brownies are baking, melt the white chocolate chips with heavy cream in a microwave-safe bowl, stirring until smooth.
- Once the brownies are cooled, drizzle the melted white chocolate over the top in a spiderweb pattern.
- Allow the chocolate to set before cutting into squares and serving.
Notes
- For a more intense chocolate flavor, use dark cocoa powder.
- Make sure to let the brownies cool completely before adding the white chocolate.
- These brownies can be stored in an airtight container for up to a week.
- Prep Time: 20 minutes
- Cook Time: 30 minutes
- Category: Dessert
- Method: Baking
- Cuisine: American
Why You’ll Love This Spiderweb Brownies
These Spiderweb Brownies are a delightful combination of ease and flavor. They come together in just about 50 minutes, making them a perfect solution for busy days. The rich, fudgy texture paired with the sweet white chocolate topping creates a taste sensation that will have everyone coming back for more. Plus, they’re visually stunning, making them a hit at any gathering. Who doesn’t love a dessert that’s both quick and impressive?
Ingredients for Spiderweb Brownies
Let’s gather our ingredients for these delightful Spiderweb Brownies! Each component plays a crucial role in creating that rich, fudgy texture and the eye-catching design. Here’s what you’ll need:
- Unsalted butter: This adds richness and moisture to the brownies. You can substitute with coconut oil for a dairy-free option.
- Granulated sugar: Sweetens the brownies and helps achieve that perfect chewy texture. Brown sugar can be used for a deeper flavor.
- Large eggs: They bind the ingredients together and provide structure. If you’re looking for an egg-free version, try using applesauce or flax eggs.
- Vanilla extract: A splash of vanilla enhances the overall flavor. Pure vanilla is best, but imitation works too in a pinch.
- All-purpose flour: This gives the brownies their structure. For a gluten-free option, almond flour or a gluten-free blend can be used.
- Unsweetened cocoa powder: The star of the show! It provides that rich chocolate flavor. Dark cocoa powder can intensify the chocolatey goodness.
- Salt: Just a pinch balances the sweetness and enhances the flavors.
- White chocolate chips: These are melted to create the spiderweb topping. You can swap them for dark chocolate chips if you prefer.
- Heavy cream: This helps to melt the white chocolate smoothly. For a lighter option, use half-and-half or even coconut cream.
For exact measurements, check the bottom of the article where you can find everything listed for easy printing!
How to Make Spiderweb Brownies
Step 1: Preheat and Prepare
First things first, preheat your oven to 350°F (175°C). While that’s heating up, grab a 9×13 inch baking pan and grease it well. This will ensure your brownies slide out easily once they’re baked. Trust me, no one wants a brownie disaster!
Step 2: Melt the Butter
In a large saucepan, melt the unsalted butter over medium heat. Once it’s melted, remove it from the heat and stir in the granulated sugar. Next, add the eggs, one at a time, mixing well after each addition. Finally, pour in the vanilla extract. This mixture should be smooth and creamy, like a warm hug!
Step 3: Combine Dry Ingredients
Now, it’s time to mix in the dry ingredients. Gently fold in the all-purpose flour, unsweetened cocoa powder, and salt. Be careful not to overmix; you want everything just combined. This will keep your brownies fudgy and delicious!
Step 4: Bake the Brownies
Pour the brownie batter into your prepared pan, spreading it evenly. Bake for 25-30 minutes. To check for doneness, insert a toothpick into the center. If it comes out with a few moist crumbs, they’re ready! Let the aroma fill your kitchen; it’s heavenly!
Step 5: Prepare the Spiderweb Topping
While the brownies cool, melt the white chocolate chips with heavy cream in a microwave-safe bowl. Heat in short bursts, stirring until smooth. Once melted, drizzle the white chocolate over the brownies in a spiderweb pattern. It’s like creating edible art, and it’s so much fun!
Step 6: Cool and Serve
Allow the brownies to cool completely before cutting them into squares. This will help the spiderweb topping set nicely. Once they’re cool, slice them up and get ready to enjoy these spooky treats with your family and friends!
Tips for Success
- Always use room temperature eggs for better mixing.
- Don’t overbake! Check your brownies a few minutes early.
- Let the brownies cool completely before adding the topping for a cleaner look.
- For a fun twist, add nuts or chocolate chunks to the batter.
- Use a sharp knife to cut the brownies for neat squares.
Equipment Needed
- 9×13 inch baking pan: A standard size for brownies. If you don’t have one, a similar-sized dish will work.
- Large saucepan: For melting butter and mixing ingredients. A mixing bowl can also do the trick.
- Microwave-safe bowl: Essential for melting the white chocolate. Any heatproof bowl will suffice.
- Spatula: Perfect for spreading the batter. A wooden spoon can be a great alternative.
Variations
- Nutty Brownies: Add chopped walnuts or pecans to the batter for a delightful crunch.
- Mint Chocolate: Mix in peppermint extract for a refreshing twist, or top with mint chocolate chips.
- Gluten-Free: Substitute all-purpose flour with a gluten-free blend or almond flour for a gluten-free version.
- Vegan Option: Use coconut oil instead of butter, flax eggs instead of regular eggs, and dairy-free chocolate chips.
- Spicy Kick: Add a pinch of cayenne pepper or chili powder to the batter for a surprising heat that complements the chocolate.
Serving Suggestions
- Pair your Spiderweb Brownies with a scoop of vanilla ice cream for a delightful contrast.
- Serve with a warm cup of spiced apple cider to enhance the fall flavors.
- For a festive touch, plate the brownies on a Halloween-themed platter.
- Garnish with fresh berries for a pop of color and freshness.
FAQs about Spiderweb Brownies
Can I make Spiderweb Brownies ahead of time?
Absolutely! These brownies can be made a day in advance. Just store them in an airtight container at room temperature. The flavors will meld beautifully overnight, making them even more delicious!
What can I use instead of white chocolate for the spiderweb?
If white chocolate isn’t your thing, feel free to use dark chocolate or milk chocolate chips. Just melt them the same way, and you’ll still have a stunning design!
How do I store leftover Spiderweb Brownies?
Store any leftovers in an airtight container at room temperature for up to a week. If you want to keep them longer, you can freeze them for up to three months. Just thaw before serving!
Can I add other toppings to my brownies?
Definitely! Feel free to sprinkle some crushed candy corn, sprinkles, or even nuts on top of the spiderweb for added texture and flavor. Get creative!
Are Spiderweb Brownies suitable for a gluten-free diet?
Yes! Simply substitute the all-purpose flour with a gluten-free flour blend or almond flour. This way, everyone can enjoy these spooky treats!
Final Thoughts
Making Spiderweb Brownies is more than just baking; it’s about creating memories with your loved ones. The joy of watching their faces light up as they take that first bite is priceless. These brownies are not only delicious but also a fun way to celebrate the season. Whether you’re hosting a Halloween party or just looking for a sweet treat, these brownies will surely impress. So, roll up your sleeves, gather your ingredients, and let the magic happen in your kitchen. Trust me, you’ll be the star of the show with these delightful, spooky treats!