
Introduction to Mini Mummy Pizzas
As the leaves turn and the air gets crisp, Halloween creeps around the corner, bringing with it a whirlwind of excitement. If you’re like me, juggling a busy schedule while trying to create memorable moments for your family, these Mini Mummy Pizzas are a delightful solution. They’re not just quick to whip up; they also bring a fun, spooky twist to dinner that kids adore. Imagine their faces lighting up as they dig into these cheesy, mummy-like treats! Trust me, this recipe is a perfect way to celebrate the season without the stress.
Print
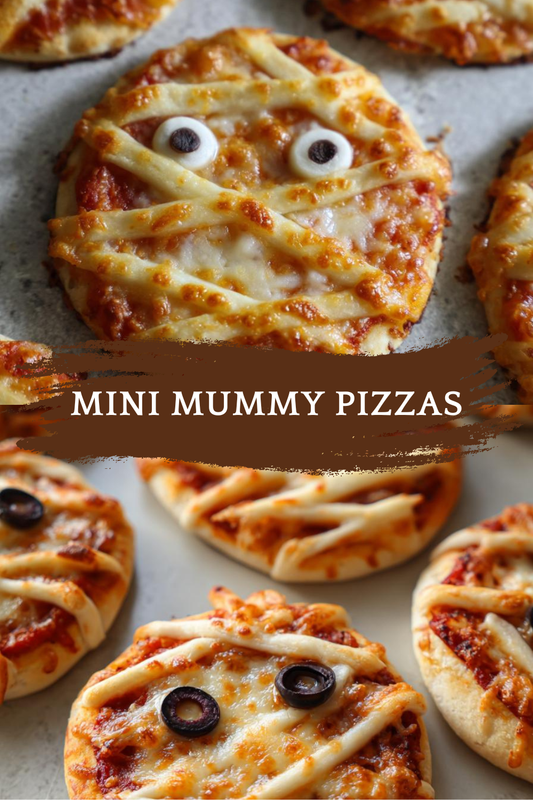
Mini Mummy Pizzas: Quick and Fun Halloween Treats!
- Total Time: 22 minutes
- Yield: 4 mini pizzas
- Diet: Vegetarian
Description
Mini Mummy Pizzas are a fun and easy Halloween treat that kids will love. These mini pizzas are topped with cheese and olives to create a spooky mummy appearance.
Ingredients
- Mini pizza crusts – 4
- Pizza sauce – 1/2 cup
- Shredded mozzarella cheese – 1 cup
- Black olives – 8, sliced
Instructions
- Preheat the oven to 400°F (200°C).
- Spread pizza sauce evenly over each mini pizza crust.
- Sprinkle shredded mozzarella cheese on top to create a mummy effect.
- Bake in the preheated oven for 10-12 minutes or until the cheese is melted and bubbly.
- Remove from the oven and place two slices of black olives on each pizza for eyes.
- Let cool slightly before serving.
Notes
- Feel free to add other toppings like pepperoni or vegetables.
- These can be made ahead of time and reheated before serving.
- Use different types of cheese for a unique flavor.
- Prep Time: 10 minutes
- Cook Time: 12 minutes
- Category: Appetizer
- Method: Baking
- Cuisine: Italian
Why You’ll Love This Mini Mummy Pizzas
These Mini Mummy Pizzas are a lifesaver for busy moms and professionals alike. They come together in just 22 minutes, making them perfect for those hectic weeknights. Plus, the kids will love the spooky design, turning a simple meal into a festive treat. With minimal ingredients and easy steps, you’ll find yourself making these again and again. They’re not just quick; they’re deliciously cheesy and fun!
Ingredients for Mini Mummy Pizzas
Gathering the right ingredients is half the fun! For these Mini Mummy Pizzas, you’ll need:
- Mini pizza crusts: These are the perfect base for your mummies. You can find them pre-made at the store or make your own if you’re feeling adventurous.
- Pizza sauce: A classic tomato sauce adds that rich flavor. Feel free to use store-bought or whip up a quick homemade version with canned tomatoes and spices.
- Shredded mozzarella cheese: This melty goodness creates the mummy’s wrappings. You can substitute with other cheeses like cheddar for a twist.
- Black olives: Sliced olives make the perfect spooky eyes. If your family isn’t a fan, consider using pepperoni or even cherry tomatoes for a pop of color.
These ingredients are simple and easy to find, making this recipe a breeze. For exact measurements, check the bottom of the article where you can also find a printable version!
How to Make Mini Mummy Pizzas
Step 1: Preheat the Oven
Preheating the oven is crucial for achieving that perfect, bubbly cheese. When the oven is hot, it helps the crust become crispy while ensuring the cheese melts evenly. Set your oven to 400°F (200°C) and let it warm up while you prepare the pizzas. This step is key!
Step 2: Spread the Pizza Sauce
Take your pizza sauce and spread it evenly over each mini crust. Use the back of a spoon for a smooth application. This ensures every bite is packed with flavor. Don’t be shy—cover the crust well, but leave a little edge for that crispy goodness!
Step 3: Add the Cheese
Now for the fun part! Sprinkle shredded mozzarella cheese generously over the sauce. To create that mummy effect, layer the cheese in a crisscross pattern. This gives the illusion of mummy wrappings, making your pizzas look delightfully spooky and inviting!
Step 4: Bake the Pizzas
Place your mini pizzas in the preheated oven and bake for 10-12 minutes. Keep an eye on them! You’ll know they’re done when the cheese is melted and bubbly, and the edges of the crust are golden brown. It’s a sight that will make your mouth water!
Step 5: Add the Olive Eyes
Once the pizzas are out of the oven, it’s time to add the finishing touch. Place two slices of black olives on each pizza for eyes. For a fun twist, you could use pepperoni or even small dollops of cream cheese to create different expressions. Get creative!
Step 6: Cool and Serve
Let your Mini Mummy Pizzas cool for a few minutes before serving. This helps the cheese set a bit, making them easier to handle. Plus, it prevents little fingers from getting burned. Serve them warm, and watch your family enjoy these spooky delights!
Tips for Success
- Use a pizza stone for an extra crispy crust.
- Experiment with different cheeses for unique flavors.
- Prep the ingredients ahead of time to save on cooking day.
- Let the kids help with toppings; it makes cooking fun!
- Store leftovers in an airtight container for quick snacks.
Equipment Needed
- Baking sheet: A standard baking sheet works perfectly. If you have a pizza stone, it can enhance the crust’s crispiness.
- Oven mitts: Essential for safely handling hot trays. Don’t forget them!
- Spatula: A spatula helps transfer the pizzas to plates without a mess.
- Measuring cups: Handy for portioning out sauce and cheese.
Variations
- Meat Lovers: Add mini pepperoni or cooked sausage for a heartier option that will satisfy meat lovers.
- Veggie Delight: Top with bell peppers, mushrooms, or spinach for a colorful and nutritious twist.
- Gluten-Free: Use gluten-free mini pizza crusts to make this treat accessible for everyone.
- Cheesy Twist: Mix different cheeses like gouda or feta for a unique flavor profile.
- Spicy Kick: Add jalapeños or a sprinkle of red pepper flakes for those who enjoy a little heat.
Serving Suggestions
- Side Salad: Pair your Mini Mummy Pizzas with a fresh garden salad for a balanced meal.
- Fruit Platter: Serve with a colorful fruit platter to add a sweet touch to the spooky theme.
- Halloween Drinks: Consider serving with themed drinks like orange soda or spooky punch.
- Fun Presentation: Use Halloween-themed plates and napkins to enhance the festive atmosphere.
FAQs about Mini Mummy Pizzas
Can I make Mini Mummy Pizzas ahead of time?
Absolutely! You can prepare the pizzas in advance and store them in the fridge. Just bake them right before serving for that fresh, cheesy goodness.
What other toppings can I use for Mini Mummy Pizzas?
Feel free to get creative! You can add pepperoni, bell peppers, or even pineapple for a sweet twist. The options are endless!
How do I store leftovers?
Store any leftover Mini Mummy Pizzas in an airtight container in the fridge. They’ll stay fresh for a couple of days, perfect for quick snacks!
Can I freeze Mini Mummy Pizzas?
Yes, you can freeze them! Just wrap them tightly in plastic wrap and place them in a freezer-safe bag. When you’re ready, bake them straight from the freezer.
Are Mini Mummy Pizzas suitable for a vegetarian diet?
Definitely! These Mini Mummy Pizzas are vegetarian-friendly, making them a great option for meatless meals. Enjoy the cheesy goodness without any meat!
Final Thoughts
Creating Mini Mummy Pizzas is more than just a fun cooking project; it’s a chance to bond with your family over a shared love for delicious food. The joy on your kids’ faces as they dig into these spooky treats is priceless. Plus, the ease of preparation means you can whip them up even on the busiest of nights. Whether you’re hosting a Halloween party or just looking for a quick dinner idea, these Mini Mummy Pizzas are sure to bring smiles and laughter to your table. Embrace the season and enjoy every cheesy bite!