
Introduction to Fun Halloween Food
As the leaves turn and the air gets crisp, it’s time to embrace the magic of Halloween! I know how busy life can get, especially for us moms juggling work, kids, and everything in between. That’s why I’m excited to share these fun Halloween food ideas that are not only easy to whip up but also sure to thrill your guests. Imagine serving up delightful treats that spark joy and laughter, making your Halloween gathering unforgettable. Let’s dive into a recipe that’s perfect for impressing your loved ones without spending hours in the kitchen!
Print
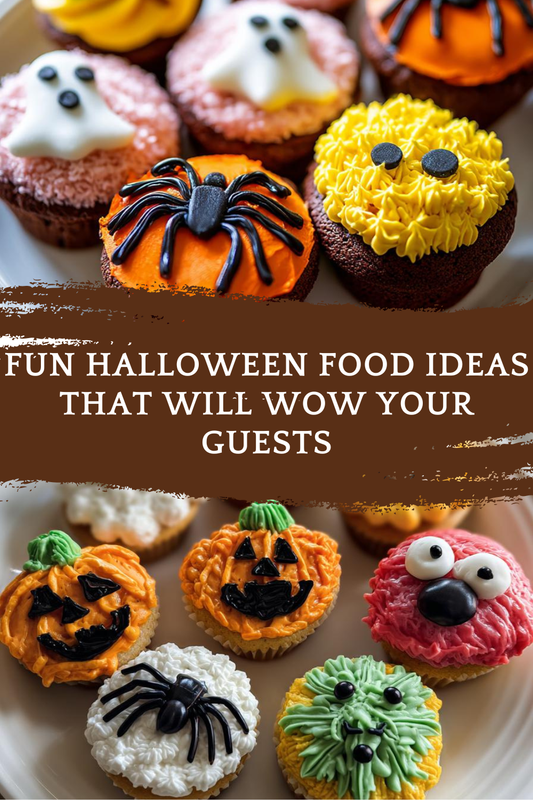
Fun Halloween food ideas that will thrill your guests!
- Total Time: 45 minutes
- Yield: 12 servings
- Diet: Vegetarian
Description
A collection of creative and spooky food ideas perfect for Halloween parties that will delight your guests.
Ingredients
- 1 cup of pumpkin puree
- 2 cups of flour
- 1 cup of sugar
- 1/2 cup of butter
- 2 eggs
- 1 tsp of baking powder
- 1 tsp of cinnamon
- 1/2 tsp of salt
- 1 cup of chocolate chips
Instructions
- Preheat the oven to 350°F (175°C).
- In a bowl, mix the pumpkin puree, sugar, and butter until smooth.
- Add the eggs one at a time, mixing well after each addition.
- In another bowl, combine the flour, baking powder, cinnamon, and salt.
- Gradually add the dry ingredients to the wet mixture, stirring until just combined.
- Fold in the chocolate chips.
- Pour the batter into a greased baking pan.
- Bake for 25-30 minutes or until a toothpick comes out clean.
- Let cool and decorate with spooky toppings if desired.
Notes
- Feel free to add food coloring for a more festive look.
- These treats can be made ahead of time and stored in an airtight container.
- Consider using Halloween-themed cookie cutters for fun shapes.
- Prep Time: 15 minutes
- Cook Time: 30 minutes
- Category: Dessert
- Method: Baking
- Cuisine: American
Why You’ll Love This Fun Halloween Food
This fun Halloween food is a breeze to make, perfect for busy schedules. With just a few simple steps, you can create a delicious treat that everyone will adore. The combination of pumpkin and chocolate is a match made in heaven, offering a delightful taste that’s both comforting and festive. Plus, it’s a great way to get the kids involved in the kitchen, making memories while whipping up something spooky and sweet!
Ingredients for Fun Halloween Food
Gathering the right ingredients is half the fun! Here’s what you’ll need to create these delightful treats:
- Pumpkin puree: This creamy base adds moisture and a subtle sweetness, making it perfect for fall.
- Flour: The backbone of any baked good, flour gives structure to your treats.
- Sugar: A touch of sweetness is essential, balancing the flavors and enhancing the pumpkin.
- Butter: This rich ingredient adds flavor and helps create a tender texture.
- Eggs: They act as a binding agent, helping everything come together beautifully.
- Baking powder: This leavening agent ensures your treats rise and become fluffy.
- Cinnamon: A warm spice that brings a cozy, autumnal flavor to the mix.
- Salt: Just a pinch enhances all the flavors, making them pop!
- Chocolate chips: These little morsels of joy add a delightful burst of sweetness and richness.
Feel free to get creative! You can add food coloring for a festive twist or use Halloween-themed cookie cutters for fun shapes. If you’re looking for alternatives, consider using whole wheat flour for a healthier option or swapping out chocolate chips for nuts or dried fruit. For exact measurements, check the bottom of the article where you can find everything available for printing!
How to Make Fun Halloween Food
Step 1: Preheat the Oven
First things first, preheat your oven to 350°F (175°C). This step is crucial because it ensures your treats bake evenly. If you skip this, your goodies might end up dense and sad, rather than fluffy and delightful. Trust me, a well-preheated oven is the secret to baking success!
Step 2: Mix Wet Ingredients
In a large bowl, combine the pumpkin puree, sugar, and softened butter. Use a whisk or a mixer to blend them until the mixture is smooth and creamy. This is where the magic begins! The pumpkin adds moisture, while the sugar and butter create a sweet, rich base that will make your treats irresistible.
Step 3: Add Eggs
Next, crack in the eggs, one at a time. Mix well after each addition. This step is important because it helps to incorporate air into the batter, making it light and fluffy. Plus, it’s a great way to get the kids involved—who doesn’t love cracking eggs?
Step 4: Combine Dry Ingredients
In a separate bowl, whisk together the flour, baking powder, cinnamon, and salt. Mixing these dry ingredients separately ensures that the baking powder is evenly distributed. This little trick helps your treats rise beautifully, giving them that perfect texture we all crave!
Step 5: Combine Wet and Dry Mixtures
Now, it’s time to bring it all together! Gradually add the dry mixture to the wet ingredients. Stir gently until just combined. Be careful not to overmix; a few lumps are perfectly fine. Overmixing can lead to tough treats, and we want them to be soft and tender!
Step 6: Fold in Chocolate Chips
Gently fold in the chocolate chips. This is where the fun really begins! The chocolate adds a delightful sweetness that pairs perfectly with the pumpkin. Folding helps keep the batter light, ensuring those chips are evenly distributed without deflating your mixture.
Step 7: Pour and Bake
Pour the batter into a greased baking pan, spreading it evenly. Pop it into your preheated oven and bake for 25-30 minutes. You’ll know it’s done when a toothpick inserted in the center comes out clean. The aroma wafting through your kitchen will be simply heavenly!
Step 8: Cool and Decorate
Once baked, let your treats cool in the pan for about 10 minutes before transferring them to a wire rack. This cooling time is essential for the texture. Once cooled, feel free to get creative with decorations! Add spooky toppings like candy eyes or a drizzle of icing for that festive flair.
Tips for Success
- Always measure your ingredients accurately for the best results.
- Use room temperature butter and eggs for easier mixing.
- Don’t skip the cooling time; it helps improve texture.
- Experiment with spices like nutmeg for added flavor.
- Involve your kids in decorating for a fun family activity!
Equipment Needed for Fun Halloween Food
- Mixing bowls: A set of various sizes is handy; you can also use any large container.
- Whisk or mixer: A whisk works great, but a hand mixer saves time.
- Baking pan: A square or rectangular pan is ideal; a muffin tin can work too!
- Measuring cups and spoons: Essential for accuracy; you can use a kitchen scale as an alternative.
- Spatula: Perfect for folding in ingredients; a wooden spoon can do the trick as well.
Variations of Fun Halloween Food
- Gluten-free option: Substitute all-purpose flour with a gluten-free blend for a delicious alternative.
- Vegan twist: Replace eggs with flaxseed meal mixed with water and use coconut oil instead of butter.
- Spiced pumpkin: Add a pinch of nutmeg or ginger for an extra layer of fall flavor.
- Nutty addition: Fold in chopped walnuts or pecans for a delightful crunch.
- Fruity flair: Mix in dried cranberries or raisins for a sweet surprise in every bite.
Serving Suggestions for Fun Halloween Food
- Pair these treats with a warm cup of apple cider for a cozy fall vibe.
- Serve alongside spooky-themed snacks like ghost-shaped cheese or veggie platters.
- For a festive touch, display them on a Halloween-themed platter or cake stand.
- Consider adding a scoop of vanilla ice cream for an indulgent dessert.
- Garnish with edible glitter or sprinkles for an extra festive flair!
FAQs about Fun Halloween Food
Can I make these treats ahead of time?
Absolutely! These fun Halloween food treats can be made a day or two in advance. Just store them in an airtight container to keep them fresh. This way, you can enjoy more time with your guests on the big day!
What can I use instead of pumpkin puree?
If you don’t have pumpkin puree, you can substitute it with applesauce or mashed bananas. Both options will add moisture and sweetness, making your treats just as delightful!
How can I make these treats more festive?
Get creative with decorations! Use Halloween-themed sprinkles, edible glitter, or even candy eyes to give your treats a spooky twist. You can also cut them into fun shapes using cookie cutters!
Are these treats suitable for kids?
<pDefinitely! These fun Halloween food treats are kid-friendly and perfect for little hands. Plus, involving your kids in the kitchen can make for a memorable family activity!
Can I freeze these treats?
<pYes, you can freeze them! Just wrap individual pieces in plastic wrap and place them in a freezer-safe bag. They’ll stay fresh for up to three months. When you’re ready to enjoy, simply thaw them at room temperature!
Final Thoughts
Creating fun Halloween food is more than just baking; it’s about making memories with your loved ones. The joy of mixing ingredients, the laughter shared while decorating, and the delight on everyone’s faces when they take that first bite are what truly make this recipe special. Whether you’re hosting a spooky gathering or simply enjoying a cozy night in, these treats will add a festive touch to your celebrations. So roll up your sleeves, gather your family, and let the spirit of Halloween inspire your kitchen adventures. Happy baking, and may your Halloween be filled with fun and flavor!