
Introduction to Fruit Charcuterie Board
As a busy mom, I know how challenging it can be to whip up something impressive yet simple for gatherings. That’s where a vibrant fruit charcuterie board comes in! It’s not just a feast for the eyes; it’s a delightful way to bring everyone together. Imagine a colorful spread of fresh fruits, creamy cheeses, and crunchy nuts, all ready to be enjoyed. This recipe is perfect for any occasion, whether it’s a casual get-together or a special celebration. Plus, it takes just 15 minutes to prepare, making it a quick solution for your busy days!
Print
“Fruit Charcuterie Board: Elevate Your Next Gathering!”
- Total Time: 15 minutes
- Yield: Serves 6-8
- Diet: Vegetarian
Description
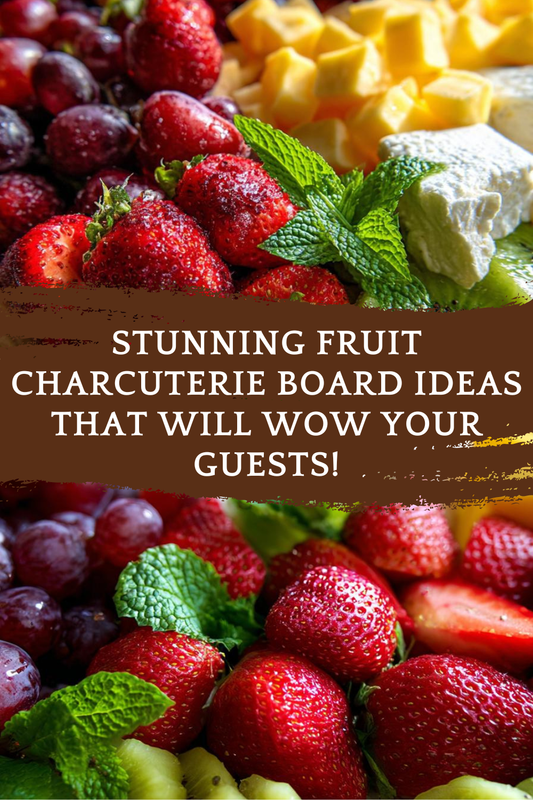
A vibrant and delicious fruit charcuterie board that is perfect for any gathering, featuring a variety of fresh fruits, nuts, and cheeses.
Ingredients
- 1 cup strawberries, halved
- 1 cup blueberries
- 1 cup grapes, halved
- 1 cup pineapple, cubed
- 1 cup kiwi, sliced
- 1 cup apple slices
- 1 cup cheese (cheddar or brie)
- 1/2 cup mixed nuts
- 1/4 cup honey or yogurt for dipping
Instructions
- Start by selecting a large wooden or marble board for presentation.
- Arrange the fruits in groups around the board, starting with the larger fruits like pineapple and apple slices.
- Fill in the gaps with smaller fruits like strawberries, blueberries, and grapes.
- Add cheese slices or wedges in between the fruits.
- Sprinkle mixed nuts around the board for added texture and flavor.
- Place a small bowl of honey or yogurt in the center for dipping.
- Garnish with fresh mint leaves for a pop of color.
- Serve immediately and enjoy the colorful display!
Notes
- Feel free to customize the fruits based on seasonal availability.
- Consider adding dried fruits or chocolate for extra variety.
- Make sure to wash all fruits thoroughly before serving.
- Prep Time: 15 minutes
- Cook Time: 0 minutes
- Category: Appetizer
- Method: No-cook
- Cuisine: American
Why You’ll Love This Fruit Charcuterie Board
This fruit charcuterie board is a game-changer for busy lives. It’s incredibly easy to assemble, allowing you to spend more time with your loved ones and less time in the kitchen. The vibrant colors and fresh flavors will impress your guests, making it a hit at any gathering. Plus, it’s a healthy option that satisfies sweet cravings without the guilt. Who wouldn’t love that?
Ingredients for Fruit Charcuterie Board
Creating a stunning fruit charcuterie board is all about variety and freshness. Here’s what you’ll need:
- Strawberries: Sweet and juicy, they add a pop of red and are always a crowd-pleaser.
- Blueberries: These little gems are packed with antioxidants and bring a lovely burst of flavor.
- Grapes: Halved for easy snacking, they’re a classic choice that everyone loves.
- Pineapple: Cubed for a tropical twist, its sweetness balances the other fruits beautifully.
- Kiwi: Sliced for a vibrant green touch, it adds a tangy flavor that’s refreshing.
- Apple slices: Crisp and crunchy, they provide a nice contrast to the softer fruits.
- Cheese: Choose between cheddar for a sharp bite or brie for a creamy texture; both pair wonderfully with fruit.
- Mixed nuts: A sprinkle of these adds crunch and healthy fats, enhancing the overall experience.
- Honey or yogurt: Perfect for dipping, they add a sweet or creamy element that complements the fruits.
Feel free to customize your board based on what’s in season or your family’s favorites. You can even add dried fruits or a drizzle of chocolate for a fun twist! Remember, all ingredient quantities are listed at the bottom of the article for easy printing.
How to Make a Fruit Charcuterie Board
Creating a fruit charcuterie board is as fun as it is simple! Follow these easy steps to assemble a beautiful and delicious spread that will wow your guests.
Step 1: Choose Your Board
Start by selecting a large wooden or marble board. The size matters! A bigger board allows for more fruits and makes for a stunning presentation. If you don’t have a charcuterie board, a large platter or even a clean cutting board will work just fine.
Step 2: Arrange the Larger Fruits
Begin with the larger fruits like pineapple and apple slices. Place them in groups around the board. This creates a solid foundation and gives your board structure. Think of it as building a colorful fruit castle!
Step 3: Fill in with Smaller Fruits
Next, fill in the gaps with smaller fruits like strawberries, blueberries, and grapes. Scatter them around the larger fruits. This not only adds color but also makes it easy for guests to grab a bite. It’s like a fruity treasure hunt!
Step 4: Add Cheese
Now, it’s time to add cheese. Slice or wedge your cheddar or brie and place them in between the fruits. The creamy texture of cheese pairs beautifully with the sweetness of the fruits. It’s a match made in culinary heaven!
Step 5: Sprinkle Nuts
Sprinkle mixed nuts around the board for added crunch. They provide a delightful contrast to the soft fruits and creamy cheese. Plus, they’re a great source of healthy fats. Who doesn’t love a little crunch?
Step 6: Include Dipping Options
Don’t forget the dipping options! Place a small bowl of honey or yogurt in the center of the board. This adds a sweet or creamy element that complements the fruits perfectly. It’s like the cherry on top of your fruity masterpiece!
Step 7: Garnish for Presentation
For that final touch, garnish your board with fresh mint leaves. They add a pop of color and a refreshing aroma. It’s the little details that make your fruit charcuterie board truly shine!
Step 8: Serve and Enjoy
Once everything is arranged, serve your fruit charcuterie board immediately. Watch as your guests marvel at the colorful display. Enjoy the smiles and compliments that come your way. You’ve just created a delightful experience!
Tips for Success
- Choose seasonal fruits for the best flavor and freshness.
- Prep fruits ahead of time to save on assembly day.
- Use a variety of textures—soft, crunchy, and creamy—for a delightful experience.
- Don’t be afraid to mix in some dried fruits or chocolate for extra flair.
- Keep your board chilled until serving to maintain freshness.
Equipment Needed
- Large board: A wooden or marble board works best, but any large platter will do.
- Knife: For slicing fruits and cheese; a sharp chef’s knife is ideal.
- Small bowls: Use for honey or yogurt; ramekins or even teacups can work.
- Cutting board: Handy for prepping fruits before arranging them.
Variations of Fruit Charcuterie Board
- Seasonal Fruits: Swap out fruits based on the season. Think peaches in summer or pears in fall for a fresh twist.
- Cheese Alternatives: Try goat cheese for a tangy flavor or vegan cheese for a dairy-free option.
- Nut-Free Version: Replace mixed nuts with seeds like pumpkin or sunflower for a nut-free board.
- Chocolate Drizzle: Add a drizzle of dark chocolate over the fruits for a decadent touch.
- Herb Infusion: Incorporate fresh herbs like basil or rosemary for an aromatic experience.
- Spicy Kick: Include a sprinkle of chili flakes on the cheese for a surprising heat.
Serving Suggestions for Fruit Charcuterie Board
- Pair with Wine: A crisp white wine or sparkling rosé complements the fruity flavors beautifully.
- Serve with Crackers: Include a variety of crackers for added crunch and texture.
- Presentation: Use colorful napkins and plates to enhance the visual appeal.
- Accompany with Cheese Board: Offer a cheese board alongside for a more extensive spread.
FAQs about Fruit Charcuterie Board
What fruits work best for a fruit charcuterie board?
While you can use any fruit you love, berries, grapes, and tropical fruits like pineapple are always crowd-pleasers. Seasonal fruits add freshness and variety, making your board even more appealing.
Can I prepare the fruit charcuterie board in advance?
Absolutely! You can wash and cut the fruits a few hours ahead. Just keep them chilled until serving to maintain their freshness. Assemble the board right before your guests arrive for the best presentation.
Is a fruit charcuterie board healthy?
Yes! A fruit charcuterie board is a fantastic way to enjoy healthy snacks. It’s packed with vitamins, fiber, and antioxidants, making it a guilt-free indulgence. Plus, it satisfies sweet cravings naturally!
Can I customize the cheese options?
Definitely! Feel free to mix and match cheeses. Cheddar, brie, goat cheese, or even vegan options can all work beautifully. Just ensure they complement the fruits for a delightful flavor experience.
What can I serve with my fruit charcuterie board?
Pair your board with a refreshing drink like sparkling water or wine. Crackers and a cheese board can also enhance the experience, providing a variety of textures and flavors for your guests to enjoy.
Final Thoughts
Creating a fruit charcuterie board is more than just assembling fruits and cheese; it’s about bringing joy to your gatherings. The vibrant colors and fresh flavors spark conversations and smiles, making every moment memorable. I love how this recipe allows me to express creativity while keeping things simple. Whether it’s a family get-together or a casual brunch with friends, this board is sure to impress. Plus, it’s a healthy treat that everyone can enjoy. So, roll up your sleeves, gather your favorite fruits, and let the fun begin. Your next gathering will be a fruity success!