
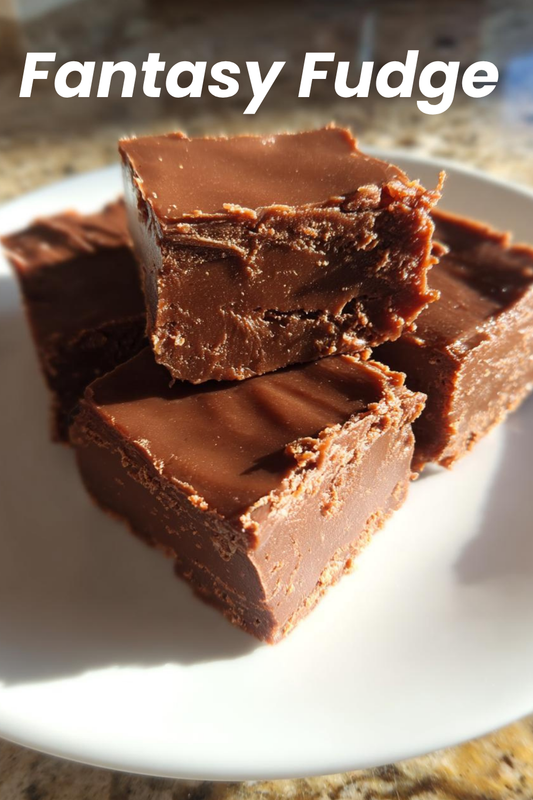
Welcome to the delightful world of Fantasy Fudge! If you’re like me, juggling a busy life while trying to whip up something sweet, this recipe is your new best friend. It’s rich, creamy, and oh-so-satisfying, making it the perfect treat to impress your loved ones or simply indulge yourself after a long day. With just a few ingredients and minimal effort, you can create a batch of this chocolatey goodness that will have everyone asking for seconds. Trust me, once you try this Fantasy Fudge, it’ll become a staple in your dessert repertoire!
Why You’ll Love This Fantasy Fudge
This Fantasy Fudge is a dream come true for busy moms and professionals alike. It’s incredibly easy to make, taking just 25 minutes from start to finish. The rich chocolate and marshmallow flavors create a taste sensation that’s hard to resist. Plus, it’s a versatile treat that can be customized with nuts or enjoyed plain. Whether you’re hosting a gathering or need a quick dessert fix, this fudge is sure to impress!
Ingredients for Fantasy Fudge
Let’s gather the magic ingredients that make this Fantasy Fudge a true delight! Here’s what you’ll need:
- Granulated Sugar: The sweet foundation of our fudge, giving it that irresistible sweetness.
- Unsalted Butter: Adds richness and creaminess, making every bite melt in your mouth.
- Evaporated Milk: This thick milk helps create a smooth texture, enhancing the fudge’s creaminess.
- Semi-Sweet Chocolate Chips: The star of the show! They bring that deep chocolate flavor we all crave.
- Marshmallow Cream: This fluffy goodness adds a delightful sweetness and a unique texture.
- Vanilla Extract: A splash of vanilla elevates the flavors, making everything taste even better.
- Chopped Nuts (Optional): For those who love a little crunch, nuts add a delightful contrast to the smooth fudge.
For exact measurements, check the bottom of the article where you can find everything you need for printing. Happy cooking!
How to Make Fantasy Fudge
Now, let’s dive into the fun part—making this delicious Fantasy Fudge! Follow these simple steps, and you’ll have a sweet treat ready in no time.
Step 1: Combine Sugar, Butter, and Milk
Start by grabbing a medium saucepan. Add the granulated sugar, unsalted butter, and evaporated milk. Stir them together gently. This mixture is the base of your fudge, so make sure everything is well combined.
Step 2: Bring to a Boil
Next, place the saucepan over medium heat. Keep stirring until the mixture comes to a boil. Once it starts bubbling, let it boil for 4-5 minutes without stirring. This step is crucial for achieving that perfect fudge texture!
Step 3: Stir in Chocolate Chips
After boiling, remove the saucepan from the heat. Now, it’s time to add the semi-sweet chocolate chips. Stir them in until they melt completely and the mixture is smooth. The chocolate will create that rich flavor we all love in Fantasy Fudge.
Step 4: Add Marshmallow Cream and Vanilla
Next, add the marshmallow cream and vanilla extract to the melted chocolate mixture. Stir well until everything is combined. This is where the magic happens! The marshmallow cream adds a delightful fluffiness to your fudge.
Step 5: Fold in Nuts (Optional)
If you’re a fan of a little crunch, now’s the time to fold in the chopped nuts. Gently mix them into the fudge. If you prefer a nut-free version, feel free to skip this step. Either way, it’s going to be delicious!
Step 6: Pour and Cool
Finally, pour the fudge mixture into a greased 9×9 inch pan. Spread it evenly with a spatula. Let it cool completely at room temperature. Once set, cut it into squares and enjoy your homemade Fantasy Fudge!
Tips for Success
- Stir constantly while boiling to prevent burning. Trust me, it’s worth the effort!
- For a creamier texture, consider using a double boiler. It’s a game changer!
- Let the fudge cool completely before cutting. This ensures clean, beautiful squares.
- Store leftovers in an airtight container to keep them fresh and delicious.
- Experiment with different nuts or add a sprinkle of sea salt for a gourmet touch!
Equipment Needed
- Medium Saucepan: A sturdy pot is essential. If you don’t have one, a large skillet works too!
- Spatula: Use a silicone spatula for easy mixing. A wooden spoon can also do the trick.
- 9×9 Inch Pan: Any square baking dish will work. Just make sure to grease it well!
Variations of Fantasy Fudge
- Peanut Butter Fantasy Fudge: Swirl in creamy peanut butter for a nutty twist that pairs perfectly with chocolate.
- Mint Chocolate Fantasy Fudge: Add a few drops of peppermint extract for a refreshing minty flavor that’s perfect for the holidays.
- White Chocolate Fantasy Fudge: Substitute semi-sweet chocolate chips with white chocolate chips for a sweeter, creamier version.
- Vegan Fantasy Fudge: Use coconut oil instead of butter and dairy-free chocolate chips to create a plant-based treat.
- Fruit-Infused Fantasy Fudge: Mix in dried fruits like cranberries or cherries for a chewy texture and a burst of flavor.
Serving Suggestions for Fantasy Fudge
- Pair your Fantasy Fudge with a scoop of vanilla ice cream for a delightful dessert experience.
- Serve alongside a warm cup of coffee or hot chocolate for a cozy treat.
- For a festive touch, arrange fudge squares on a decorative platter with fresh berries.
- Wrap individual pieces in colorful foil for a charming gift or party favor.
FAQs about Fantasy Fudge
Can I use different types of chocolate chips?
Absolutely! While semi-sweet chocolate chips are traditional, you can experiment with milk chocolate or dark chocolate chips for a different flavor profile. Each type will give your Fantasy Fudge a unique twist!
How should I store my Fantasy Fudge?
To keep your fudge fresh, store it in an airtight container at room temperature. If you want to extend its shelf life, you can refrigerate it. Just remember to let it come to room temperature before serving for the best texture!
Can I make Fantasy Fudge ahead of time?
Yes! Fantasy Fudge is perfect for making ahead. It can be stored for up to two weeks, making it a great option for holiday treats or special occasions. Just be sure to keep it sealed tight!
What can I do if my fudge is too soft?
If your fudge turns out too soft, it may need more time to cool or set. You can also try placing it in the refrigerator for a bit to firm it up. If all else fails, consider it a delicious topping for ice cream!
Is Fantasy Fudge suitable for special diets?
While the classic recipe is vegetarian, you can easily adapt it for various diets. For a vegan version, swap out the butter for coconut oil and use dairy-free chocolate chips. There are plenty of ways to enjoy this treat!
Final Thoughts
Making Fantasy Fudge is more than just whipping up a sweet treat; it’s about creating moments of joy in our busy lives. The rich, creamy texture and delightful chocolate flavor can turn an ordinary day into something special. Whether you’re sharing it with family or savoring a piece after a long day, this fudge brings smiles all around. Plus, it’s a fantastic way to involve your kids in the kitchen, creating memories that last a lifetime. So, roll up your sleeves, gather those ingredients, and let the magic of Fantasy Fudge brighten your day!
Print
Fantasy Fudge: Discover the Secret to Irresistible Flavor!
- Total Time: 25 minutes
- Yield: 36 pieces
- Diet: Vegetarian
Description
Fantasy Fudge is a deliciously rich and creamy treat that combines chocolate and marshmallow flavors, perfect for satisfying your sweet tooth.
Ingredients
- 2 cups granulated sugar
- 1/2 cup unsalted butter
- 2/3 cup evaporated milk
- 2 cups semi-sweet chocolate chips
- 1 jar (7 oz) marshmallow cream
- 1 teaspoon vanilla extract
- 1 cup chopped nuts (optional)
Instructions
- In a saucepan, combine sugar, butter, and evaporated milk. Bring to a boil over medium heat, stirring constantly.
- Once boiling, continue to cook for 4-5 minutes without stirring.
- Remove from heat and stir in chocolate chips until melted and smooth.
- Add marshmallow cream and vanilla extract, mixing until well combined.
- If desired, fold in chopped nuts.
- Pour the mixture into a greased 9×9 inch pan and let it cool completely before cutting into squares.
Notes
- Make sure to stir constantly while boiling to prevent burning.
- For a creamier texture, use a double boiler.
- Store in an airtight container to maintain freshness.
- Prep Time: 15 minutes
- Cook Time: 10 minutes
- Category: Dessert
- Method: Stovetop
- Cuisine: American