
Introduction to Dessert Charcuterie Board
As a busy mom, I know how challenging it can be to whip up something special for gatherings. That’s where the dessert charcuterie board comes in! This delightful spread of sweet treats is not only visually stunning but also incredibly easy to assemble. Imagine a colorful array of chocolates, fruits, and pastries that will impress your guests without keeping you in the kitchen for hours. Whether it’s a birthday party or a cozy family night, this dessert charcuterie board is the perfect solution to satisfy everyone’s sweet tooth while allowing you to enjoy the moment.
Print
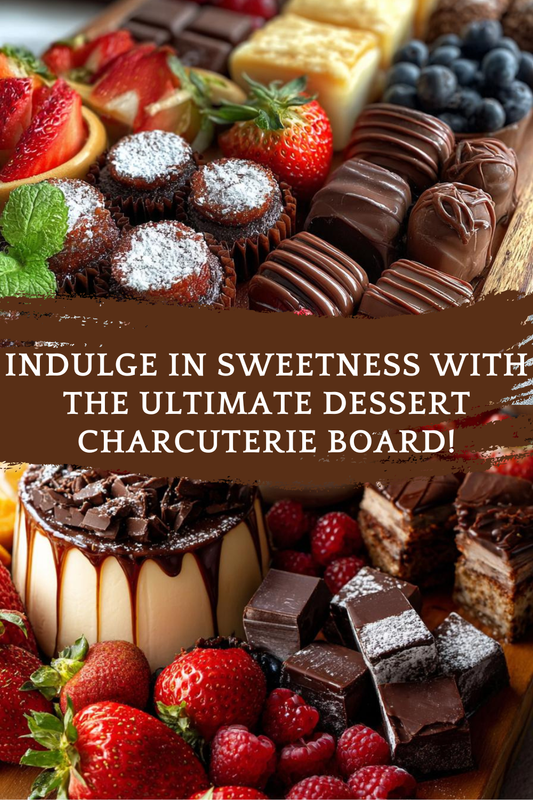
Dessert charcuterie board: Sweet treats to impress!
- Total Time: 20 minutes
- Yield: Serves 6-8
- Diet: Vegetarian
Description
A delightful dessert charcuterie board featuring an assortment of sweet treats that are perfect for impressing guests at any gathering.
Ingredients
- Assorted chocolates (dark, milk, white)
- Fresh fruits (strawberries, blueberries, grapes)
- Cookies (variety of flavors)
- Brownies (cut into bite-sized pieces)
- Mini pastries (eclairs, cream puffs)
- Nuts (almonds, walnuts)
- Dried fruits (apricots, figs)
- Marshmallows
- Honey or chocolate sauce (for drizzling)
Instructions
- Gather all ingredients and arrange them on a large serving board.
- Start by placing larger items like brownies and mini pastries in clusters.
- Fill in gaps with fresh fruits and chocolates.
- Add cookies and nuts in small bowls or scattered around the board.
- Include dried fruits and marshmallows for added texture.
- Drizzle honey or chocolate sauce over the board for a finishing touch.
- Serve immediately and enjoy the variety of flavors!
Notes
- Feel free to customize the board with your favorite sweets.
- Consider dietary restrictions when selecting ingredients.
- Use seasonal fruits for a fresh touch.
- Prep Time: 20 minutes
- Cook Time: 0 minutes
- Category: Dessert
- Method: No-cook
- Cuisine: American
Why You’ll Love This Dessert Charcuterie Board
This dessert charcuterie board is a game-changer for busy lives. It’s quick to prepare, taking just 20 minutes, and requires no cooking at all! You can customize it to fit your family’s tastes, making it a hit with everyone. Plus, the vibrant colors and variety of textures create an eye-catching centerpiece that sparks joy. It’s the perfect way to indulge without the stress of complicated recipes!
Ingredients for Dessert Charcuterie Board
Creating a dessert charcuterie board is all about variety and personal preference. Here’s what you’ll need:
- Assorted chocolates: Dark, milk, and white chocolates add richness and sweetness. Choose your favorites for a personal touch.
- Fresh fruits: Strawberries, blueberries, and grapes bring freshness and a pop of color. They also balance the sweetness of the other treats.
- Cookies: A variety of flavors, like chocolate chip and oatmeal raisin, offer different textures and tastes. Store-bought or homemade, they’re always a crowd-pleaser.
- Brownies: Cut into bite-sized pieces, these fudgy delights are a must-have. They add a decadent touch to your board.
- Mini pastries: Eclairs and cream puffs are delightful additions that elevate the board. They’re perfect for those who love a little elegance.
- Nuts: Almonds and walnuts provide crunch and a savory contrast to the sweets. They also add a healthy element to the mix.
- Dried fruits: Apricots and figs offer chewy textures and natural sweetness. They’re great for adding variety.
- Marshmallows: Soft and fluffy, they’re a fun addition that kids and adults alike enjoy.
- Honey or chocolate sauce: Drizzling these over the board enhances both flavor and presentation. It’s the finishing touch that ties everything together.
Feel free to customize the board with your favorite sweets or seasonal fruits. Remember to consider any dietary restrictions when selecting ingredients. For exact quantities, check the bottom of the article where you can find everything available for printing!
How to Make a Dessert Charcuterie Board
Creating a dessert charcuterie board is a fun and creative process. It’s all about arranging your sweet treats in a way that’s visually appealing and delicious. Let’s dive into the steps to make your board a showstopper!
Step 1: Gather Your Ingredients
Before you start, it’s essential to have everything ready. Gather all your ingredients and tools. This makes the process smoother and more enjoyable. Plus, it helps you visualize how you want your dessert charcuterie board to look!
Step 2: Arrange Larger Items
Begin by placing larger items like brownies and mini pastries on the board. Cluster them together to create focal points. This not only adds height but also makes the board visually appealing. Think of it as building a sweet landscape!
Step 3: Fill in with Fresh Fruits and Chocolates
Next, fill in the gaps with fresh fruits and assorted chocolates. The vibrant colors of strawberries, blueberries, and grapes will brighten up your board. Plus, the chocolates add a touch of indulgence. Balance is key here, so mix and match for a beautiful display!
Step 4: Add Cookies and Nuts
Now it’s time to sprinkle in the cookies and nuts. Place cookies in small bowls or scatter them around the board. This adds variety and texture. Nuts like almonds and walnuts provide a crunchy contrast to the soft sweets, making every bite exciting!
Step 5: Include Dried Fruits and Marshmallows
Don’t forget the dried fruits and marshmallows! These chewy treats add another layer of texture and flavor. They’re like little surprises that keep everyone coming back for more. Plus, they look adorable nestled among the other goodies!
Step 6: Drizzle with Honey or Chocolate Sauce
For the finishing touch, drizzle honey or chocolate sauce over the board. This not only enhances the flavor but also makes your dessert charcuterie board look irresistible. It’s like adding a cherry on top of a sundae—just perfect!
Step 7: Serve and Enjoy
Finally, it’s time to serve your masterpiece! Gather your loved ones and enjoy the delightful variety of flavors. Remember, the joy is in the process as much as in the eating. So, take a moment to appreciate your creation before diving in!
Tips for Success
- Use a large, flat board for ample space to arrange your treats.
- Mix textures and colors for a visually appealing display.
- Involve your kids in the assembly for a fun family activity.
- Prepare ingredients ahead of time to save on prep time.
- Don’t be afraid to get creative—there are no strict rules!
Equipment Needed
- Large serving board: A wooden or marble board works beautifully. A large platter can also do the trick.
- Small bowls: Use these for cookies and nuts. If you don’t have bowls, small cups or ramekins are great alternatives.
- Knife: For cutting brownies and fruits. A simple kitchen knife will suffice.
- Spoon: For drizzling honey or chocolate sauce.
Variations of Dessert Charcuterie Board
- Chocolate Lovers: Focus on a variety of chocolates, including chocolate-covered strawberries, truffles, and chocolate-dipped pretzels for an indulgent twist.
- Fruit-Forward: Make fresh fruits the star by adding a selection of seasonal fruits like peaches, mangoes, and kiwi. Pair with yogurt for dipping!
- Nut-Free Option: Skip the nuts and replace them with seeds like pumpkin or sunflower seeds for a crunchy element without allergens.
- Vegan Delight: Use dairy-free chocolates, coconut whipped cream, and a selection of vegan cookies and pastries to cater to plant-based diets.
- Gluten-Free Board: Choose gluten-free cookies and brownies, and include rice cakes or gluten-free crackers for added crunch.
Serving Suggestions for Dessert Charcuterie Board
- Pair with coffee or tea: A warm beverage complements the sweetness beautifully.
- Include a fruit dip: Yogurt or chocolate dip can enhance the fruit experience.
- Use decorative napkins: Bright, colorful napkins add a festive touch to your presentation.
- Serve on a rustic table: A wooden table or picnic blanket creates a cozy atmosphere.
FAQs about Dessert Charcuterie Board
What is a dessert charcuterie board?
A dessert charcuterie board is a delightful arrangement of sweet treats, including chocolates, fruits, cookies, and pastries. It’s a visually appealing way to serve desserts at gatherings, allowing guests to sample a variety of flavors.
How do I customize my dessert charcuterie board?
You can customize your dessert charcuterie board by selecting your favorite sweets and seasonal fruits. Consider dietary restrictions, and feel free to swap in gluten-free or vegan options to cater to everyone’s tastes!
Can I prepare the dessert charcuterie board in advance?
Absolutely! You can prep the ingredients ahead of time and assemble the board just before serving. This way, you can enjoy the gathering without the last-minute rush.
What are some good pairings for a dessert charcuterie board?
Pair your dessert charcuterie board with coffee, tea, or even dessert wines. A fruit dip or chocolate sauce can also enhance the experience, making it even more enjoyable!
How many people does a dessert charcuterie board serve?
This dessert charcuterie board typically serves 6-8 people, making it perfect for small gatherings or family celebrations. Adjust the quantities based on your guest list for a sweet success!
Final Thoughts
Creating a dessert charcuterie board is more than just assembling sweets; it’s about bringing joy to your gatherings. The smiles on your loved ones’ faces as they indulge in a variety of treats are priceless. This recipe allows you to express your creativity while keeping things simple and stress-free. Plus, it’s a wonderful way to bond with family, whether you’re arranging the board together or enjoying it after a meal. So, gather your favorite sweets, let your imagination run wild, and savor the delightful moments that come with sharing this sweet experience!