
Introduction to Cheesy Halloween Breadstick Bones
As the leaves turn and the air gets crisp, I find myself craving cozy, festive treats. That’s where these Cheesy Halloween Breadstick Bones come in! They’re not just a fun snack; they’re a delightful way to bring a little spooky magic to your kitchen. Perfect for busy moms like me, this recipe is quick and easy, making it a fantastic solution for last-minute Halloween gatherings. Plus, who can resist the gooey cheese and playful bone shapes? Trust me, your family will love these, and they’ll disappear faster than you can say “trick or treat!”
Print
Cheesy Halloween Breadstick Bones: A Spooky Treat to Make!
- Total Time: 35 minutes
- Yield: 12 breadstick bones
- Diet: Vegetarian
Description
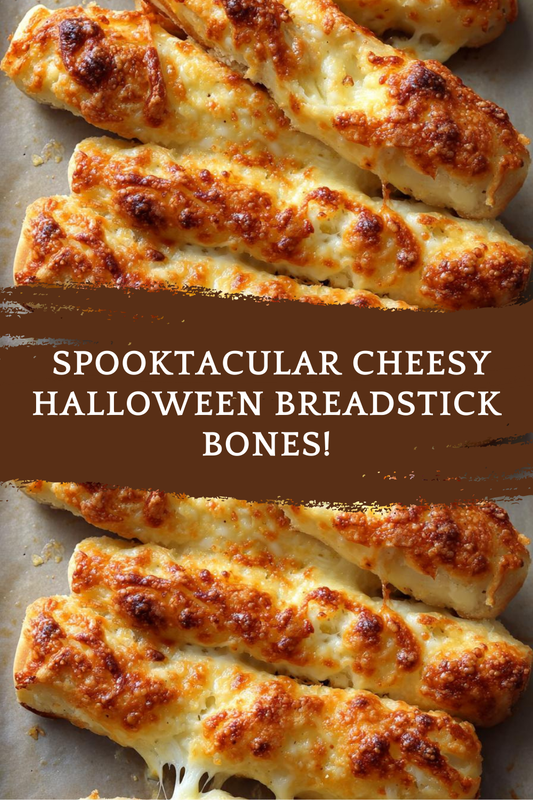
Cheesy Halloween Breadstick Bones are a fun and spooky treat perfect for Halloween parties. These breadsticks are shaped like bones and are filled with gooey cheese, making them a delightful snack for both kids and adults.
Ingredients
- 1 package of pizza dough
- 1 cup of shredded mozzarella cheese
- 1/2 cup of grated Parmesan cheese
- 1 egg (for egg wash)
- 1 teaspoon of garlic powder
- 1 teaspoon of Italian seasoning
- Flour (for dusting)
Instructions
- Preheat your oven to 400°F (200°C).
- Roll out the pizza dough on a floured surface.
- Cut the dough into strips about 1 inch wide.
- Take a strip and shape it into a bone by twisting the ends and making the center thicker.
- Place the shaped bones on a baking sheet lined with parchment paper.
- Sprinkle mozzarella and Parmesan cheese on top of each bone.
- In a small bowl, beat the egg and brush it over the breadsticks for a golden finish.
- Sprinkle garlic powder and Italian seasoning over the top.
- Bake in the preheated oven for 12-15 minutes or until golden brown.
- Let cool slightly before serving.
Notes
- For extra flavor, you can add herbs or spices to the dough.
- Serve with marinara sauce for dipping.
- These can be made ahead of time and reheated before serving.
- Prep Time: 20 minutes
- Cook Time: 15 minutes
- Category: Appetizer
- Method: Baking
- Cuisine: American
Why You’ll Love This Cheesy Halloween Breadstick Bones
These Cheesy Halloween Breadstick Bones are a lifesaver for busy days! They come together in just 35 minutes, making them perfect for a quick snack or a fun party appetizer. The combination of gooey mozzarella and savory Parmesan creates a flavor explosion that both kids and adults will adore. Plus, the playful bone shapes add a festive touch that makes any Halloween gathering feel special. You’ll love how easy and delicious they are!
Ingredients for Cheesy Halloween Breadstick Bones
Gathering the right ingredients is half the fun! Here’s what you’ll need to whip up these Cheesy Halloween Breadstick Bones:
- Pizza dough: The base of our bones! You can use store-bought for convenience or make your own if you’re feeling adventurous.
- Shredded mozzarella cheese: This gooey cheese melts beautifully, creating that irresistible cheesy pull.
- Grated Parmesan cheese: Adds a nutty flavor that complements the mozzarella perfectly.
- Egg: Used for the egg wash, it gives the breadsticks a lovely golden finish.
- Garlic powder: A sprinkle of this adds a savory kick that elevates the flavor.
- Italian seasoning: A blend of herbs that brings a taste of Italy to your spooky snack.
- Flour: Essential for dusting your surface to prevent sticking while rolling out the dough.
Feel free to get creative! You can add herbs or spices to the dough for extra flavor. If you’re looking for a healthier twist, consider using whole wheat pizza dough. For exact measurements, check the bottom of the article where you can find everything available for printing!
How to Make Cheesy Halloween Breadstick Bones
Now that we have our ingredients ready, let’s dive into the fun part—making these Cheesy Halloween Breadstick Bones! Follow these simple steps, and you’ll have a spooky treat that’s sure to impress.
Step 1: Preheat the Oven
First things first, preheat your oven to 400°F (200°C). Preheating is crucial because it ensures that your breadsticks bake evenly. A hot oven helps achieve that golden, crispy exterior we all love!
Step 2: Prepare the Dough
Next, roll out your pizza dough on a floured surface. Make sure to dust the surface well to prevent sticking. This step is key! A well-floured surface allows you to roll the dough easily without tearing it.
Step 3: Cut the Dough
Now, cut the dough into strips about 1 inch wide. Use a sharp knife or pizza cutter for clean edges. The width is important; too thick, and they won’t cook through, too thin, and they might burn. Aim for that perfect balance!
Step 4: Shape the Bones
Here comes the fun part! Take a strip and twist it into a bone shape. Make the ends thinner and the center thicker. This gives it that classic bone look. Don’t worry if they aren’t perfect; they’ll still taste amazing!
Step 5: Arrange on Baking Sheet
Place your shaped bones on a baking sheet lined with parchment paper. This prevents sticking and makes cleanup a breeze. Leave a little space between each bone to allow for expansion while baking.
Step 6: Add Cheese
Now, sprinkle a generous amount of mozzarella and Parmesan cheese on top of each bone. The mozzarella will melt beautifully, while the Parmesan adds a delightful crunch. Don’t be shy with the cheese; it’s Halloween, after all!
Step 7: Egg Wash
In a small bowl, beat the egg and brush it over the breadsticks. This egg wash gives them that lovely golden finish. It’s like a little magic touch that makes them look extra special!
Step 8: Seasoning
Sprinkle garlic powder and Italian seasoning over the top. This step is essential for flavor! Make sure to distribute the seasoning evenly so every bite is packed with deliciousness.
Step 9: Bake
Pop the baking sheet into your preheated oven and bake for 12-15 minutes. Keep an eye on them! You want them to be golden brown and crispy. A little peek through the oven door can help you gauge their doneness.
Step 10: Cool and Serve
Once they’re out of the oven, let the breadsticks cool slightly before serving. This helps the cheese set a bit, making them easier to handle. Trust me, the wait is worth it!
Tips for Success
- Use a pizza stone for an extra crispy bottom.
- Experiment with different cheeses like cheddar or pepper jack for a twist.
- Make sure your dough is at room temperature for easier handling.
- For a fun presentation, serve with a side of marinara sauce for dipping.
- Don’t rush the cooling process; it enhances the flavor and texture.
Equipment Needed
- Baking sheet: A standard one works, but a stone or insulated sheet can enhance crispiness.
- Parchment paper: This makes cleanup easy; aluminum foil is a good alternative.
- Rolling pin: If you don’t have one, a wine bottle can do the trick!
- Pizza cutter or sharp knife: Essential for cutting the dough into strips.
Variations
- Herbed Dough: Add fresh herbs like rosemary or thyme to the dough for an aromatic twist.
- Spicy Kick: Mix in some crushed red pepper flakes or jalapeños for a spicy version that packs a punch.
- Cheesy Surprise: Stuff the bones with additional cheese or even pepperoni for a fun surprise inside.
- Gluten-Free Option: Use gluten-free pizza dough to make these treats accessible for everyone.
- Vegan Version: Substitute the egg wash with a plant-based milk and use vegan cheese for a dairy-free delight.
Serving Suggestions
- Pair with a warm marinara sauce for dipping; it adds a delicious twist!
- Serve alongside a fresh salad for a balanced meal.
- For drinks, consider apple cider or a spooky punch to keep the Halloween theme alive.
- Present on a festive platter with Halloween-themed decorations for added flair.
FAQs about Cheesy Halloween Breadstick Bones
As you prepare to make these Cheesy Halloween Breadstick Bones, you might have a few questions. Here are some common queries that can help you along the way!
Can I make the dough ahead of time?
Absolutely! You can prepare the dough a day in advance. Just wrap it tightly in plastic wrap and store it in the fridge. When you’re ready to bake, let it come to room temperature before rolling it out.
What can I serve with these breadsticks?
These Halloween snacks pair wonderfully with marinara sauce for dipping. You can also serve them with a side of ranch dressing or a spicy aioli for a fun twist!
Can I freeze the breadsticks?
Yes, you can freeze them! After baking, let them cool completely, then place them in an airtight container. They can be frozen for up to three months. Just reheat in the oven when you’re ready to enjoy!
How do I store leftovers?
Store any leftover Cheesy Halloween Breadstick Bones in an airtight container in the fridge. They’ll stay fresh for about 2-3 days. Just reheat them in the oven for the best texture!
Can I use different types of cheese?
Definitely! Feel free to mix it up with your favorite cheeses. Cheddar, gouda, or even a spicy pepper jack can add a unique flavor to your spooky treats.
Final Thoughts
Making Cheesy Halloween Breadstick Bones is more than just a recipe; it’s a delightful experience that brings joy to your kitchen. The laughter of your kids as they help shape the bones, the aroma of melting cheese wafting through the air, and the excitement of serving a spooky treat all create lasting memories. These breadsticks are not only delicious but also a fun way to celebrate Halloween together. So, gather your loved ones, roll up your sleeves, and enjoy the magic of cooking. Trust me, these bones will become a cherished tradition in your home!