
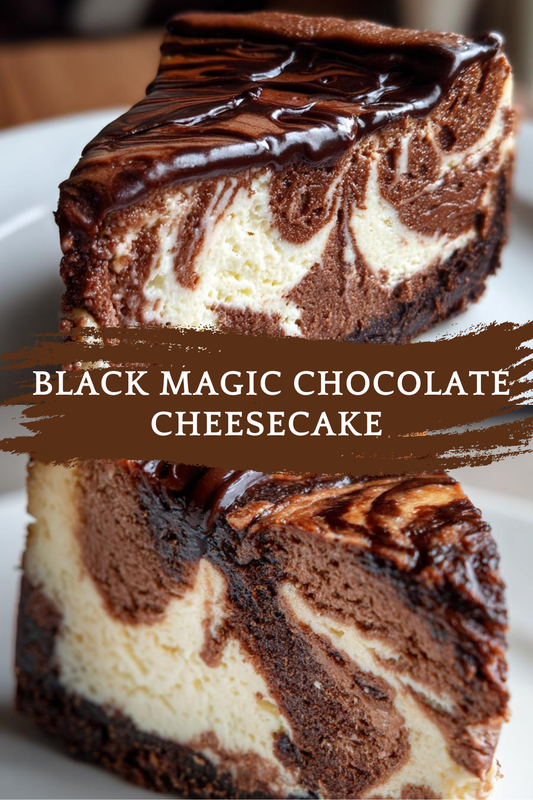
Introduction to Black Magic Chocolate Cheesecake
As a busy mom, I know how precious time can be, especially when it comes to whipping up something special in the kitchen. That’s why I’m excited to share my Black Magic Chocolate Cheesecake recipe with you! This rich and creamy dessert is not just a treat for chocolate lovers; it’s a quick solution for those hectic days when you want to impress your loved ones without spending hours in the kitchen. With its decadent flavor and simple steps, this cheesecake is sure to become a favorite in your home, just like it has in mine!
Print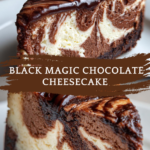
Black Magic Chocolate Cheesecake: Indulge in Decadence!
- Total Time: 4 hours 20 minutes
- Yield: 12 servings
- Diet: Vegetarian
Description
A rich and creamy chocolate cheesecake that is sure to satisfy any chocolate lover’s cravings.
Ingredients
- 2 cups chocolate cookie crumbs
- 1/2 cup unsalted butter, melted
- 3 (8 oz) packages cream cheese, softened
- 1 cup granulated sugar
- 1 teaspoon vanilla extract
- 3 large eggs
- 1 cup sour cream
- 1 cup semi-sweet chocolate chips
Instructions
- Preheat the oven to 325°F (160°C).
- In a bowl, combine chocolate cookie crumbs and melted butter; press into the bottom of a springform pan.
- In a large mixing bowl, beat cream cheese and sugar until smooth.
- Add vanilla extract and eggs, one at a time, mixing well after each addition.
- Stir in sour cream and melted chocolate chips until fully combined.
- Pour the cheesecake mixture over the crust in the springform pan.
- Bake for 55-60 minutes or until the center is set.
- Allow to cool, then refrigerate for at least 4 hours before serving.
Notes
- For a richer flavor, use dark chocolate chips.
- Top with whipped cream or chocolate ganache for extra indulgence.
- Make sure all ingredients are at room temperature for a smoother batter.
- Prep Time: 20 minutes
- Cook Time: 60 minutes
- Category: Dessert
- Method: Baking
- Cuisine: American
Why You’ll Love This Black Magic Chocolate Cheesecake
This Black Magic Chocolate Cheesecake is a dream come true for busy moms and professionals alike. It’s incredibly easy to make, requiring just a handful of ingredients and minimal prep time. The rich, velvety texture and intense chocolate flavor will have your family begging for seconds. Plus, it’s a showstopper for gatherings, making you the star of any dessert table without breaking a sweat!
Ingredients for Black Magic Chocolate Cheesecake
Gathering the right ingredients is the first step to creating your Black Magic Chocolate Cheesecake. Here’s what you’ll need:
- Chocolate cookie crumbs: These form the base of your cheesecake, adding a delightful crunch and rich flavor.
- Unsalted butter: Melted butter binds the cookie crumbs together, creating a sturdy crust that holds everything in place.
- Cream cheese: The star of the show! Softened cream cheese gives the cheesecake its creamy texture and rich taste.
- Granulated sugar: This sweetens the filling, balancing the rich chocolate flavor perfectly.
- Vanilla extract: A splash of vanilla enhances the overall flavor, adding warmth and depth.
- Eggs: These are essential for structure, helping the cheesecake set beautifully as it bakes.
- Sour cream: This adds a tangy richness that elevates the cheesecake’s flavor profile.
- Semi-sweet chocolate chips: Melted and mixed into the batter, these provide that luscious chocolatey goodness we all crave.
For those looking to switch things up, consider using dark chocolate chips for a more intense flavor. You can also top your cheesecake with whipped cream or a drizzle of chocolate ganache for an extra touch of indulgence. Remember, all ingredient quantities are listed at the bottom of the article for easy printing!
How to Make Black Magic Chocolate Cheesecake
Now that you have your ingredients ready, let’s dive into the steps to create this heavenly Black Magic Chocolate Cheesecake. Each step is simple, and I promise you’ll feel like a pro in no time!
Step 1: Preheat the Oven
First things first, preheat your oven to 325°F (160°C). Preheating is crucial because it ensures even baking. If you skip this step, your cheesecake might not set properly, and we don’t want that! So, let that oven warm up while you prepare the crust.
Step 2: Prepare the Crust
In a mixing bowl, combine your chocolate cookie crumbs with the melted butter. Stir until the crumbs are fully coated. This mixture should resemble wet sand. Now, press it firmly into the bottom of a springform pan. Use the back of a measuring cup or your fingers to create an even layer. A well-pressed crust will hold your cheesecake together beautifully!
Step 3: Mix the Filling
In a large mixing bowl, beat the softened cream cheese and granulated sugar together until smooth. This is where the magic begins! Make sure there are no lumps. Next, add the eggs one at a time, mixing well after each addition. This step is vital for a creamy texture. If you rush it, your cheesecake might end up with a grainy consistency.
Step 4: Add Sour Cream and Chocolate
Now, it’s time to elevate that filling! Stir in the sour cream, which adds a delightful tanginess. Then, gently fold in the melted chocolate chips. This is where the rich chocolate flavor comes from. Make sure everything is well combined, but don’t overmix. We want that luscious texture to shine through!
Step 5: Pour and Bake
Carefully pour the cheesecake mixture over your prepared crust. Spread it evenly with a spatula. Now, pop it into the preheated oven and bake for 55-60 minutes. You’ll know it’s done when the center is set but still slightly jiggly. It will firm up as it cools, so don’t worry if it looks a bit soft!
Step 6: Cooling and Refrigeration
Once baked, remove the cheesecake from the oven and let it cool in the pan for about an hour. After that, refrigerate it for at least 4 hours, or overnight if you can wait! This chilling time is essential for the flavors to meld and for the cheesecake to set perfectly. Trust me, the wait will be worth it!
Tips for Success
- Ensure all ingredients are at room temperature for a smoother batter.
- Don’t overmix the filling; it can lead to cracks in your cheesecake.
- Use a water bath for even baking and to prevent cracks.
- Let the cheesecake cool gradually to avoid sudden temperature changes.
- For a cleaner slice, use a hot knife to cut through the cheesecake.
Equipment Needed
- Springform pan: Essential for easy removal. A regular cake pan works too, but slicing will be trickier.
- Mixing bowls: Use a large bowl for the filling and a smaller one for the crust.
- Electric mixer: A hand mixer is perfect, but a whisk can work if you’re feeling strong!
- Spatula: Great for spreading the filling evenly.
- Measuring cups and spoons: Accurate measurements are key for success!
Variations of Black Magic Chocolate Cheesecake
- Dark Chocolate Delight: Swap semi-sweet chocolate chips for dark chocolate chips for a richer, more intense flavor.
- Nutty Crust: Add crushed nuts, like walnuts or pecans, to the crust for an extra crunch and flavor boost.
- Mint Chocolate: Incorporate a few drops of peppermint extract into the filling for a refreshing minty twist.
- Gluten-Free Option: Use gluten-free chocolate cookies for the crust to make this dessert suitable for gluten-sensitive friends.
- Vegan Version: Substitute cream cheese with a vegan alternative and use flax eggs instead of regular eggs for a plant-based treat.
Serving Suggestions for Black Magic Chocolate Cheesecake
- Pair with fresh berries like raspberries or strawberries for a pop of color and tartness.
- Serve with a dollop of whipped cream or a drizzle of chocolate ganache for extra indulgence.
- Complement with a scoop of vanilla ice cream for a delightful contrast in flavors.
- For drinks, consider a rich coffee or a glass of dessert wine to enhance the chocolate experience.
FAQs about Black Magic Chocolate Cheesecake
Can I make Black Magic Chocolate Cheesecake ahead of time?
Absolutely! This cheesecake actually tastes better after chilling overnight. Just make sure to cover it well in the fridge to keep it fresh.
What can I use instead of cream cheese?
If you’re looking for a dairy-free option, try using a vegan cream cheese alternative. It works surprisingly well and still gives you that creamy texture!
How do I prevent cracks in my cheesecake?
To avoid cracks, don’t overmix the batter and consider using a water bath while baking. This helps maintain a consistent temperature and moisture level.
Can I freeze Black Magic Chocolate Cheesecake?
Yes, you can freeze it! Just wrap it tightly in plastic wrap and then foil. Thaw it in the fridge before serving for the best texture.
What’s the best way to slice the cheesecake?
For clean slices, use a hot knife. Dip it in hot water, wipe it dry, and then cut through the cheesecake. This method gives you those perfect, beautiful slices!
Final Thoughts
Creating this Black Magic Chocolate Cheesecake is more than just baking; it’s about sharing joy and indulgence with those you love. The rich, creamy texture and deep chocolate flavor will have everyone coming back for seconds, and the smiles on their faces will be priceless. Whether it’s a special occasion or a simple family dinner, this cheesecake brings a touch of magic to any table. So, roll up your sleeves, embrace the process, and enjoy the delightful experience of making something truly special. Trust me, your loved ones will thank you for it!