
Introduction to Black Cocoa Halloween Cookies – Dark, Rich & Spooky Treats
As the leaves turn and the air gets crisp, I find myself craving something special for Halloween. That’s where these Black Cocoa Halloween Cookies – Dark, Rich & Spooky Treats come in! They’re not just cookies; they’re a delightful way to celebrate the season. Perfect for busy moms like us, these treats are quick to whip up and sure to impress your family and friends. Imagine the smiles on their faces as they bite into these dark, rich delights. Trust me, you’ll want to keep this recipe close for all your spooky celebrations!
Print
Black Cocoa Halloween Cookies: Discover Dark, Rich Delights!
- Total Time: 27 minutes
- Yield: 24 cookies
- Diet: Vegetarian
Description
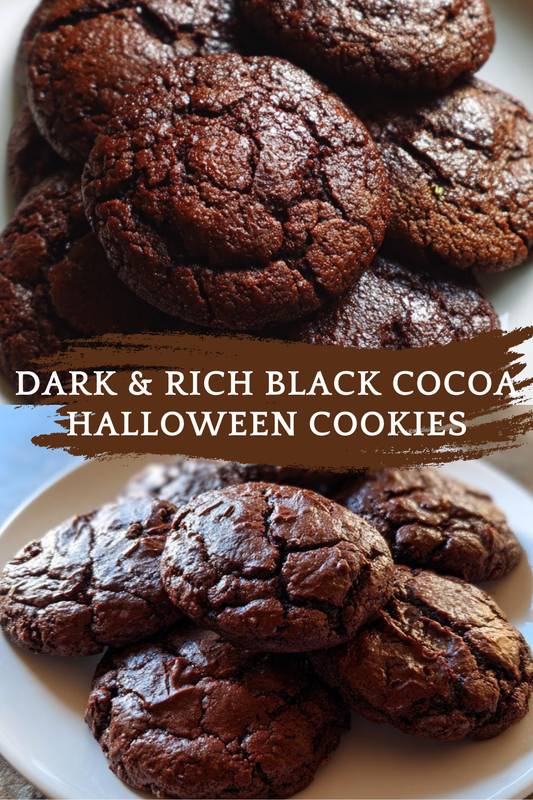
These Black Cocoa Halloween Cookies are dark, rich, and perfect for spooky celebrations. With a unique flavor and a striking appearance, they are sure to impress your guests.
Ingredients
- 1 cup all-purpose flour
- 1/2 cup black cocoa powder
- 1/2 teaspoon baking soda
- 1/4 teaspoon salt
- 1/2 cup unsalted butter, softened
- 1 cup granulated sugar
- 1 large egg
- 1 teaspoon vanilla extract
- 1/2 cup chocolate chips (optional)
Instructions
- Preheat your oven to 350°F (175°C).
- In a bowl, whisk together the flour, black cocoa powder, baking soda, and salt.
- In another bowl, cream the softened butter and sugar until light and fluffy.
- Add the egg and vanilla extract to the butter mixture and mix well.
- Gradually add the dry ingredients to the wet ingredients, mixing until just combined.
- If using, fold in the chocolate chips.
- Drop spoonfuls of dough onto a baking sheet lined with parchment paper.
- Bake for 10-12 minutes or until the edges are set.
- Let cool on the baking sheet for a few minutes before transferring to a wire rack to cool completely.
Notes
- For a more intense chocolate flavor, consider adding more black cocoa powder.
- These cookies can be decorated with spooky icing or sprinkles for Halloween.
- Store in an airtight container to keep them fresh.
- Prep Time: 15 minutes
- Cook Time: 12 minutes
- Category: Dessert
- Method: Baking
- Cuisine: American
Why You’ll Love This Black Cocoa Halloween Cookies – Dark, Rich & Spooky Treats
These Black Cocoa Halloween Cookies – Dark, Rich & Spooky Treats are a lifesaver for busy days! They come together in just 27 minutes, making them perfect for last-minute gatherings or school events. The rich, chocolatey flavor is a crowd-pleaser, even for picky eaters. Plus, the striking dark color adds a fun twist to your Halloween festivities. You’ll love how easy they are to make and how quickly they disappear!
Ingredients for Black Cocoa Halloween Cookies – Dark, Rich & Spooky Treats
Gathering the right ingredients is the first step to creating these delightful Black Cocoa Halloween Cookies – Dark, Rich & Spooky Treats. Here’s what you’ll need:
- All-purpose flour: This is the base of your cookies, providing structure and texture.
- Black cocoa powder: The star of the show! It gives these cookies their deep, dark color and rich flavor.
- Baking soda: This helps the cookies rise, ensuring they’re soft and chewy.
- Salt: Just a pinch enhances the sweetness and balances the flavors.
- Unsalted butter: Softened butter creates a creamy texture and rich taste.
- Granulated sugar: This sweetens the cookies and contributes to their delightful crunch.
- Large egg: It binds the ingredients together and adds moisture.
- Vanilla extract: A splash of vanilla adds warmth and depth to the flavor.
- Chocolate chips (optional): For an extra chocolatey kick, fold in some chocolate chips. They’re a fun surprise in every bite!
For those looking to make substitutions, you can use whole wheat flour for a healthier twist or swap in dairy-free butter for a vegan option. The exact quantities for each ingredient are listed at the bottom of the article, ready for printing!
How to Make Black Cocoa Halloween Cookies – Dark, Rich & Spooky Treats
Step 1: Preheat the Oven
First things first, preheat your oven to 350°F (175°C). Preheating is crucial because it ensures your cookies bake evenly. If the oven isn’t hot enough, your cookies might spread too much or not rise properly. Trust me, a well-preheated oven is the secret to cookie perfection!
Step 2: Mix Dry Ingredients
In a mixing bowl, whisk together the all-purpose flour, black cocoa powder, baking soda, and salt. This step is essential for evenly distributing the baking soda and salt throughout the flour. The black cocoa powder will give your cookies that deep, dark color and rich flavor. Just imagine the aroma wafting through your kitchen!
Step 3: Cream Butter and Sugar
In another bowl, cream the softened butter and granulated sugar together until the mixture is light and fluffy. This usually takes about 2-3 minutes. The goal here is to incorporate air into the butter, which helps your cookies rise beautifully. You’ll know it’s ready when it looks pale and fluffy, almost like a cloud!
Step 4: Combine Wet Ingredients
Next, add the large egg and vanilla extract to the butter mixture. Mix well until everything is combined. The egg adds moisture and helps bind the ingredients together, while the vanilla brings a warm, inviting flavor. It’s like a hug for your taste buds!
Step 5: Combine Dry and Wet Ingredients
Gradually add the dry ingredients to the wet mixture, mixing until just combined. Be careful not to overmix; you want to keep that tender texture. It’s okay if there are a few flour streaks left. This is where the magic happens, and your cookie dough starts to take shape!
Step 6: Fold in Chocolate Chips
If you’re feeling extra indulgent, fold in the chocolate chips at this stage. They’re optional, but they add a delightful surprise in every bite. Gently mix them in, ensuring they’re evenly distributed throughout the dough. Who doesn’t love a little extra chocolate?
Step 7: Shape the Cookies
Using a spoon or cookie scoop, drop spoonfuls of dough onto a baking sheet lined with parchment paper. Leave some space between each cookie, as they will spread while baking. Think of it as giving them room to breathe and grow into their spooky shapes!
Step 8: Bake the Cookies
Bake your cookies in the preheated oven for 10-12 minutes. Keep an eye on them; they’re done when the edges are set but the centers are still soft. They’ll continue to firm up as they cool. The anticipation will be worth it when you see those dark, rich cookies emerge!
Step 9: Cool the Cookies
Let the cookies cool on the baking sheet for a few minutes before transferring them to a wire rack. This cooling time is important; it allows them to set properly. If you try to move them too soon, they might crumble. Patience is key, my friend!
Tips for Success
- Use room temperature ingredients for better mixing.
- Don’t skip the preheating step; it’s crucial for even baking.
- For a chewier cookie, slightly underbake them.
- Experiment with different mix-ins like nuts or dried fruit.
- Store cookies in an airtight container to keep them fresh longer.
Equipment Needed
- Mixing bowls: Use any size you have; just make sure they’re sturdy.
- Whisk: A fork works in a pinch if you don’t have one.
- Cookie scoop or spoon: A tablespoon will do for shaping the cookies.
- Baking sheet: Line it with parchment paper or use a silicone mat.
- Wire rack: If you don’t have one, a plate will work for cooling.
Variations of Black Cocoa Halloween Cookies – Dark, Rich & Spooky Treats
- Gluten-Free: Substitute all-purpose flour with a gluten-free blend to make these cookies suitable for gluten-sensitive friends.
- Vegan: Use a flax egg (1 tablespoon ground flaxseed mixed with 2.5 tablespoons water) instead of the egg and swap in vegan butter.
- Mint Chocolate: Add a few drops of peppermint extract for a refreshing twist, perfect for Halloween!
- Spicy Kick: Mix in a pinch of cayenne pepper or cinnamon for a surprising flavor boost that pairs well with chocolate.
- Nutty Delight: Fold in chopped nuts like walnuts or pecans for added crunch and flavor.
Serving Suggestions for Black Cocoa Halloween Cookies – Dark, Rich & Spooky Treats
- Milk: Serve with a cold glass of milk for a classic pairing that never fails.
- Coffee: Enjoy alongside a warm cup of coffee for a delightful afternoon treat.
- Presentation: Arrange cookies on a spooky-themed platter for a festive touch.
- Ice Cream: Top with a scoop of vanilla ice cream for an indulgent dessert.
FAQs about Black Cocoa Halloween Cookies – Dark, Rich & Spooky Treats
Can I use regular cocoa powder instead of black cocoa powder?
Yes, you can! However, the cookies will be lighter in color and have a different flavor profile. Black cocoa powder gives these cookies their unique dark richness.
How should I store the cookies?
Store your Black Cocoa Halloween Cookies in an airtight container at room temperature. They’ll stay fresh for about a week, but I doubt they’ll last that long!
Can I freeze the cookie dough?
Absolutely! You can freeze the dough for up to three months. Just scoop the dough onto a baking sheet, freeze until solid, then transfer to a freezer bag. Bake straight from the freezer, adding a minute or two to the baking time.
What can I use instead of butter?
If you need a dairy-free option, coconut oil or vegan butter works well. Just make sure it’s softened for easy mixing!
How can I make these cookies more festive for Halloween?
Decorate your cookies with spooky icing or colorful sprinkles. You can also shape them into fun Halloween-themed designs using cookie cutters!
Final Thoughts on Black Cocoa Halloween Cookies – Dark, Rich & Spooky Treats
Making these Black Cocoa Halloween Cookies – Dark, Rich & Spooky Treats is more than just baking; it’s about creating memories. The joy of pulling a tray of dark, rich cookies from the oven fills your kitchen with warmth and excitement. Whether you’re sharing them at a Halloween party or enjoying them with your family, these cookies are sure to spark smiles and laughter. Plus, the ease of preparation means you can whip them up even on the busiest days. So, roll up your sleeves and dive into this delightful baking adventure!