
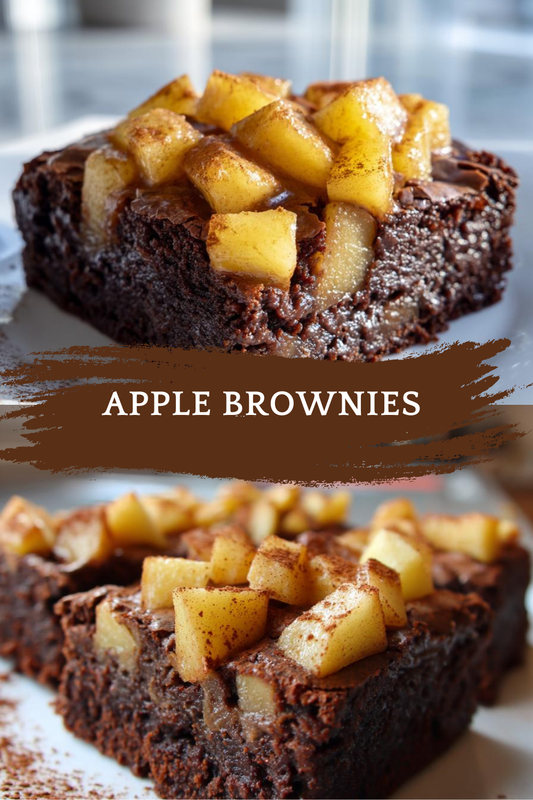
Introduction to Apple Brownies
As a busy mom, I know how precious time can be, especially when it comes to whipping up something sweet. That’s why I’m excited to share my recipe for Apple Brownies! These delightful treats combine the rich, chocolatey goodness we all crave with the natural sweetness of apples. It’s a quick solution for a busy day or a dish that will impress your loved ones at any gathering. Trust me, once you try these Apple Brownies, they’ll become a staple in your dessert rotation. Let’s dive into this delicious adventure together!
Print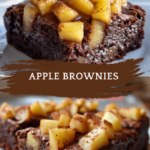
Apple Brownies: Discover the Delicious Twist Today!
- Total Time: 45 minutes
- Yield: 16 brownies
- Diet: Vegetarian
Description
Apple Brownies are a delightful dessert that combines the rich flavors of chocolate and the sweetness of apples, creating a unique and delicious treat.
Ingredients
- 1 cup all-purpose flour
- 1/2 cup unsweetened cocoa powder
- 1/2 teaspoon baking powder
- 1/4 teaspoon salt
- 1/2 cup unsalted butter, melted
- 1 cup granulated sugar
- 2 large eggs
- 1 teaspoon vanilla extract
- 1 cup diced apples
- 1/2 cup chopped walnuts (optional)
Instructions
- Preheat the oven to 350°F (175°C) and grease a baking pan.
- In a bowl, mix together the flour, cocoa powder, baking powder, and salt.
- In another bowl, combine the melted butter and sugar, then add the eggs and vanilla extract.
- Gradually add the dry ingredients to the wet mixture and stir until combined.
- Fold in the diced apples and walnuts if using.
- Pour the batter into the prepared baking pan and spread evenly.
- Bake for 25-30 minutes or until a toothpick inserted in the center comes out clean.
- Let cool before cutting into squares and serving.
Notes
- For a richer flavor, use dark chocolate cocoa powder.
- Store leftovers in an airtight container at room temperature for up to 3 days.
- These brownies can be served warm with a scoop of vanilla ice cream for an extra treat.
- Prep Time: 15 minutes
- Cook Time: 30 minutes
- Category: Dessert
- Method: Baking
- Cuisine: American
Why You’ll Love This Apple Brownies
These Apple Brownies are not just a dessert; they’re a lifesaver for busy days! They come together in just 45 minutes, making them perfect for last-minute gatherings or a sweet treat after dinner. The combination of chocolate and apples creates a flavor explosion that will have everyone asking for seconds. Plus, they’re easy to make, so even if you’re juggling a million things, you can whip these up without breaking a sweat!
Ingredients for Apple Brownies
Let’s gather our ingredients for these scrumptious Apple Brownies! Each component plays a vital role in creating that perfect blend of flavors and textures.
- All-purpose flour: This is the backbone of our brownies, providing structure and a soft texture.
- Unsweetened cocoa powder: It adds that rich chocolate flavor we all love, making these brownies a true chocolate delight.
- Baking powder: A little leavening agent to help our brownies rise and become fluffy.
- Salt: Just a pinch enhances the sweetness and balances the flavors beautifully.
- Unsalted butter: Melted butter brings moisture and richness, making every bite melt in your mouth.
- Granulated sugar: This sweetener is essential for that delightful sweetness and helps create a chewy texture.
- Large eggs: They bind everything together and contribute to the brownies’ fudgy consistency.
- Vanilla extract: A splash of vanilla adds warmth and depth to the flavor profile.
- Diced apples: The star of the show! They bring natural sweetness and a lovely texture contrast.
- Chopped walnuts (optional): For those who enjoy a bit of crunch, walnuts add a delightful nutty flavor.
For exact measurements, check the bottom of the article where you can find everything listed for easy printing. Now, let’s get ready to bake these delicious Apple Brownies!
How to Make Apple Brownies
Step 1: Preheat and Prepare
First things first, let’s get that oven preheating to 350°F (175°C). While it warms up, grab a baking pan and grease it lightly. I like to use butter or cooking spray for easy removal later. This step is crucial because it ensures your Apple Brownies bake evenly. Trust me, you don’t want to skip this part! A well-prepared pan means less sticking and more delicious brownies to enjoy.
Step 2: Mix Dry Ingredients
In a medium bowl, combine the all-purpose flour, unsweetened cocoa powder, baking powder, and salt. Whisk them together until they’re well blended. This step is important because it helps distribute the leavening agent evenly throughout the mixture. The cocoa powder should be free of lumps for a smooth brownie texture. Take a moment to enjoy the rich chocolate aroma wafting up; it’s a sneak peek of the deliciousness to come!
Step 3: Combine Wet Ingredients
In another bowl, mix the melted butter and granulated sugar until they’re well combined. Then, add the eggs and vanilla extract, whisking until the mixture is smooth and creamy. This is where the magic begins! The melted butter adds richness, while the sugar creates that lovely sweetness. Don’t rush this step; a good mix ensures your Apple Brownies will be moist and flavorful.
Step 4: Combine Mixtures
Now, it’s time to bring the two mixtures together! Gradually add the dry ingredients to the wet mixture, stirring gently until everything is just combined. Be careful not to overmix; a few lumps are perfectly fine. This is where the brownie batter starts to take shape, and you can already imagine how delicious these Apple Brownies will be. The anticipation is half the fun!
Step 5: Fold in Apples and Nuts
Next, gently fold in the diced apples and walnuts, if you’re using them. The apples add a delightful sweetness and moisture, while the walnuts provide a lovely crunch. Make sure the apples are evenly distributed throughout the batter. This step is like adding a surprise element to your brownies, making each bite a little different and exciting. I can already taste the delicious contrast of flavors!
Step 6: Bake the Brownies
Pour the batter into your prepared baking pan, spreading it evenly with a spatula. Pop it into the preheated oven and bake for 25-30 minutes. You’ll know they’re done when a toothpick inserted in the center comes out clean. The aroma will fill your kitchen, making it hard to resist sneaking a taste. Just remember, patience is key; let them bake to perfection!
Step 7: Cool and Serve
Once baked, remove the pan from the oven and let the brownies cool in the pan for about 10 minutes. Then, transfer them to a wire rack to cool completely. This step is essential for achieving that perfect texture. Once cooled, cut them into squares and serve. You can enjoy them as they are or with a scoop of vanilla ice cream for an extra treat. Trust me, you’ll want to savor every bite!
Tips for Success
- Use room temperature eggs for better mixing and texture.
- Don’t overmix the batter; a few lumps are okay for fudgy brownies.
- For extra flavor, try adding a pinch of cinnamon or nutmeg.
- Let the brownies cool completely before cutting for cleaner edges.
- Store leftovers in an airtight container to keep them fresh and moist.
Equipment Needed
- Baking pan: A 9×9 inch pan works perfectly, but you can use any similar-sized dish.
- Mixing bowls: A medium bowl for dry ingredients and a larger one for wet ingredients.
- Whisk: A whisk is great for mixing, but a fork will do in a pinch.
- Spatula: Use a spatula to spread the batter evenly in the pan.
- Measuring cups and spoons: Essential for accurate ingredient measurements.
Variations
- Gluten-free: Substitute all-purpose flour with a gluten-free blend for a delicious gluten-free version of Apple Brownies.
- Vegan: Replace eggs with flaxseed meal mixed with water and use a plant-based butter alternative to make these brownies vegan-friendly.
- Spiced Apple Brownies: Add a teaspoon of cinnamon or pumpkin spice to the batter for a warm, cozy flavor that’s perfect for fall.
- Chocolate Chip Apple Brownies: Mix in some chocolate chips along with the apples for an extra chocolatey treat that will satisfy any sweet tooth.
- Caramel Swirl: Drizzle caramel sauce on top of the batter before baking for a decadent caramel apple twist.
Serving Suggestions
- Serve warm with a scoop of vanilla ice cream for a delightful contrast of temperatures.
- Pair with a cup of hot coffee or tea for a cozy afternoon treat.
- Dust with powdered sugar for an elegant presentation at gatherings.
- Add a drizzle of chocolate or caramel sauce for extra indulgence.
FAQs about Apple Brownies
Can I use different types of apples in my Apple Brownies?
Absolutely! You can use any apple variety you like. Sweet apples like Fuji or Honeycrisp work wonderfully, while tart apples like Granny Smith add a nice contrast. Feel free to experiment!
How do I store leftover Apple Brownies?
Store your Apple Brownies in an airtight container at room temperature for up to three days. If you want to keep them longer, you can refrigerate them for up to a week. Just make sure they’re well-sealed!
Can I freeze Apple Brownies?
Yes, you can freeze these delicious treats! Wrap them tightly in plastic wrap and then place them in a freezer-safe container. They’ll stay fresh for up to three months. Just thaw them at room temperature before enjoying!
What can I serve with Apple Brownies?
These brownies pair beautifully with a scoop of vanilla ice cream or a dollop of whipped cream. A drizzle of caramel sauce or a sprinkle of nuts on top can elevate the experience even more!
Are Apple Brownies suitable for a gluten-free diet?
Yes! You can easily make these Apple Brownies gluten-free by substituting all-purpose flour with a gluten-free flour blend. Just make sure to check the other ingredients for gluten content as well.
Final Thoughts
Making Apple Brownies is more than just baking; it’s about creating sweet memories in the kitchen. The delightful combination of chocolate and apples brings joy to every bite, making them perfect for family gatherings or a cozy night in. I love how easy they are to whip up, even on the busiest days. Plus, the smiles on my loved ones’ faces when they take that first bite? Priceless! So, gather your ingredients and let’s embark on this delicious journey together. Trust me, these Apple Brownies will become a cherished favorite in your home, just like they are in mine!