
As a busy mom, I know how important it is to find quick and delightful treats that bring joy to our loved ones. That’s why I absolutely adore these Patriotic Red, White, and Blue Whoopie Pies. They’re not just a feast for the eyes; they’re a delicious way to celebrate any patriotic occasion! With their vibrant colors and soft, cake-like texture, these whoopie pies are perfect for family gatherings, barbecues, or even a simple dessert after dinner. Plus, they’re easy to whip up, making them a fantastic solution for those hectic days when you want to impress without the stress!
Print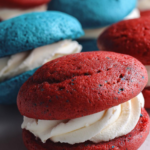
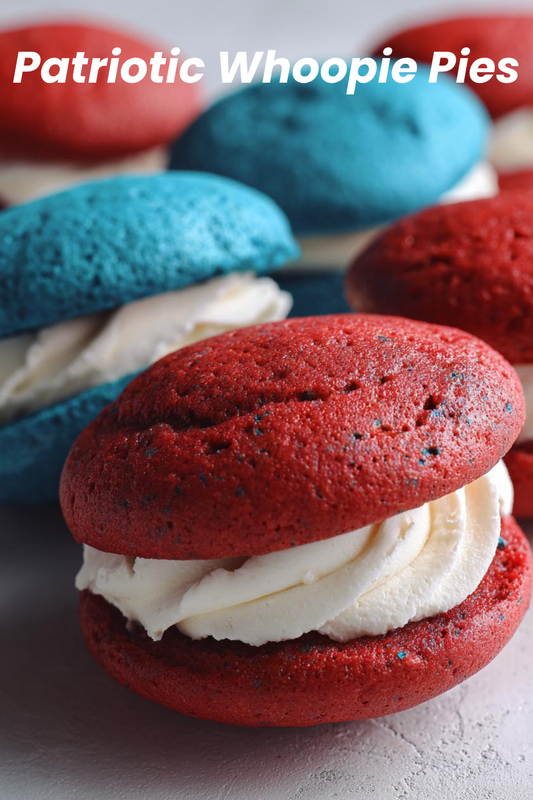
Patriotic Red, White, and Blue Whoopie Pies You’ll Love!
- Total Time: 32 minutes
- Yield: 12 whoopie pies
- Diet: Vegetarian
Description
Delicious whoopie pies featuring red, white, and blue colors, perfect for patriotic celebrations.
Ingredients
- 1 cup all-purpose flour
- 1/2 cup cocoa powder
- 1 tsp baking soda
- 1/2 tsp salt
- 1/2 cup unsalted butter, softened
- 1 cup granulated sugar
- 1 large egg
- 1 tsp vanilla extract
- 1/2 cup buttermilk
- Red and blue food coloring
- 1 cup marshmallow fluff
- 1/2 cup powdered sugar
- 1/4 cup butter, softened
- 1 tsp vanilla extract (for filling)
Instructions
- Preheat the oven to 350°F (175°C).
- In a bowl, mix flour, cocoa powder, baking soda, and salt.
- In another bowl, cream together butter and sugar until light and fluffy.
- Add egg and vanilla extract to the butter mixture and mix well.
- Gradually add the dry ingredients and buttermilk, alternating between them.
- Divide the batter into two bowls; tint one red and the other blue using food coloring.
- Drop spoonfuls of each color onto a baking sheet lined with parchment paper.
- Bake for 10-12 minutes or until set. Let cool completely.
- For the filling, beat together marshmallow fluff, powdered sugar, butter, and vanilla extract until smooth.
- Spread the filling on the flat side of one cookie and sandwich with another cookie.
Notes
- Store in an airtight container for up to 3 days.
- Feel free to use different colors for different occasions.
- Prep Time: 20 minutes
- Cook Time: 12 minutes
- Category: Dessert
- Method: Baking
- Cuisine: American
Why You’ll Love This Patriotic Red, White, and Blue Whoopie Pies
These Patriotic Red, White, and Blue Whoopie Pies are a delightful blend of ease and flavor. They come together in just about 30 minutes, making them perfect for busy schedules. The rich chocolate flavor paired with the sweet marshmallow filling is simply irresistible. Plus, their festive colors make them a hit at any gathering, ensuring smiles all around. Trust me, they’ll become a family favorite in no time!
Ingredients for Patriotic Red, White, and Blue Whoopie Pies
Gathering the right ingredients is the first step to creating these delightful Patriotic Red, White, and Blue Whoopie Pies. Here’s what you’ll need:
- All-purpose flour: This is the base of your whoopie pies, giving them structure and a soft texture.
- Cocoa powder: Adds a rich chocolate flavor that perfectly complements the sweetness of the filling.
- Baking soda: This leavening agent helps the cookies rise, making them light and fluffy.
- Salt: Just a pinch enhances the flavors and balances the sweetness.
- Unsalted butter: Softened butter creates a creamy texture and rich flavor in the batter.
- Granulated sugar: Sweetens the cookies and helps achieve that delightful cake-like consistency.
- Large egg: Acts as a binder, adding moisture and richness to the batter.
- Vanilla extract: A splash of vanilla brings warmth and depth to the flavor profile.
- Buttermilk: This adds moisture and a slight tang, making the cookies tender.
- Red and blue food coloring: Essential for achieving that festive look; feel free to get creative with colors!
- Marshmallow fluff: The star of the filling, it provides a sweet, gooey texture that’s simply irresistible.
- Powdered sugar: Sweetens the filling and helps it achieve a smooth consistency.
- Butter (for filling): Softened butter adds richness to the filling, making it creamy and delicious.
- Vanilla extract (for filling): A touch of vanilla enhances the flavor of the filling.
For exact measurements, check the bottom of the article where you can find everything listed for easy printing. Happy baking!
How to Make Patriotic Red, White, and Blue Whoopie Pies
Now that you have your ingredients ready, let’s dive into the fun part: making these delightful Patriotic Red, White, and Blue Whoopie Pies. Follow these simple steps, and you’ll have a colorful treat that’s sure to impress!
Step 1: Preheat the Oven
First things first, preheat your oven to 350°F (175°C). Preheating is crucial because it ensures that your whoopie pies bake evenly. If you skip this step, you might end up with cookies that are flat or unevenly cooked. Trust me, a little patience here goes a long way!
Step 2: Mix Dry Ingredients
In a medium bowl, combine your all-purpose flour, cocoa powder, baking soda, and salt. Whisk them together until they’re well blended. This step is important because it evenly distributes the leavening agent, ensuring your whoopie pies rise beautifully. Plus, it helps to avoid any clumps of cocoa powder!
Step 3: Cream Butter and Sugar
In a separate large bowl, cream together the softened unsalted butter and granulated sugar. Use an electric mixer on medium speed until the mixture is light and fluffy, about 3-5 minutes. This step is key for achieving that soft, cake-like texture in your whoopie pies. The air you incorporate here will help them rise!
Step 4: Add Egg and Vanilla
Next, add in the large egg and vanilla extract to your butter-sugar mixture. Mix until everything is well combined. The egg acts as a binder, giving your batter structure, while the vanilla adds a warm, inviting flavor that makes these whoopie pies irresistible!
Step 5: Combine Wet and Dry Ingredients
Now it’s time to bring it all together! Gradually add the dry ingredients to the wet mixture, alternating with the buttermilk. Start with a third of the dry mix, then add half of the buttermilk, and repeat until everything is combined. This method helps to keep your batter smooth and prevents overmixing, which can lead to tough cookies.
Step 6: Color the Batter
Divide your batter into two bowls. Tint one bowl with red food coloring and the other with blue. Start with a few drops and mix until you achieve your desired shade. Don’t be afraid to get creative! The vibrant colors will make your Patriotic Red, White, and Blue Whoopie Pies pop!
Step 7: Bake the Cookies
Drop spoonfuls of each colored batter onto a baking sheet lined with parchment paper. Make sure to leave some space between them, as they will spread while baking. Bake for 10-12 minutes, or until the edges are set. You’ll know they’re done when they spring back lightly when touched. Let them cool completely on a wire rack.
Step 8: Prepare the Filling
While your cookies cool, let’s whip up the filling! In a bowl, beat together the marshmallow fluff, powdered sugar, softened butter, and vanilla extract until smooth. This filling is the heart of your whoopie pies, adding that sweet, gooey goodness that everyone loves!
Step 9: Assemble the Whoopie Pies
To assemble, spread a generous amount of filling on the flat side of one cookie and sandwich it with another. Press gently to ensure the filling spreads evenly. For a fun presentation, you can roll the edges in colorful sprinkles or shredded coconut. Your Patriotic Red, White, and Blue Whoopie Pies are now ready to shine!
Tips for Success
- Make sure your butter is softened for easy creaming with sugar.
- Use a cookie scoop for even-sized whoopie pies.
- Let the cookies cool completely before adding the filling to prevent it from melting.
- Experiment with different food coloring for various occasions.
- Store your whoopie pies in an airtight container to keep them fresh.
Equipment Needed
- Baking sheet: A standard baking sheet works well; you can also use a silicone baking mat for easy cleanup.
- Mixing bowls: Use medium and large bowls; any size will do as long as they fit your ingredients.
- Electric mixer: A hand mixer is perfect, but a whisk will work if you’re feeling strong!
- Cookie scoop: This helps with portioning; a tablespoon works in a pinch.
- Wire rack: Essential for cooling; a plate can substitute if needed.
Variations
- Gluten-Free: Substitute all-purpose flour with a gluten-free blend to make these whoopie pies suitable for gluten-sensitive friends.
- Vegan: Use a flax egg (1 tablespoon ground flaxseed mixed with 2.5 tablespoons water) instead of the egg, and replace butter with coconut oil or vegan butter.
- Flavor Twist: Add a teaspoon of peppermint extract for a refreshing minty flavor or a dash of espresso powder for a mocha twist.
- Fruit Filling: Swap marshmallow fluff for whipped cream mixed with fresh berries for a fruity filling that’s light and refreshing.
- Chocolate Lovers: Incorporate chocolate chips into the batter for an extra chocolatey treat that will satisfy any sweet tooth!
Serving Suggestions
- Pair your Patriotic Red, White, and Blue Whoopie Pies with a scoop of vanilla ice cream for a delightful dessert.
- Serve alongside fresh fruit, like strawberries and blueberries, to enhance the festive theme.
- For drinks, consider lemonade or iced tea to keep things refreshing.
- Display them on a colorful platter for a vibrant presentation at your next gathering.
FAQs about Patriotic Red, White, and Blue Whoopie Pies
Can I make these whoopie pies ahead of time?
Absolutely! You can bake the cookies a day in advance and store them in an airtight container. Just add the filling on the day you plan to serve them for the freshest taste.
What can I use instead of buttermilk?
If you don’t have buttermilk on hand, you can easily make a substitute. Just mix one cup of milk with a tablespoon of vinegar or lemon juice. Let it sit for about 5 minutes, and you’re good to go!
How do I store leftover whoopie pies?
Store your Patriotic Red, White, and Blue Whoopie Pies in an airtight container at room temperature for up to three days. If you want to keep them longer, consider refrigerating them for up to a week.
Can I freeze whoopie pies?
Yes! These whoopie pies freeze beautifully. Just wrap them individually in plastic wrap and place them in a freezer-safe bag. They can last up to three months in the freezer. Thaw them in the fridge before serving.
What other occasions can I make these for?
While they’re perfect for patriotic holidays, you can customize the colors for any celebration! Think Halloween orange and black, or pastel shades for Easter. The possibilities are endless!
Final Thoughts
Creating these Patriotic Red, White, and Blue Whoopie Pies is more than just baking; it’s about making memories with your loved ones. The joy of seeing their faces light up as they take a bite is priceless. Whether it’s a family gathering or a casual get-together, these whoopie pies add a splash of color and sweetness to any occasion. Plus, they’re a breeze to make, even on the busiest days. So, roll up your sleeves, gather your ingredients, and let the laughter and deliciousness unfold. Happy baking, and may your kitchen be filled with love and joy!