
As the leaves turn and the air gets crisp, I find myself dreaming of Thanksgiving brownies. These delightful treats are a perfect blend of rich chocolate and seasonal flavors, making them an ideal dessert for busy moms and professionals like us. With just a few simple steps, you can whip up a batch that will impress your loved ones and satisfy your sweet tooth. Whether you’re hosting a gathering or just need a quick solution for a cozy night in, these brownies are sure to bring warmth and joy to your holiday table.
Print
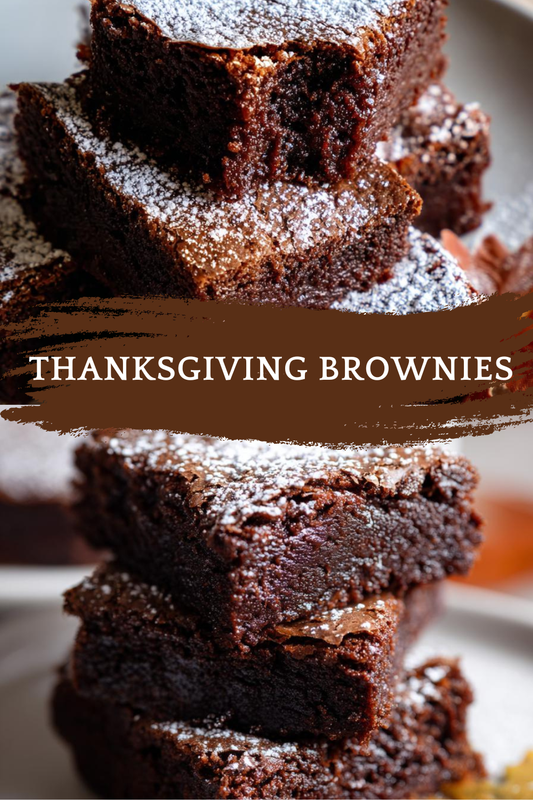
Thanksgiving brownies: A delicious twist on tradition!
- Total Time: 45 minutes
- Yield: 24 brownies
- Diet: Vegetarian
Description
Thanksgiving brownies are a delightful twist on traditional holiday desserts, combining rich chocolate flavor with seasonal ingredients.
Ingredients
- 1 cup unsalted butter
- 2 cups granulated sugar
- 4 large eggs
- 1 teaspoon vanilla extract
- 1 cup all-purpose flour
- 1 cup cocoa powder
- 1/2 teaspoon salt
- 1 cup chopped walnuts or pecans
- 1 cup chocolate chips
- 1/2 cup pumpkin puree
Instructions
- Preheat the oven to 350°F (175°C) and grease a 9×13 inch baking pan.
- In a large bowl, melt the butter and mix in the sugar until well combined.
- Add the eggs one at a time, mixing well after each addition, then stir in the vanilla extract.
- In another bowl, whisk together the flour, cocoa powder, and salt.
- Gradually add the dry ingredients to the wet mixture, stirring until just combined.
- Fold in the pumpkin puree, nuts, and chocolate chips.
- Pour the batter into the prepared baking pan and spread evenly.
- Bake for 25-30 minutes or until a toothpick inserted in the center comes out clean.
- Let cool before cutting into squares and serving.
Notes
- For a richer flavor, use dark chocolate cocoa powder.
- These brownies can be stored in an airtight container for up to a week.
- Serve with whipped cream or ice cream for an extra treat.
- Prep Time: 15 minutes
- Cook Time: 30 minutes
- Category: Dessert
- Method: Baking
- Cuisine: American
Why You’ll Love This Thanksgiving Brownies
Thanksgiving brownies are not just a dessert; they’re a lifesaver for busy days. With a prep time of just 15 minutes, you can have these delicious treats ready in no time. The rich chocolate flavor combined with the warmth of pumpkin makes them a crowd-pleaser. Plus, they’re easy to make, so you can spend less time in the kitchen and more time enjoying the holiday with your loved ones.
Ingredients for Thanksgiving Brownies
Gathering the right ingredients is the first step to creating these scrumptious Thanksgiving brownies. Here’s what you’ll need:
- Unsalted butter: This adds richness and moisture. You can substitute with coconut oil for a dairy-free option.
- Granulated sugar: Sweetness is key! Brown sugar can be used for a deeper flavor.
- Large eggs: They help bind everything together. If you’re vegan, try flax eggs as a substitute.
- Vanilla extract: A splash of this enhances the chocolate flavor. Pure vanilla is best, but imitation works too.
- All-purpose flour: This gives structure to the brownies. For a gluten-free version, almond or oat flour can be used.
- Cocoa powder: The heart of the chocolate flavor. Dark chocolate cocoa powder will intensify the taste.
- Salt: Just a pinch balances the sweetness and enhances flavors.
- Chopped walnuts or pecans: These add a delightful crunch. Feel free to skip them if you have nut allergies.
- Chocolate chips: Because who doesn’t love extra chocolate? You can use milk, dark, or even white chocolate chips.
- Pumpkin puree: This seasonal ingredient adds moisture and a hint of fall flavor. Canned pumpkin works perfectly!
For exact measurements, check the bottom of the article where you can find everything listed for easy printing. Happy baking!
How to Make Thanksgiving Brownies
Step 1: Preheat and Prepare
First things first, preheat your oven to 350°F (175°C). While it warms up, grab a 9×13 inch baking pan and grease it well. This will ensure your Thanksgiving brownies come out easily and don’t stick. Trust me, no one wants a brownie disaster!
Step 2: Mix the Wet Ingredients
In a large bowl, melt the unsalted butter until it’s nice and gooey. Then, mix in the granulated sugar until it’s well combined. Next, crack in the eggs one at a time, stirring after each addition. This helps create that rich texture we all love. Finally, add a splash of vanilla extract for that extra flavor boost. Your mixture should be smooth and creamy, like a warm hug!
Step 3: Combine the Dry Ingredients
In another bowl, whisk together the all-purpose flour, cocoa powder, and salt. This step is crucial for evenly distributing the cocoa and ensuring your brownies have that deep chocolate flavor. Plus, it helps avoid any lumps. A smooth batter is key!
Step 4: Combine Wet and Dry Mixtures
Now, it’s time to bring the two mixtures together. Gradually add the dry ingredients to the wet mixture, stirring gently until just combined. Be careful not to overmix; we want those brownies to be fudgy, not tough. A few flour streaks are perfectly fine!
Step 5: Add the Special Ingredients
Here comes the fun part! Fold in the pumpkin puree, chopped nuts, and chocolate chips. The pumpkin adds moisture and a hint of fall flavor, while the nuts and chocolate chips give that delightful crunch and sweetness. It’s a party in your batter!
Step 6: Bake the Brownies
Pour the luscious batter into your prepared baking pan, spreading it evenly. Pop it into the oven and let it bake for 25-30 minutes. Keep an eye on it! You’ll know it’s done when a toothpick inserted in the center comes out clean. The aroma will be heavenly!
Step 7: Cool and Serve
Once baked, remove the pan from the oven and let the brownies cool for a bit. This is the hardest part, I know! After about 10-15 minutes, cut them into squares. Serve them warm or at room temperature, and watch them disappear!
Tips for Success
- Use room temperature eggs for better mixing.
- Don’t overmix the batter; it keeps the brownies fudgy.
- For extra flavor, sprinkle sea salt on top before baking.
- Let the brownies cool completely for cleaner cuts.
- Store leftovers in an airtight container to keep them fresh.
Equipment Needed
- 9×13 inch baking pan: A standard size for brownies. If you don’t have one, a similar-sized dish will work.
- Mixing bowls: Use at least two—one for wet ingredients and one for dry. Any size will do!
- Whisk: Perfect for mixing dry ingredients. A fork can also do the trick.
- Spatula: Great for folding in ingredients and spreading the batter. A wooden spoon works too!
- Measuring cups and spoons: Essential for accuracy. If you’re in a pinch, use a kitchen scale.
Variations
- Gluten-Free: Substitute all-purpose flour with a gluten-free blend or almond flour for a delicious alternative.
- Vegan: Use flax eggs instead of regular eggs and coconut oil in place of butter for a plant-based treat.
- Mint Chocolate: Add a teaspoon of peppermint extract for a refreshing twist on your Thanksgiving brownies.
- Spiced Brownies: Incorporate a teaspoon of cinnamon or nutmeg to enhance the fall flavors.
- Cheesecake Swirl: Add dollops of cream cheese mixture on top before baking for a rich, creamy layer.
Serving Suggestions
- Pair your Thanksgiving brownies with a scoop of vanilla ice cream for a delightful contrast.
- Serve with a dollop of whipped cream and a sprinkle of cinnamon for a festive touch.
- Drizzle with caramel sauce for an extra indulgent treat.
- Enjoy with a warm cup of spiced chai or coffee to complement the flavors.
- For a beautiful presentation, dust with powdered sugar before serving.
FAQs about Thanksgiving Brownies
Can I make Thanksgiving brownies ahead of time?
Absolutely! These brownies can be made a day or two in advance. Just store them in an airtight container at room temperature. They’ll taste just as delicious when it’s time to serve!
How do I know when my brownies are done baking?
The best way to check is by inserting a toothpick into the center. If it comes out clean or with a few moist crumbs, your Thanksgiving brownies are ready. If it’s wet with batter, give them a few more minutes.
Can I freeze Thanksgiving brownies?
Yes, you can! Once cooled, wrap the brownies tightly in plastic wrap and then in aluminum foil. They can be frozen for up to three months. Just thaw them in the fridge before serving.
What can I substitute for pumpkin puree?
If you don’t have pumpkin puree, you can use applesauce or mashed bananas. Both will add moisture and a hint of sweetness, though the flavor will be slightly different.
Are these brownies suitable for a gluten-free diet?
Yes! Simply swap the all-purpose flour for a gluten-free flour blend. This way, everyone can enjoy these delicious Thanksgiving brownies without worry!
Final Thoughts
As I reflect on these Thanksgiving brownies, I can’t help but smile. They’re more than just a dessert; they’re a celebration of flavors and memories. Each bite is a reminder of cozy gatherings and laughter shared around the table. This recipe is a simple way to bring joy to your holiday season, even amidst the hustle and bustle. So, whether you’re baking for family or friends, these brownies will surely warm hearts and satisfy cravings. Embrace the joy of cooking and let these delightful treats be a part of your Thanksgiving tradition!