
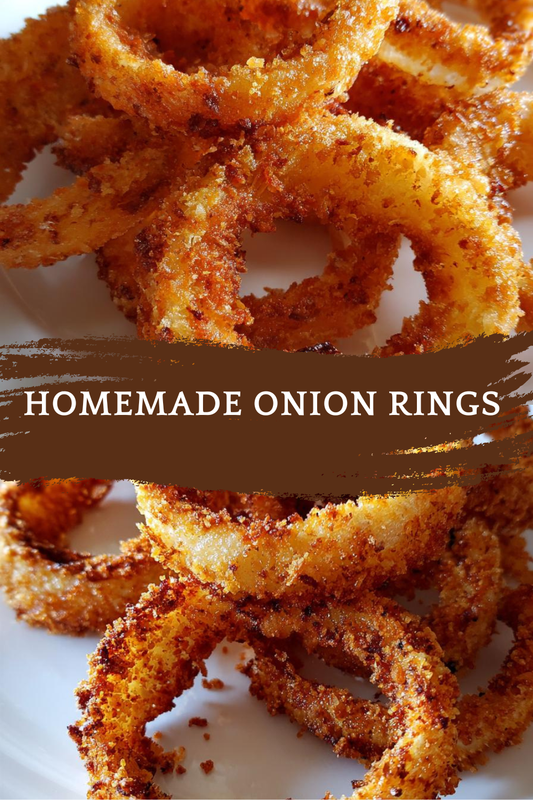
Introduction to Onion Rings
There’s something magical about crispy onion rings that brings a smile to my face. Whether it’s a busy weeknight or a weekend gathering, these golden delights are the perfect solution for any occasion. I love how they can transform a simple meal into something special, making them a go-to snack or side dish. Plus, they’re easy to whip up, even on the most hectic days. Trust me, once you try this onion rings recipe, you’ll find yourself making them again and again, impressing your loved ones with that perfect crunch!
Print
Onion Rings: Discover the Perfect Crunch Today!
- Total Time: 25 minutes
- Yield: 4 servings
- Diet: Vegetarian
Description
Crispy and delicious onion rings that are perfect as a snack or side dish.
Ingredients
- 2 large onions
- 1 cup all-purpose flour
- 1 cup breadcrumbs
- 1 cup buttermilk
- 1 teaspoon garlic powder
- 1 teaspoon paprika
- Salt and pepper to taste
- Oil for frying
Instructions
- Slice the onions into thick rings and separate them.
- In a bowl, mix flour, garlic powder, paprika, salt, and pepper.
- Dip each onion ring into the buttermilk, then coat with the flour mixture.
- Next, dip the coated onion rings into the breadcrumbs.
- Heat oil in a deep fryer or large pot to 350°F (175°C).
- Fry the onion rings in batches until golden brown, about 2-3 minutes.
- Remove and drain on paper towels.
- Serve hot with your favorite dipping sauce.
Notes
- For extra flavor, add cayenne pepper to the flour mixture.
- Ensure the oil is hot enough before frying to achieve a crispy texture.
- Can be baked instead of fried for a healthier option.
- Prep Time: 15 minutes
- Cook Time: 10 minutes
- Category: Appetizer
- Method: Frying
- Cuisine: American
Why You’ll Love This Onion Rings
These onion rings are not just a treat for your taste buds; they’re a lifesaver for busy days! With just a handful of ingredients and minimal prep time, you can have a delicious snack ready in no time. The crispy texture and savory flavor make them irresistible. Plus, they’re versatile enough to pair with any meal or serve as a crowd-pleasing appetizer. Who wouldn’t love that?
Ingredients for Onion Rings
To create these mouthwatering onion rings, you’ll need a few simple ingredients that you might already have in your pantry. Here’s what you’ll need:
- Onions: I recommend using large onions for the best results. Sweet onions like Vidalia add a delightful flavor.
- All-purpose flour: This is the base for your coating, giving the rings that essential crunch.
- Breadcrumbs: Use plain or seasoned breadcrumbs for an extra layer of flavor and texture.
- Buttermilk: This adds moisture and helps the flour stick, creating a deliciously crispy exterior.
- Garlic powder: A sprinkle of this adds a savory depth that elevates the taste.
- Paprika: This gives a subtle smokiness and a beautiful color to your onion rings.
- Salt and pepper: Essential for seasoning, these will enhance all the flavors in your dish.
- Oil for frying: Choose a neutral oil with a high smoke point, like vegetable or canola oil, for frying.
For those looking to spice things up, consider adding cayenne pepper to the flour mixture for a kick! If you prefer a healthier option, you can bake the onion rings instead of frying them. The exact quantities for each ingredient are listed at the bottom of the article, ready for you to print out and take to the kitchen!
How to Make Onion Rings
Step 1: Prepare the Onions
Start by peeling the onions and slicing them into thick rings, about half an inch wide. The thickness is key; it ensures a satisfying crunch while keeping the onion tender inside. Once sliced, gently separate the rings. I love the way they look, like little onion halos! This step is simple but sets the stage for that perfect onion ring experience.
Step 2: Mix the Dry Ingredients
In a large bowl, combine the all-purpose flour, garlic powder, paprika, salt, and pepper. Whisk them together until well blended. This mixture is where the magic begins! The spices will infuse the onion rings with flavor, making each bite a delightful surprise. Don’t skip this step; it’s essential for that crispy, savory coating we all crave.
Step 3: Dip in Buttermilk
Take each onion ring and dip it into the buttermilk, ensuring it’s fully coated. This step is crucial as the buttermilk helps the flour mixture stick to the onion. Plus, it adds a lovely richness to the flavor. I always find this part fun, watching the rings transform as they soak up the buttermilk goodness!
Step 4: Coat with Flour Mixture
After dipping in buttermilk, it’s time to coat the onion rings with the flour mixture. Toss each ring in the bowl, making sure it’s evenly covered. This layer is what gives the onion rings that satisfying crunch when fried. I like to give them a little shake to remove any excess flour, ensuring they fry up perfectly!
Step 5: Breadcrumb Coating
Next, dip the coated onion rings into the breadcrumbs. Make sure they’re fully covered for that extra crispy texture. I often use seasoned breadcrumbs for an added flavor boost. This step is where the onion rings start to look irresistible! The crunch factor is about to go through the roof!
Step 6: Heat the Oil
In a deep fryer or large pot, heat the oil to 350°F (175°C). This temperature is key for achieving that golden brown color and crispy texture. I always test the oil by dropping in a small piece of bread; if it sizzles, it’s ready! Be patient; the right temperature makes all the difference in your onion rings.
Step 7: Fry the Onion Rings
Carefully place the onion rings in the hot oil in batches. Fry them for about 2-3 minutes or until they turn golden brown. Don’t overcrowd the pot; this ensures they fry evenly. The aroma will fill your kitchen, and you’ll be tempted to sneak a taste before they’re even done!
Step 8: Drain and Serve
Once golden brown, remove the onion rings from the oil and place them on paper towels to drain excess oil. This step is crucial for keeping them crispy. Serve them hot with your favorite dipping sauce. I love pairing them with ranch or spicy ketchup. Enjoy the crunch and flavor explosion!
Tips for Success
- Make sure your oil is hot enough before frying to achieve that perfect crunch.
- Don’t overcrowd the pot; fry in batches for even cooking.
- For extra flavor, try adding cayenne pepper to the flour mixture.
- Let the onion rings rest on paper towels to keep them crispy.
- Experiment with different dipping sauces to find your favorite!
Equipment Needed
- Deep fryer or large pot: A deep fryer is ideal, but a heavy pot works too.
- Slotted spoon: Perfect for removing the onion rings from the hot oil.
- Mixing bowls: Use for combining the flour and buttermilk.
- Whisk: Great for mixing dry ingredients evenly.
- Paper towels: Essential for draining excess oil.
Variations of Onion Rings
- Spicy Onion Rings: Add cayenne pepper or chili powder to the flour mixture for a fiery kick.
- Cheesy Onion Rings: Mix grated Parmesan or cheddar cheese into the breadcrumb coating for a cheesy twist.
- Gluten-Free Option: Substitute all-purpose flour with a gluten-free flour blend and use gluten-free breadcrumbs.
- Baked Onion Rings: For a healthier version, coat the rings and bake them at 425°F (220°C) for 20-25 minutes, flipping halfway through.
- Herbed Onion Rings: Add dried herbs like oregano or thyme to the flour mixture for an aromatic flavor.
Serving Suggestions for Onion Rings
- Pair your onion rings with a zesty dipping sauce like ranch or spicy ketchup for a flavor boost.
- Serve alongside burgers or sandwiches for a classic combo that everyone loves.
- Garnish with fresh herbs for a pop of color and added freshness.
- Enjoy with a cold beverage, like iced tea or a light beer, to complement the crunch.
FAQs about Onion Rings
Can I make onion rings ahead of time? Yes, you can prepare the onion rings and coat them in the flour and breadcrumb mixture. Store them in the refrigerator for a few hours before frying. This way, you can enjoy fresh, crispy onion rings without the last-minute rush!
What type of onions are best for onion rings? I recommend using large sweet onions like Vidalia or yellow onions. They provide a delicious flavor and a satisfying crunch. However, you can experiment with red onions for a slightly different taste!
Can I bake onion rings instead of frying? Absolutely! For a healthier option, coat the onion rings and bake them at 425°F (220°C) for about 20-25 minutes. Just remember to flip them halfway through for even crispiness.
How do I store leftover onion rings? If you have any leftovers (which is rare!), store them in an airtight container in the refrigerator. To reheat, pop them in the oven at 350°F (175°C) for about 10 minutes to regain their crunch.
What dipping sauces pair well with onion rings? The options are endless! Classic choices include ranch dressing, spicy ketchup, or even a tangy barbecue sauce. You can also try a creamy garlic dip for a delightful twist!
Final Thoughts
Making onion rings at home is more than just a cooking task; it’s a delightful experience that brings joy to both the cook and the diners. The aroma of frying onions fills the kitchen, creating a warm, inviting atmosphere. Each crispy bite is a reminder of the simple pleasures in life. Whether you’re serving them at a family dinner or enjoying them as a late-night snack, these onion rings are sure to bring smiles all around. So, roll up your sleeves, gather your ingredients, and let the crunching begin! You won’t regret it!