
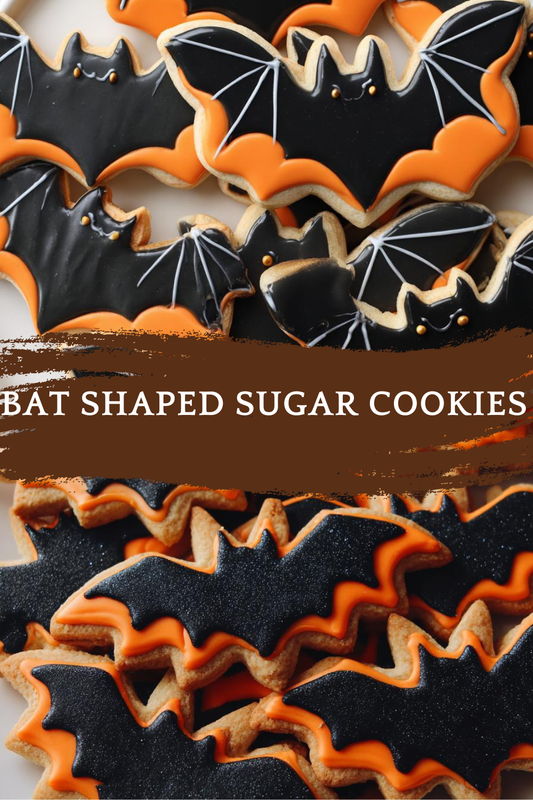
Introduction to Bat Shaped Sugar Cookies
As the leaves turn and the air gets crisp, I find myself craving the sweet, spooky spirit of Halloween. That’s where these delightful bat shaped sugar cookies come in! They’re not just a treat; they’re a fun way to bring the family together in the kitchen. Whether you’re a busy mom juggling work and kids or a professional looking to impress at a gathering, this recipe is your go-to. With just a few simple ingredients and steps, you can whip up a batch of these charming cookies that will surely delight everyone. Let’s get baking!
Print
Bat Shaped Sugar Cookies: A Spooky Sweet Delight!
- Total Time: 30 minutes
- Yield: 24 cookies
- Diet: Vegetarian
Description
These bat-shaped sugar cookies are a fun and festive treat perfect for Halloween celebrations.
Ingredients
- 2 3/4 cups all-purpose flour
- 1 teaspoon baking soda
- 1/2 teaspoon baking powder
- 1 cup unsalted butter, softened
- 1 1/2 cups white sugar
- 1 egg
- 1 teaspoon vanilla extract
- 1/2 teaspoon almond extract
- 3 to 4 tablespoons milk
- Black icing for decoration
Instructions
- Preheat your oven to 375°F (190°C).
- In a bowl, mix together flour, baking soda, and baking powder.
- In a separate bowl, cream together the butter and sugar until smooth.
- Beat in the egg, vanilla extract, and almond extract.
- Gradually blend in the dry ingredients.
- Add milk as needed to soften the dough.
- Roll out the dough on a floured surface and cut into bat shapes.
- Place cookies on ungreased baking sheets.
- Bake for 8 to 10 minutes in the preheated oven.
- Let cool before decorating with black icing.
Notes
- For a more intense flavor, consider adding a pinch of cinnamon.
- Store cookies in an airtight container to maintain freshness.
- These cookies can be made ahead of time and frozen.
- Prep Time: 20 minutes
- Cook Time: 10 minutes
- Category: Dessert
- Method: Baking
- Cuisine: American
Why You’ll Love This Bat Shaped Sugar Cookies
These bat shaped sugar cookies are a breeze to make, perfect for those busy days when time is tight. With just a handful of ingredients, you can create a deliciously sweet treat that’s sure to impress. Plus, the whimsical bat shape adds a festive touch to any Halloween celebration. They’re not only tasty but also a fun activity to share with your kids, making memories in the kitchen together!
Ingredients for Bat Shaped Sugar Cookies
Gathering the right ingredients is the first step to creating these delightful bat shaped sugar cookies. Here’s what you’ll need:
- All-purpose flour: This is the backbone of your cookies, providing structure and texture.
- Baking soda: A leavening agent that helps the cookies rise and become fluffy.
- Baking powder: Works alongside baking soda to ensure your cookies are light and airy.
- Unsalted butter: Adds richness and flavor. Make sure it’s softened for easy creaming.
- White sugar: Sweetens the cookies and contributes to their lovely texture.
- Egg: Acts as a binder, helping to hold everything together while adding moisture.
- Vanilla extract: A must-have for that warm, sweet flavor that elevates your cookies.
- Almond extract: Just a hint of this adds a delightful twist to the flavor profile.
- Milk: Used to adjust the dough’s consistency, making it easier to roll out.
- Black icing: Essential for decorating your bat cookies, giving them that spooky look.
For those looking to experiment, consider adding a pinch of cinnamon for a warm spice note. You can find all the exact measurements at the bottom of the article, ready for printing. Happy baking!
How to Make Bat Shaped Sugar Cookies
Now that you have your ingredients ready, let’s dive into the fun part—making these bat shaped sugar cookies! Follow these simple steps, and you’ll have a batch of spooky treats in no time.
Step 1: Preheat the Oven
First things first, preheat your oven to 375°F (190°C). This step is crucial! Preheating ensures that your cookies bake evenly and achieve that perfect golden color. Trust me, there’s nothing worse than undercooked cookies!
Step 2: Mix Dry Ingredients
In a medium bowl, whisk together the all-purpose flour, baking soda, and baking powder. This combination is key to achieving the right texture. Make sure there are no lumps, as they can affect how your cookies rise. A well-mixed dry blend sets the stage for success!
Step 3: Cream Butter and Sugar
In a separate large bowl, cream together the softened unsalted butter and white sugar until the mixture is light and fluffy. This process is essential for creating a tender cookie. The air you incorporate during creaming helps the cookies rise beautifully!
Step 4: Add Wet Ingredients
Next, beat in the egg, vanilla extract, and almond extract. Mix until everything is well combined. The egg adds moisture and binds the ingredients together, while the extracts infuse your cookies with delightful flavor. It’s like a warm hug in every bite!
Step 5: Combine Dry and Wet Mixtures
Gradually blend the dry ingredients into the wet mixture. Use a spatula or wooden spoon to fold them together gently. Be careful not to overwork the dough; this can lead to tough cookies. You want a soft, pliable dough that’s ready to be shaped!
Step 6: Adjust Dough Consistency
If your dough feels too dry, add milk one tablespoon at a time until it reaches the right consistency. The dough should be soft but not sticky. This step is crucial for rolling out your bat shapes later on!
Step 7: Shape the Cookies
On a floured surface, roll out the dough to about 1/4 inch thick. Use a bat-shaped cookie cutter to cut out your cookies. If the dough sticks, sprinkle a little more flour on the surface. Place the bat shapes on ungreased baking sheets, leaving some space between them.
Step 8: Bake the Cookies
Bake your cookies in the preheated oven for 8 to 10 minutes. Keep an eye on them! You’ll know they’re done when the edges are lightly golden. Remember, they’ll continue to firm up as they cool, so don’t overbake!
Step 9: Cool and Decorate
Once baked, let the cookies cool on the baking sheet for a few minutes before transferring them to a wire rack. This cooling time is essential for preventing breakage. Once cool, it’s time to unleash your creativity with black icing. Decorate your bat cookies to your heart’s content!
Tips for Success
- Always measure your flour correctly; too much can lead to dry cookies.
- Chill the dough for 30 minutes if it’s too soft to handle.
- Use a sharp cookie cutter for clean edges on your bat shapes.
- Experiment with different icing designs for a fun twist.
- Store cookies in an airtight container to keep them fresh longer.
Equipment Needed
- Mixing bowls: A set of various sizes is handy; you can use any large bowl if needed.
- Whisk: Essential for mixing dry ingredients; a fork works in a pinch.
- Cookie cutter: A bat-shaped cutter is ideal, but any shape will do!
- Baking sheets: Use ungreased sheets or line them with parchment paper for easy cleanup.
- Cooling rack: Helps cookies cool evenly; a plate can work if you don’t have one.
Variations of Bat Shaped Sugar Cookies
- Chocolate Chip Bats: Add mini chocolate chips to the dough for a delightful surprise in every bite.
- Gluten-Free Option: Substitute all-purpose flour with a gluten-free blend to accommodate dietary needs.
- Spiced Bats: Incorporate a teaspoon of pumpkin spice or cinnamon for a warm, autumnal flavor.
- Royal Icing: Use royal icing instead of black icing for a glossy finish and intricate designs.
- Nutty Bats: Mix in finely chopped nuts like walnuts or pecans for added texture and flavor.
Serving Suggestions for Bat Shaped Sugar Cookies
- Pair your bat shaped sugar cookies with a warm cup of apple cider for a cozy treat.
- Serve them alongside a spooky Halloween-themed fruit platter for a colorful contrast.
- Display cookies on a decorative platter with Halloween decorations for a festive touch.
- Offer a side of chocolate or caramel dip for an extra indulgent experience.
- Wrap cookies in clear bags tied with orange ribbons for delightful party favors.
FAQs about Bat Shaped Sugar Cookies
Can I make these bat shaped sugar cookies ahead of time?
Absolutely! You can prepare the dough in advance and refrigerate it for up to three days. Just roll it out and cut your bat shapes when you’re ready to bake. You can also freeze the baked cookies for up to three months!
What can I use instead of black icing for decoration?
If black icing isn’t your thing, consider using melted chocolate or colored royal icing. You can even sprinkle edible glitter for a fun twist. The options are endless!
How do I store my bat shaped sugar cookies?
To keep your cookies fresh, store them in an airtight container at room temperature. They should stay delicious for about a week. If you want to keep them longer, consider freezing them!
Can I use a different shape for these cookies?
Of course! While bat shaped sugar cookies are perfect for Halloween, feel free to use any cookie cutter you have on hand. Ghosts, pumpkins, or even stars can add a festive flair!
What’s the best way to decorate my cookies?
Get creative! Use piping bags for detailed designs or simply spread icing with a knife for a more rustic look. Add sprinkles, candy eyes, or even edible markers for a personal touch!
Final Thoughts
Making bat shaped sugar cookies is more than just baking; it’s about creating memories with your loved ones. The joy of rolling out dough, cutting out those whimsical bat shapes, and decorating them together brings a sense of warmth to any Halloween celebration. These cookies are not only delicious but also a fun way to express your creativity. Whether you’re sharing them at a party or enjoying them at home, each bite is a reminder of the sweet moments spent in the kitchen. So, gather your family, and let the baking adventure begin!