
Introduction to Tombstone Marshmallow Pops
As the leaves turn and the air gets crisp, I find myself dreaming up spooky treats to celebrate Halloween. One of my absolute favorites is Tombstone Marshmallow Pops. These delightful little creations are not only fun to make, but they also bring a smile to everyone’s face. If you’re a busy mom or professional like me, you’ll appreciate how quick and easy these pops are to whip up. They’re perfect for parties or just a sweet surprise for your loved ones. Let’s dive into this deliciously spooky adventure together!
Print
Tombstone Marshmallow Pops: A Spooky Treat to Try!
- Total Time: 30 minutes
- Yield: 10 pops
- Diet: Vegetarian
Description
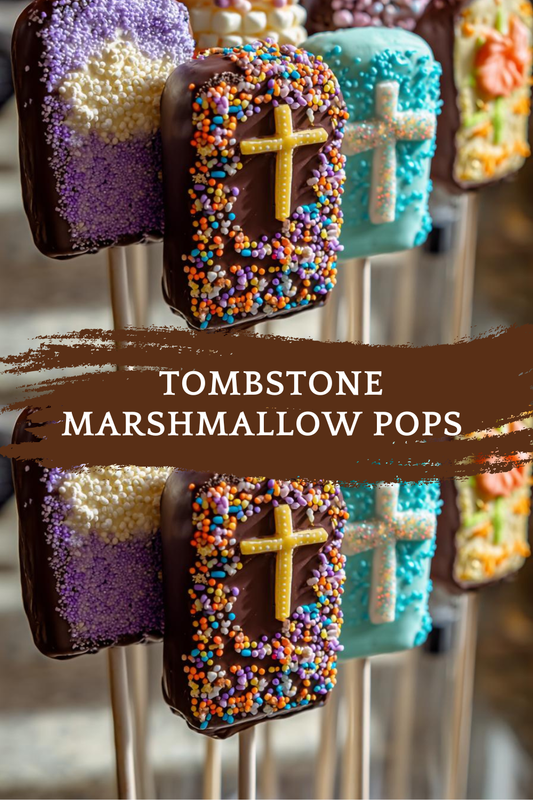
Tombstone Marshmallow Pops are a fun and spooky treat perfect for Halloween parties or gatherings. These delicious marshmallow pops are decorated to look like tombstones, making them a festive addition to any dessert table.
Ingredients
- 10 large marshmallows
- 1 cup chocolate melting wafers
- 10 lollipop sticks
- White icing or edible marker for decoration
- Crushed cookies or graham crackers for dirt
Instructions
- Insert a lollipop stick into each marshmallow.
- Melt the chocolate wafers according to package instructions.
- Dip each marshmallow into the melted chocolate, ensuring it is fully coated.
- Place the coated marshmallows on a baking sheet lined with parchment paper.
- Before the chocolate sets, sprinkle crushed cookies or graham crackers around the base to resemble dirt.
- Once the chocolate has hardened, use white icing or an edible marker to write spooky names or messages on the marshmallows to create tombstones.
- Let the decorations set completely before serving.
Notes
- For a more festive look, use colored chocolate melts.
- Store in an airtight container to keep them fresh.
- These can be made a day in advance.
- Prep Time: 20 minutes
- Cook Time: 10 minutes
- Category: Dessert
- Method: No-bake
- Cuisine: American
Why You’ll Love This Tombstone Marshmallow Pops
These Tombstone Marshmallow Pops are a game-changer for busy days. They come together in just 30 minutes, making them a quick and delightful treat. Plus, the kids can join in on the fun, turning a simple recipe into a family bonding experience. With their sweet chocolate coating and playful designs, these pops are sure to impress at any Halloween gathering. Who knew spooky could be so easy and delicious?
Ingredients for Tombstone Marshmallow Pops
Gathering the right ingredients is half the fun! Here’s what you’ll need to create these delightful Tombstone Marshmallow Pops:
- Large marshmallows: These are the stars of the show! Their fluffy texture makes for a perfect base.
- Chocolate melting wafers: Choose your favorite flavor! They create a smooth, delicious coating that resembles a tombstone.
- Lollipop sticks: These are essential for easy handling and make your pops fun to eat.
- White icing or edible marker: Use these to add spooky names or messages, giving your pops personality.
- Crushed cookies or graham crackers: Sprinkle these around the base to mimic dirt, adding a fun touch to your presentation.
Feel free to get creative! You can use colored chocolate melts for a festive twist or even swap out the marshmallows for flavored ones. If you’re looking for a gluten-free option, just check the labels on your ingredients. For exact quantities, check the bottom of the article where you can find everything available for printing!
How to Make Tombstone Marshmallow Pops
Now that we have our ingredients ready, let’s get to the fun part! Making these Tombstone Marshmallow Pops is a breeze. Follow these simple steps, and you’ll have a spooky treat that’s sure to delight everyone.
Step 1: Prepare the Marshmallows
Start by inserting a lollipop stick into each marshmallow. This is the base of your pops. Make sure to push the stick in about halfway, so it’s sturdy. It’s like giving your marshmallow a little handle for all the fun to come!
Step 2: Melt the Chocolate
Next, melt the chocolate wafers according to the package instructions. I usually do this in a microwave-safe bowl, heating in short bursts. Stir until smooth. A silky chocolate coating is key for that tombstone effect!
Step 3: Dip the Marshmallows
Now, dip each marshmallow into the melted chocolate. Make sure it’s fully coated. This creates that delicious tombstone look. Let any excess chocolate drip off before moving to the next step. It’s like giving your pops a chocolate bath!
Step 4: Add the Dirt
Place the coated marshmallows on a baking sheet lined with parchment paper. Before the chocolate sets, sprinkle crushed cookies or graham crackers around the base. This mimics dirt and adds a fun touch to your spooky scene. It’s like creating a mini graveyard!
Step 5: Decorate the Tombstones
Once the chocolate has hardened, it’s time to get creative! Use white icing or an edible marker to write spooky names or messages on the marshmallows. This is where your pops get their personality. Think of it as giving each tombstone its own story!
Step 6: Let Them Set
Finally, let the decorations set completely before serving. This ensures everything stays in place. You want your Tombstone Marshmallow Pops to look perfect for your Halloween gathering. Patience is key, but trust me, it’s worth the wait!
Tips for Success
- Use a toothpick to help with dipping if the marshmallows are too heavy on the stick.
- Chill the melted chocolate briefly to thicken it for easier dipping.
- Experiment with different toppings like sprinkles or edible glitter for extra flair.
- Make sure the chocolate is fully set before decorating to avoid smudging.
- Have fun with the designs—let your creativity shine!
Equipment Needed
- Microwave-safe bowl: For melting chocolate. A small saucepan works too!
- Baking sheet: To place your pops on. A plate can do in a pinch.
- Parchment paper: For easy cleanup. Wax paper is a good alternative.
- Spatula: To help with dipping. A fork can work if you’re in a hurry!
Variations of Tombstone Marshmallow Pops
- Flavored Marshmallows: Try using strawberry or chocolate-flavored marshmallows for a fun twist on the classic.
- Dark Chocolate Coating: Swap out the chocolate melting wafers for dark chocolate for a richer flavor.
- Vegan Option: Use dairy-free chocolate melts and vegan marshmallows to make these pops suitable for a vegan diet.
- Gluten-Free Version: Ensure all ingredients, especially the cookies, are gluten-free for those with dietary restrictions.
- Nutty Crunch: Add crushed nuts or toffee bits to the “dirt” for an extra crunch and flavor.
Serving Suggestions for Tombstone Marshmallow Pops
- Pair these pops with a spooky punch or apple cider for a festive drink option.
- Serve on a decorative platter surrounded by faux cobwebs for a Halloween vibe.
- Include a variety of Halloween-themed treats for a fun dessert table.
- Use clear bags tied with orange ribbons for individual treats at parties.
FAQs about Tombstone Marshmallow Pops
Can I make Tombstone Marshmallow Pops in advance?
Absolutely! These spooky treats can be made a day in advance. Just store them in an airtight container to keep them fresh. This is a lifesaver for busy moms like me who want to get a head start on Halloween festivities!
What can I use instead of chocolate melting wafers?
If you don’t have chocolate melting wafers, you can use chocolate chips. Just remember to add a little bit of shortening or coconut oil to help them melt smoothly. It’s a great alternative that still gives you that delicious coating!
How do I store leftover Tombstone Marshmallow Pops?
Store any leftovers in an airtight container at room temperature. They’ll stay fresh for a few days. Just be sure to keep them away from heat or direct sunlight to maintain their yummy texture!
Can I customize the decorations on the pops?
Definitely! Get creative with your decorations. Use colored icing, sprinkles, or even edible glitter to make your Tombstone Marshmallow Pops stand out. The more personalized, the better!
Are Tombstone Marshmallow Pops suitable for kids?
Yes! These treats are perfect for kids. They’re fun to make and even more fun to eat. Just keep an eye on the little ones while they’re decorating to ensure they don’t go overboard with the icing!
Final Thoughts
Creating Tombstone Marshmallow Pops is more than just a recipe; it’s a delightful experience that brings joy to both young and old. As I watch my kids giggle while decorating, I’m reminded of the magic that simple treats can create. These pops are not only a sweet indulgence but also a canvas for creativity and family bonding. Whether you’re hosting a Halloween party or just looking to add a little fun to your day, these spooky treats are sure to bring smiles. So grab your ingredients and let the Halloween spirit inspire your kitchen adventures!