
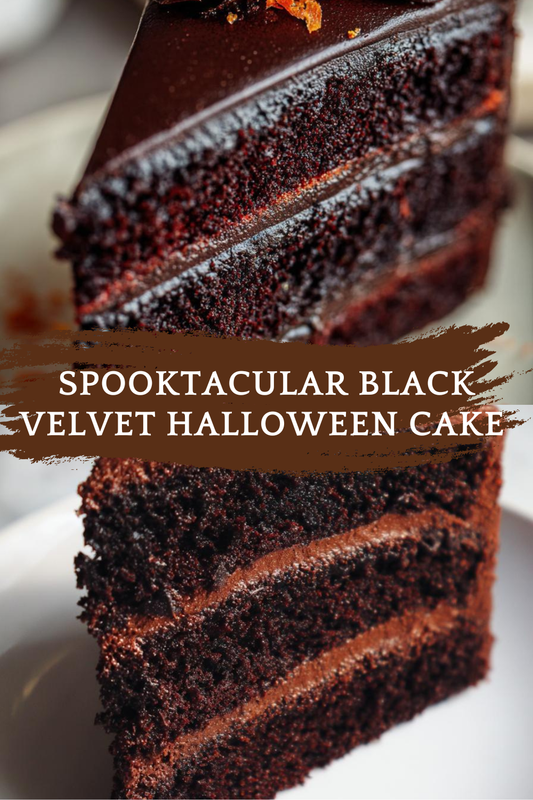
Introduction to Black Velvet Halloween Cake
As the leaves turn and the air gets crisp, I find myself dreaming of spooky treats that bring a smile to my family’s faces. Enter the Black Velvet Halloween Cake, a delightful twist on the classic red velvet. This cake is not just a feast for the eyes; it’s a deliciously rich dessert that’s perfect for busy moms like us. Whether you’re hosting a Halloween party or just want to surprise your loved ones, this cake is a quick solution that will impress everyone. Trust me, it’s a treat that’s as fun to make as it is to eat!
Print
Black Velvet Halloween Cake: A Spooky Delight Awaits!
- Total Time: 55 minutes
- Yield: 12 servings
- Diet: Vegetarian
Description
A deliciously spooky Black Velvet Halloween Cake that is perfect for Halloween celebrations.
Ingredients
- 2 cups all-purpose flour
- 1 1/2 cups granulated sugar
- 1 cup unsweetened cocoa powder
- 1 1/2 teaspoons baking soda
- 1 teaspoon baking powder
- 1 teaspoon salt
- 1 cup vegetable oil
- 1 cup buttermilk
- 2 large eggs
- 1 teaspoon vanilla extract
- 1 tablespoon black food coloring
- 1 cup boiling water
Instructions
- Preheat your oven to 350°F (175°C) and grease two 9-inch round cake pans.
- In a large bowl, sift together the flour, sugar, cocoa powder, baking soda, baking powder, and salt.
- In another bowl, whisk together the oil, buttermilk, eggs, vanilla extract, and black food coloring.
- Combine the wet ingredients with the dry ingredients and mix until smooth.
- Gradually stir in the boiling water until well combined.
- Pour the batter evenly into the prepared cake pans.
- Bake for 30-35 minutes or until a toothpick inserted in the center comes out clean.
- Let the cakes cool in the pans for 10 minutes, then transfer to wire racks to cool completely.
Notes
- For a more intense black color, you can add more black food coloring.
- Pair with cream cheese frosting for a delicious contrast.
- Decorate with Halloween-themed sprinkles or edible decorations.
- Prep Time: 20 minutes
- Cook Time: 35 minutes
- Category: Dessert
- Method: Baking
- Cuisine: American
Why You’ll Love This Black Velvet Halloween Cake
This Black Velvet Halloween Cake is a game-changer for busy days. It’s easy to whip up, taking just over an hour from start to finish. The rich, chocolatey flavor paired with that striking black hue makes it a showstopper. Plus, it’s versatile! You can dress it up with festive decorations or keep it simple. Either way, it’s sure to delight your family and friends, making every bite a spooky celebration!
Ingredients for Black Velvet Halloween Cake
Gathering the right ingredients is the first step to creating your Black Velvet Halloween Cake. Here’s what you’ll need:
- All-purpose flour: This is the backbone of your cake, providing structure and texture.
- Granulated sugar: Sweetness is key! It balances the rich cocoa flavor.
- Unsweetened cocoa powder: This gives the cake its deep chocolatey taste and dark color.
- Baking soda: A leavening agent that helps the cake rise and become fluffy.
- Baking powder: Works alongside baking soda for that perfect lift.
- Salt: Just a pinch enhances all the flavors in your cake.
- Vegetable oil: Keeps the cake moist and tender; you can also use melted butter for a richer flavor.
- Buttermilk: Adds a tangy flavor and helps create a soft crumb. If you don’t have it, regular milk with a splash of vinegar works too!
- Large eggs: They bind everything together and add moisture.
- Vanilla extract: A splash of vanilla brings warmth and depth to the cake.
- Black food coloring: This is what gives your cake that spooky black hue. Feel free to adjust the amount for a deeper color!
- Boiling water: This may seem odd, but it helps to intensify the chocolate flavor and create a smooth batter.
For exact measurements, check the bottom of the article where you can find everything listed for easy printing. Happy baking!
How to Make Black Velvet Halloween Cake
Step 1: Preheat and Prepare
First things first, preheat your oven to 350°F (175°C). This ensures your Black Velvet Halloween Cake bakes evenly. While the oven warms up, grab two 9-inch round cake pans and grease them well. I like to use a bit of vegetable oil or butter, then dust them with flour. This little trick helps the cakes slide out easily once they’re baked. Trust me, no one wants a cake that sticks!
Step 2: Mix Dry Ingredients
In a large mixing bowl, sift together the all-purpose flour, granulated sugar, cocoa powder, baking soda, baking powder, and salt. Sifting is key; it aerates the flour and removes any lumps. This step ensures your cake has a light, fluffy texture. Once sifted, gently whisk the dry ingredients together until they’re well combined. This is where the magic begins, as the rich cocoa aroma fills your kitchen!
Step 3: Combine Wet Ingredients
In a separate bowl, whisk together the vegetable oil, buttermilk, eggs, vanilla extract, and black food coloring. Mixing these wet ingredients well is crucial for a smooth batter. The oil keeps the cake moist, while the buttermilk adds a delightful tang. Don’t be shy with the black food coloring; it’s what gives your cake that spooky, dark hue. Just imagine how impressive it will look!
Step 4: Combine Wet and Dry Mixtures
Now, it’s time to bring the wet and dry ingredients together. Pour the wet mixture into the bowl of dry ingredients. Gently mix with a spatula or wooden spoon until everything is just combined. Be careful not to overmix; a few lumps are perfectly fine. This step is where your Black Velvet Halloween Cake starts to take shape, and the excitement builds!
Step 5: Add Boiling Water
Here’s the secret ingredient: boiling water! Gradually stir in the boiling water until the batter is smooth. This step may seem unusual, but it intensifies the chocolate flavor and creates a silky texture. Just be cautious; the batter will be hot! This is the moment when your cake transforms into a rich, velvety delight that’s hard to resist.
Step 6: Bake the Cake
Carefully pour the batter evenly into your prepared cake pans. Give the pans a gentle tap on the counter to release any air bubbles. Pop them into your preheated oven and bake for 30-35 minutes. You’ll know they’re done when a toothpick inserted in the center comes out clean. The aroma wafting through your kitchen will be absolutely heavenly!
Step 7: Cool the Cakes
Once baked, let the cakes cool in the pans for about 10 minutes. This allows them to set before transferring. After that, gently remove them from the pans and place them on wire racks to cool completely. Cooling is essential; it prevents the frosting from melting. Plus, it gives you a moment to admire your spooky creation before the fun decorating begins!
Tips for Success
- Always measure your ingredients accurately for the best results.
- Use room temperature eggs and buttermilk for a smoother batter.
- Don’t skip the sifting step; it makes a big difference in texture.
- Let the cakes cool completely before frosting to avoid melting.
- Experiment with different frostings, like cream cheese or chocolate ganache, for a unique twist!
Equipment Needed
- Two 9-inch round cake pans (or one 9×13-inch pan for a single layer)
- Mixing bowls (a large one for dry ingredients and a medium one for wet)
- Whisk and spatula (or wooden spoon for mixing)
- Measuring cups and spoons for accuracy
- Wire racks for cooling (or a large plate if you don’t have racks)
Variations of Black Velvet Halloween Cake
- Gluten-Free Option: Substitute all-purpose flour with a gluten-free blend to make this cake suitable for gluten-sensitive friends.
- Vegan Twist: Replace eggs with flaxseed meal and use plant-based milk instead of buttermilk for a delicious vegan version.
- Chocolate Chip Surprise: Fold in some chocolate chips into the batter for an extra chocolatey treat that everyone will love.
- Spiced Version: Add a teaspoon of cinnamon or pumpkin spice to the dry ingredients for a warm, autumnal flavor.
- Layered Delight: Create a multi-layer cake by baking in three pans and adding different fillings like raspberry jam or whipped cream between layers.
Serving Suggestions for Black Velvet Halloween Cake
- Pair with a dollop of whipped cream or a scoop of vanilla ice cream for a delightful contrast.
- Serve alongside a spooky punch or hot apple cider to enhance the Halloween theme.
- Decorate with Halloween-themed sprinkles or edible glitter for a festive touch.
- Slice into fun shapes using cookie cutters for a playful presentation.
FAQs about Black Velvet Halloween Cake
Can I make this cake ahead of time?
Absolutely! You can bake the Black Velvet Halloween Cake a day in advance. Just store the cooled cakes in an airtight container at room temperature. When you’re ready to serve, frost and decorate as desired. This makes it a perfect option for busy moms planning ahead!
What frosting pairs best with this cake?
I recommend cream cheese frosting for a delightful contrast to the rich chocolate flavor. However, chocolate ganache or even a simple buttercream works beautifully too. The choice is yours, and each option adds its own charm to the Black Velvet Halloween Cake!
Can I use a different food coloring?
While black food coloring is essential for that spooky look, you can experiment with other colors if you want a different theme. Just keep in mind that the cake won’t have the same dramatic effect. But hey, a vibrant purple or green could be fun for a Halloween party!
How do I store leftovers?
Store any leftover Black Velvet Halloween Cake in an airtight container in the fridge. It should stay fresh for about 3-4 days. Just remember to let it come to room temperature before serving for the best flavor and texture!
Can I freeze this cake?
Yes, you can freeze the Black Velvet Halloween Cake! Wrap the cooled cakes tightly in plastic wrap and then in aluminum foil. They can be frozen for up to three months. When you’re ready to enjoy, just thaw in the fridge overnight and frost as usual!
Final Thoughts
Creating this Black Velvet Halloween Cake is more than just baking; it’s about making memories with your loved ones. The joy of watching their faces light up as they take that first bite is priceless. This cake brings a touch of magic to your Halloween celebrations, making it a delightful centerpiece for any gathering. Plus, it’s a fantastic way to involve your kids in the kitchen, turning a simple recipe into a fun family activity. So, roll up your sleeves, embrace the spooky spirit, and let this cake be the highlight of your Halloween festivities!