
Introduction to Halloween Whoopie Pies
As the leaves turn and the air gets crisp, I can’t help but get excited about Halloween. One of my favorite treats to whip up during this spooky season is Halloween Whoopie Pies. These delightful, cake-like sandwiches are not only fun to make, but they also bring a smile to everyone’s face. Whether you’re a busy mom juggling work and kids or a professional looking to impress at a gathering, this recipe is a quick solution that will wow your loved ones. Trust me, these whoopie pies are the perfect blend of spooky and sweet!
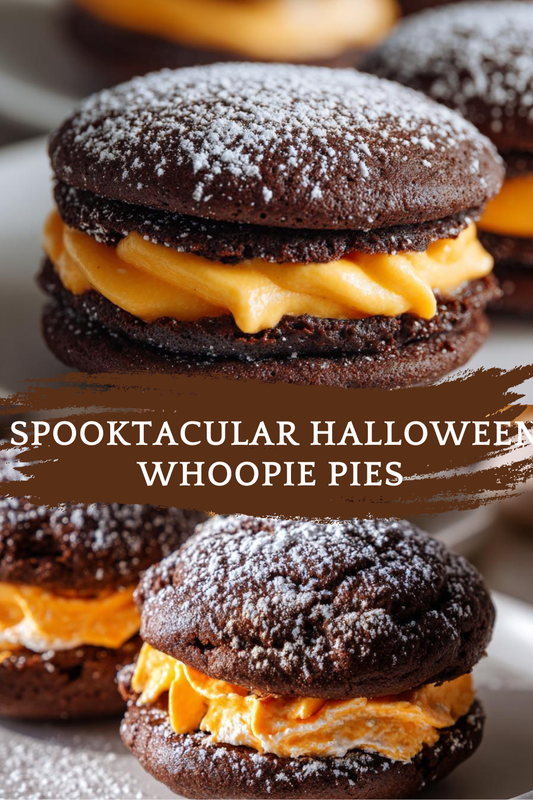
PrintHalloween Whoopie Pies: Discover the Spookiest Recipes!
- Total Time: 42 minutes
- Yield: 12 whoopie pies
- Diet: Vegetarian
Description
Halloween Whoopie Pies are delightful, spooky treats perfect for Halloween celebrations, featuring a soft, cake-like exterior and a creamy filling.
Ingredients
- 2 cups all-purpose flour
- 1 cup cocoa powder
- 1 teaspoon baking soda
- 1/2 teaspoon salt
- 1 cup unsalted butter, softened
- 1 cup granulated sugar
- 1 cup brown sugar
- 2 large eggs
- 1 teaspoon vanilla extract
- 1 cup milk
- 1 cup powdered sugar
- 1/2 cup cream cheese, softened
- Food coloring (orange and black)
Instructions
- Preheat the oven to 350°F (175°C) and line a baking sheet with parchment paper.
- In a bowl, whisk together flour, cocoa powder, baking soda, and salt.
- In a separate bowl, cream together the butter, granulated sugar, and brown sugar until light and fluffy.
- Add the eggs and vanilla extract to the butter mixture and mix well.
- Gradually add the dry ingredients to the wet ingredients, alternating with the milk, and mix until smooth.
- Drop spoonfuls of the batter onto the prepared baking sheet, spacing them apart.
- Bake for 10-12 minutes or until the edges are firm. Let cool completely.
- In a bowl, mix the cream cheese and powdered sugar until smooth. Add food coloring to create desired colors.
- Spread the cream cheese filling on the flat side of one pie and top with another pie to create a sandwich.
- Decorate with additional frosting or sprinkles if desired.
Notes
- Store in an airtight container for up to 3 days.
- Feel free to customize the filling with different flavors or colors.
- These can be made ahead of time and frozen for later use.
- Prep Time: 30 minutes
- Cook Time: 12 minutes
- Category: Dessert
- Method: Baking
- Cuisine: American
Why You’ll Love This Halloween Whoopie Pies
These Halloween Whoopie Pies are a dream come true for busy schedules. They come together quickly, making them perfect for last-minute treats or festive gatherings. The soft, cake-like exterior paired with a creamy filling creates a delightful taste that’s hard to resist. Plus, they’re customizable! You can play with colors and flavors, ensuring every batch is unique and exciting. Who wouldn’t love a treat that’s both easy and delicious?
Ingredients for Halloween Whoopie Pies
Gathering the right ingredients is half the fun of baking these Halloween Whoopie Pies! Here’s what you’ll need:
- All-purpose flour: This is the backbone of your whoopie pies, giving them structure and a soft texture.
- Cocoa powder: For that rich, chocolatey flavor that makes these treats irresistible.
- Baking soda: This helps the pies rise, creating that lovely cake-like consistency.
- Salt: Just a pinch enhances the sweetness and balances the flavors.
- Unsalted butter: Softened butter adds richness and moisture to the batter.
- Granulated sugar: This sweetens the pies and contributes to their delightful texture.
- Brown sugar: Adds a hint of caramel flavor and keeps the pies moist.
- Large eggs: They bind everything together and help with the rise.
- Vanilla extract: A splash of vanilla brings warmth and depth to the flavor.
- Milk: This adds moisture and helps create a smooth batter.
- Powdered sugar: Essential for the creamy filling, giving it that sweet, melt-in-your-mouth quality.
- Cream cheese: This adds a tangy richness to the filling, making it extra special.
- Food coloring (orange and black): Perfect for adding a festive touch to your filling, making these pies truly Halloween-worthy!
For exact measurements, check the bottom of the article where you can find everything listed for easy printing. Feel free to get creative with your ingredients! You can swap in gluten-free flour or use different types of sugar if you prefer. The possibilities are endless!
How to Make Halloween Whoopie Pies
Step 1: Preheat and Prepare
First things first, preheat your oven to 350°F (175°C). This step is crucial for achieving that perfect bake. While the oven warms up, line a baking sheet with parchment paper. This not only prevents sticking but also makes cleanup a breeze. Trust me, you’ll thank yourself later! Having everything ready will make the process smoother and more enjoyable.
Step 2: Mix Dry Ingredients
In a large bowl, whisk together the all-purpose flour, cocoa powder, baking soda, and salt. This step is essential for evenly distributing the leavening agents and flavors. Make sure there are no lumps in the cocoa powder; we want a smooth batter! This mixture will form the foundation of your Halloween Whoopie Pies, so take your time to get it just right.
Step 3: Cream the Butter and Sugars
In another bowl, cream together the softened unsalted butter, granulated sugar, and brown sugar until the mixture is light and fluffy. This usually takes about 3-5 minutes. The goal here is to incorporate air into the butter, which will help your whoopie pies rise beautifully. You’ll know it’s ready when it looks pale and creamy. It’s like magic in a bowl!
Step 4: Combine Wet Ingredients
Now, it’s time to add the eggs and vanilla extract to your butter mixture. Beat them in one at a time, ensuring each egg is fully incorporated before adding the next. This helps create a smooth, cohesive batter. The vanilla adds a lovely warmth that complements the chocolate perfectly. You’ll start to smell that delicious aroma wafting through your kitchen!
Step 5: Combine Wet and Dry Mixtures
Gradually add the dry ingredients to the wet mixture, alternating with the milk. Start with a third of the dry mix, then add half the milk, and repeat until everything is combined. This method prevents clumping and ensures a smooth batter. Mix just until combined; overmixing can lead to tough pies. We want them soft and cake-like, not dense!
Step 6: Bake the Whoopie Pies
Using a spoon or cookie scoop, drop spoonfuls of batter onto the prepared baking sheet, spacing them about two inches apart. Bake for 10-12 minutes, or until the edges are firm but the centers are still soft. Keep an eye on them; you want that perfect balance! Once baked, let them cool completely on a wire rack. Patience is key here!
Step 7: Prepare the Cream Cheese Filling
While the whoopie pies cool, it’s time to whip up the cream cheese filling. In a bowl, mix the softened cream cheese and powdered sugar until smooth and creamy. This is where the fun begins! Add a few drops of food coloring to create your desired Halloween hues. Whether you go for spooky black or vibrant orange, this filling will be the star of the show!
Step 8: Assemble the Whoopie Pies
To assemble, spread a generous amount of the cream cheese filling on the flat side of one whoopie pie. Top it with another pie, flat side down, to create a delicious sandwich. Press gently to ensure the filling oozes slightly out the sides. If you’re feeling festive, decorate with additional frosting or sprinkles. Your Halloween Whoopie Pies are now ready to be devoured!
Tips for Success
- Make sure your butter is softened for easy creaming.
- Use a cookie scoop for uniform pie sizes.
- Let the whoopie pies cool completely before adding the filling.
- Experiment with different food coloring for a fun twist.
- Store leftovers in an airtight container to keep them fresh.
Equipment Needed
- Baking sheet: A standard baking sheet works well, but you can use a jelly roll pan if you have one.
- Parchment paper: If you don’t have this, a silicone baking mat is a great alternative.
- Mixing bowls: Use any size, but a large bowl is ideal for mixing.
- Whisk: A hand whisk or electric mixer will do the trick.
- Cookie scoop: If you don’t have one, a tablespoon works just fine!
Variations
- Gluten-free: Substitute all-purpose flour with a gluten-free blend for a delicious alternative.
- Vegan: Use plant-based butter, flax eggs, and non-dairy milk to create a vegan version of these treats.
- Flavor twists: Add peppermint extract for a minty kick or orange zest for a citrusy flavor.
- Nutty addition: Fold in chopped nuts or chocolate chips for extra texture and flavor.
- Spooky fillings: Experiment with different fillings like pumpkin spice or caramel for a seasonal twist.
Serving Suggestions
- Pair your Halloween Whoopie Pies with a warm cup of spiced apple cider for a cozy treat.
- Serve alongside a platter of fresh fruit for a colorful contrast.
- For a festive touch, display them on a spooky-themed cake stand.
- Consider adding a scoop of vanilla ice cream for an indulgent dessert.
FAQs about Halloween Whoopie Pies
Can I make Halloween Whoopie Pies ahead of time?
Absolutely! These delightful treats can be made a day or two in advance. Just store them in an airtight container to keep them fresh. You can also freeze them for up to a month. Just remember to add the filling right before serving for the best texture!
What can I use instead of cream cheese in the filling?
If cream cheese isn’t your thing, you can substitute it with mascarpone cheese or even whipped cream for a lighter filling. Just make sure to adjust the sugar to taste, as whipped cream is less sweet than cream cheese.
How do I store leftover Halloween Whoopie Pies?
Store any leftovers in an airtight container at room temperature for up to three days. If you want to keep them longer, consider refrigerating them. Just be sure to let them come to room temperature before serving for the best flavor!
Can I customize the flavors of the whoopie pies?
Definitely! You can add different extracts like almond or peppermint to the batter for a unique twist. You can also mix in chocolate chips or nuts for added texture. The possibilities are endless!
What’s the best way to decorate my Halloween Whoopie Pies?
Get creative! Use additional frosting, sprinkles, or even edible glitter to give your whoopie pies a festive look. You can also pipe designs with colored frosting to make them extra spooky. Have fun with it!
Final Thoughts
Making Halloween Whoopie Pies is more than just baking; it’s about creating memories with your loved ones. The joy of mixing, baking, and decorating these delightful treats brings a sense of togetherness that’s hard to beat. As you watch your family’s faces light up with each bite, you’ll realize that these spooky sweets are perfect for any celebration. Plus, the flexibility of this recipe means you can adapt it to suit your family’s tastes. So, roll up your sleeves, embrace the mess, and enjoy the sweet rewards of your culinary adventure this Halloween!