
Introduction to Halloween Baking Ideas
As the leaves turn and the air gets crisp, I find myself diving into the world of Halloween baking ideas. There’s something magical about creating festive treats that not only taste delicious but also spark joy and creativity. Whether you’re a busy mom juggling work and family or a professional looking to impress your friends, these baking ideas are perfect for you. They’re quick, fun, and sure to delight everyone at your Halloween gathering. So, roll up your sleeves and let’s whip up some spooky delights that will make this season unforgettable!
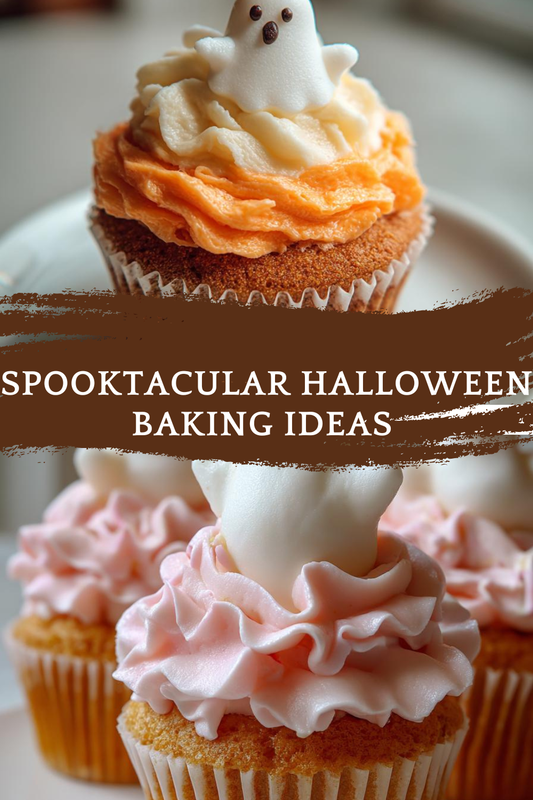
PrintHalloween baking ideas that delight and inspire creativity!
- Total Time: 50 minutes
- Yield: 12 servings
- Diet: Vegetarian
Description
A collection of fun and creative Halloween baking ideas that will inspire your festive spirit and delight your guests.
Ingredients
- 2 cups all-purpose flour
- 1 cup granulated sugar
- 1/2 cup unsweetened cocoa powder
- 1 tsp baking powder
- 1/2 tsp baking soda
- 1/4 tsp salt
- 1 cup milk
- 1/2 cup vegetable oil
- 2 large eggs
- 1 tsp vanilla extract
- Food coloring (orange, black, green)
- Decorative sprinkles
Instructions
- Preheat your oven to 350°F (175°C).
- In a large bowl, mix together the flour, sugar, cocoa powder, baking powder, baking soda, and salt.
- In another bowl, whisk together the milk, vegetable oil, eggs, and vanilla extract.
- Combine the wet and dry ingredients until just mixed.
- Divide the batter into separate bowls and add food coloring to create different colors.
- Pour the colored batter into greased baking pans.
- Bake for 25-30 minutes or until a toothpick comes out clean.
- Let cool and decorate with frosting and sprinkles to create Halloween-themed designs.
Notes
- Feel free to use any Halloween-themed cookie cutters for shaping.
- Experiment with different flavors and colors for a unique twist.
- Store baked goods in an airtight container to maintain freshness.
- Prep Time: 20 minutes
- Cook Time: 30 minutes
- Category: Dessert
- Method: Baking
- Cuisine: American
Why You’ll Love This Halloween Baking Ideas
These Halloween baking ideas are not just about fun; they’re a lifesaver for busy days! With simple ingredients and quick steps, you can whip up delightful treats in no time. Plus, the taste is simply irresistible! Imagine the smiles on your loved ones’ faces as they enjoy your spooky creations. It’s a perfect way to bond with family while unleashing your inner baker. Trust me, you’ll love every moment!
Ingredients for Halloween Baking Ideas
Gathering the right ingredients is the first step to creating your Halloween masterpieces. Here’s what you’ll need:
- All-purpose flour: The backbone of your baked goods, providing structure and texture.
- Granulated sugar: This sweetener adds the perfect touch of sweetness to balance the flavors.
- Unsweetened cocoa powder: For that rich, chocolatey flavor that makes everything better.
- Baking powder: A leavening agent that helps your treats rise and become fluffy.
- Baking soda: Another leavening agent, it works wonders when combined with acidic ingredients.
- Salt: Just a pinch enhances the overall flavor, making your treats taste even more delicious.
- Milk: Adds moisture and richness, ensuring your baked goods are soft and tender.
- Vegetable oil: Keeps your treats moist and adds a lovely texture.
- Eggs: They bind everything together and contribute to the overall structure.
- Vanilla extract: A splash of this adds warmth and depth to your flavors.
- Food coloring: Get creative! Use orange, black, and green to bring your Halloween theme to life.
- Decorative sprinkles: These are the finishing touch, adding a festive flair to your spooky designs.
Feel free to experiment with flavors or even substitute ingredients based on your preferences. For instance, you can use almond milk instead of regular milk for a nutty twist. If you’re feeling adventurous, try adding a dash of cinnamon or nutmeg for a warm, autumnal flavor. The exact quantities for each ingredient are listed at the bottom of the article, ready for you to print and use!
How to Make Halloween Baking Ideas
Now that you have your ingredients ready, let’s dive into the fun part—baking! Follow these simple steps to create your Halloween treats that will wow your family and friends.
Step 1: Preheat the Oven
First things first, preheat your oven to 350°F (175°C). This step is crucial because it ensures your treats bake evenly. A hot oven helps the batter rise properly, giving you that fluffy texture we all love. So, don’t skip this step!
Step 2: Mix Dry Ingredients
In a large bowl, combine your all-purpose flour, granulated sugar, cocoa powder, baking powder, baking soda, and salt. Whisk them together until they’re well blended. This is key for achieving a smooth batter. If you see any lumps, break them up! A well-mixed dry blend sets the stage for a perfect bake.
Step 3: Combine Wet Ingredients
In another bowl, whisk together the milk, vegetable oil, eggs, and vanilla extract. Make sure to mix thoroughly until everything is well combined. This step is important because it helps to create a uniform batter. The more you whisk, the better your treats will turn out!
Step 4: Mix Wet and Dry Ingredients
Now, it’s time to combine the wet and dry ingredients. Pour the wet mixture into the dry ingredients and gently fold them together. Be careful not to overmix! A few lumps are okay. Overmixing can lead to dense treats, and we want them light and fluffy.
Step 5: Color the Batter
Here comes the fun part! Divide the batter into separate bowls and add your food coloring. Use orange for a classic Halloween vibe, black for a spooky touch, and green for a pop of color. Swirl the colors together for a marbled effect or layer them for a striped look. Let your creativity shine!
Step 6: Pour into Pans
Prepare your baking pans by greasing them lightly. This will help your treats come out easily once they’re baked. Pour the colored batter into the pans, filling them about two-thirds full. This gives them room to rise without overflowing.
Step 7: Bake
Place your pans in the preheated oven and bake for 25-30 minutes. To check for doneness, insert a toothpick into the center. If it comes out clean, your treats are ready! If not, give them a few more minutes. Keep an eye on them; you don’t want to overbake!
Step 8: Cool and Decorate
Once baked, remove the pans from the oven and let them cool for about 10 minutes. Then, transfer the treats to a wire rack to cool completely. This step is essential for perfect decorating. Once cool, unleash your inner artist! Use frosting and decorative sprinkles to create spooky designs that will impress everyone.
Tips for Success
- Always measure your ingredients accurately for the best results.
- Use room temperature eggs and milk for a smoother batter.
- Don’t rush the cooling process; it helps with decorating.
- Experiment with different food coloring techniques for unique designs.
- Keep your workspace organized to make baking more enjoyable.
Equipment Needed for Halloween Baking Ideas
- Mixing bowls: Use any size you have; just ensure they’re sturdy.
- Whisk: A hand whisk works great, but an electric mixer speeds things up.
- Baking pans: Round or square pans are perfect; muffin tins work too!
- Measuring cups and spoons: Essential for accuracy; use a kitchen scale for precision.
- Cooling rack: If you don’t have one, a plate will do just fine.
Variations on Halloween Baking Ideas
- Gluten-free option: Substitute all-purpose flour with a gluten-free blend for a delicious alternative.
- Vegan twist: Replace eggs with flaxseed meal and use almond milk instead of regular milk.
- Flavorful additions: Add a teaspoon of pumpkin spice or cinnamon for a warm, autumn flavor.
- Chocolate lovers: Mix in chocolate chips or chunks for an extra chocolatey treat.
- Fruit infusion: Incorporate mashed bananas or applesauce for added moisture and natural sweetness.
Serving Suggestions for Halloween Baking Ideas
- Pair your spooky treats with a warm cup of apple cider for a cozy vibe.
- Serve alongside a platter of fresh fruit for a colorful contrast.
- Use Halloween-themed plates and napkins to enhance the festive atmosphere.
- Consider adding a scoop of vanilla ice cream for an indulgent touch.
FAQs about Halloween Baking Ideas
Can I make these Halloween baking ideas ahead of time?
Absolutely! You can bake your treats a day or two in advance. Just store them in an airtight container to keep them fresh. This way, you can enjoy more time with your family and friends during the festivities!
What if I don’t have food coloring?
No worries! You can use natural alternatives like beet juice for red, turmeric for yellow, or matcha for green. These options not only add color but also a unique flavor twist to your Halloween baking ideas.
How can I make these treats healthier?
To lighten up your Halloween baking ideas, consider using whole wheat flour instead of all-purpose flour. You can also reduce the sugar or substitute it with honey or maple syrup for a more natural sweetness.
What’s the best way to decorate my Halloween treats?
Get creative! Use frosting to create spooky faces or designs. Add edible glitter, candy eyes, or themed sprinkles for a festive touch. The more colorful and fun, the better!
Can I freeze these Halloween treats?
Yes! These treats freeze beautifully. Just wrap them tightly in plastic wrap and place them in a freezer-safe bag. When you’re ready to enjoy, let them thaw at room temperature for a delightful treat anytime!
Final Thoughts
As I reflect on these Halloween baking ideas, I can’t help but smile at the joy they bring. The laughter shared while decorating, the delightful aromas wafting through the kitchen, and the sheer excitement of presenting your spooky creations to loved ones are truly magical. This recipe isn’t just about baking; it’s about creating memories that last a lifetime. So, gather your family, unleash your creativity, and let the spirit of Halloween fill your home with warmth and happiness. Trust me, these treats will not only satisfy your sweet tooth but also your heart!