
Introduction to Easy Pumpkin Carving
As the leaves turn and the air gets crisp, I find myself drawn to the delightful tradition of easy pumpkin carving. It’s a wonderful way to embrace the season and create something beautiful with your family. I know how busy life can get, especially for us moms juggling work and home. That’s why I love this quick and fun activity! With just a few simple steps, you can transform a humble pumpkin into a stunning masterpiece that will impress your loved ones. Let’s dive into this creative adventure together!
Print
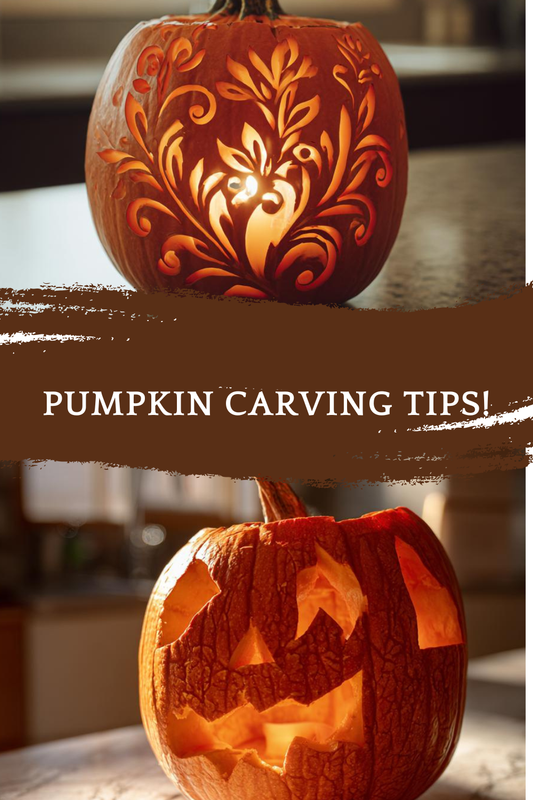
Easy pumpkin carving: Create stunning designs effortlessly!
- Total Time: 15 minutes
- Yield: 1 carved pumpkin
- Diet: Vegetarian
Description
Learn how to create stunning pumpkin designs effortlessly with our easy pumpkin carving techniques.
Ingredients
- 1 medium pumpkin
- Carving tools (knife, scoop, stencil)
- Optional: candles or LED lights for illumination
Instructions
- Choose a pumpkin and cut off the top to create a lid.
- Scoop out the seeds and pulp from the inside.
- Select a design or stencil for carving.
- Transfer the design onto the pumpkin’s surface.
- Carefully carve along the lines of the design using your tools.
- Place a candle or LED light inside to illuminate your creation.
Notes
- Always be cautious when using sharp tools.
- Consider using a small pumpkin for intricate designs.
- Preserve your pumpkin by applying petroleum jelly to the cut edges.
- Prep Time: 15 minutes
- Cook Time: 0 minutes
- Category: Craft
- Method: Carving
- Cuisine: N/A
Why You’ll Love This Easy Pumpkin Carving
Easy pumpkin carving is a fantastic way to unleash your creativity without spending hours in the kitchen. It’s quick, taking just 15 minutes from start to finish, making it perfect for busy days. Plus, it’s a wonderful bonding experience for families. You’ll create lasting memories while crafting a unique decoration that brings joy to your home. Trust me, this is a fun and rewarding way to celebrate the season!
Ingredients for Easy Pumpkin Carving
Gathering the right ingredients is the first step in your easy pumpkin carving adventure. Here’s what you’ll need:
- 1 medium pumpkin: Choose a pumpkin that feels sturdy and has a smooth surface. This will be your canvas for creativity!
- Carving tools: A sharp knife, a scoop for the insides, and a stencil for your design are essential. If you don’t have a carving kit, a regular kitchen knife will do the trick.
- Optional: Candles or LED lights for illumination. These will make your carved pumpkin glow beautifully at night, adding a magical touch to your creation.
For those who want to get fancy, consider using a small pumpkin for intricate designs. It’s easier to handle and can lead to some adorable results! Remember, the exact quantities and more detailed instructions are available at the bottom of the article for your convenience.
How to Make Easy Pumpkin Carving
Now that you have your ingredients ready, let’s jump into the fun part: the actual carving! Follow these simple steps to create your masterpiece.
Step 1: Choose Your Pumpkin
Start by selecting a pumpkin that speaks to you. Look for one that’s firm and has a smooth surface. This will make carving easier and more enjoyable. Trust me, a good pumpkin is like a blank canvas waiting for your artistic touch!
Step 2: Cut Off the Top
Using your carving tools, carefully cut off the top of the pumpkin to create a lid. Make sure to angle your knife inward slightly. This way, the lid won’t fall inside when you put it back on. Safety first, right?
Step 3: Scoop Out the Seeds
Now it’s time to get your hands a little messy! Scoop out the seeds and stringy pulp from inside the pumpkin. I like to use a sturdy spoon for this. It’s a bit like cleaning out a small cave, but the reward is worth it. Save those seeds for roasting later!
Step 4: Select Your Design
Choose a design that excites you! Whether it’s a classic jack-o’-lantern face or something more intricate, the options are endless. You can find stencils online or draw your own. Just remember, the simpler the design, the easier it will be to carve.
Step 5: Transfer the Design
Once you have your design, it’s time to transfer it onto the pumpkin. You can lightly trace it with a pen or use a pin to poke holes along the lines. This will guide you as you carve. It’s like creating a roadmap for your pumpkin adventure!
Step 6: Carve the Pumpkin
Now comes the exciting part! Carefully carve along the lines of your design using your tools. Take your time and don’t rush. If you make a mistake, it’s okay! Just embrace the imperfections; they add character to your creation.
Step 7: Illuminate Your Creation
Finally, place a candle or LED light inside your carved pumpkin. This will bring your design to life, especially at night. Watching your pumpkin glow is like seeing your hard work rewarded. It’s a magical moment that makes all the effort worthwhile!
Tips for Success
- Always use a sharp knife for cleaner cuts and easier carving.
- Consider using a small pumpkin for detailed designs; they’re easier to handle.
- Keep a damp cloth nearby to wipe off your tools and hands as you go.
- Apply petroleum jelly to the cut edges to help preserve your pumpkin longer.
- Involve the kids! It’s a great way to bond and create memories together.
Equipment Needed for Easy Pumpkin Carving
- Carving knife: A sharp kitchen knife works well if you don’t have a carving kit.
- Scoop: A sturdy spoon or ice cream scoop can help remove the insides easily.
- Stencil: Use printed designs or draw your own for a personal touch.
- Marker: A washable marker is great for tracing your design.
Variations on Easy Pumpkin Carving
- Mini Pumpkins: Use small pumpkins for adorable, bite-sized designs. They’re perfect for table centerpieces!
- Painted Pumpkins: If carving isn’t your thing, try painting your pumpkin instead. Use acrylic paints for vibrant colors and fun patterns.
- Glow-in-the-Dark Paint: For a spooky twist, use glow-in-the-dark paint on your carved designs. They’ll shine bright at night!
- Seasonal Themes: Get creative with themes! Try carving autumn leaves, spooky ghosts, or even your favorite characters.
- Food-safe Designs: If you plan to use your pumpkin for cooking later, consider designs that won’t compromise the flesh, like simple patterns or outlines.
Serving Suggestions for Your Carved Pumpkin
- Display: Place your carved pumpkin on a colorful tablecloth for a festive touch.
- Pair with Snacks: Serve with seasonal treats like caramel apples or popcorn for a fun fall gathering.
- Drinks: Offer warm apple cider or pumpkin spice lattes to complement the autumn vibe.
- Lighting: Use string lights around your pumpkin for an enchanting evening glow.
FAQs about Easy Pumpkin Carving
What tools do I need for easy pumpkin carving?
You’ll need a sharp knife, a scoop for the insides, and a stencil for your design. If you don’t have a carving kit, a regular kitchen knife works just fine!
Can I carve a pumpkin without a stencil?
Absolutely! You can freehand your design or use a washable marker to draw directly on the pumpkin. Just let your creativity flow!
How do I preserve my carved pumpkin?
To keep your pumpkin fresh longer, apply petroleum jelly to the cut edges. This helps seal in moisture and slows down decay.
What are some easy pumpkin carving designs for beginners?
Start with simple shapes like triangles for eyes and a jagged mouth. Classic jack-o’-lantern faces are always a hit and perfect for beginners!
Can I use my carved pumpkin for cooking later?
Yes, but be cautious with your design. Opt for simple patterns that won’t compromise the flesh if you plan to cook with it later. Enjoy your culinary adventure!
Final Thoughts on Easy Pumpkin Carving
Easy pumpkin carving is more than just a fun activity; it’s a chance to create cherished memories with your loved ones. As you gather around the table, laughter fills the air, and creativity flows freely. Each carved pumpkin tells a story, reflecting your unique style and spirit. Whether you’re a seasoned pro or a first-timer, the joy of seeing your design come to life is truly magical. So grab your tools, unleash your imagination, and let the spirit of the season inspire you. Happy carving, and may your pumpkins shine bright this Halloween!