
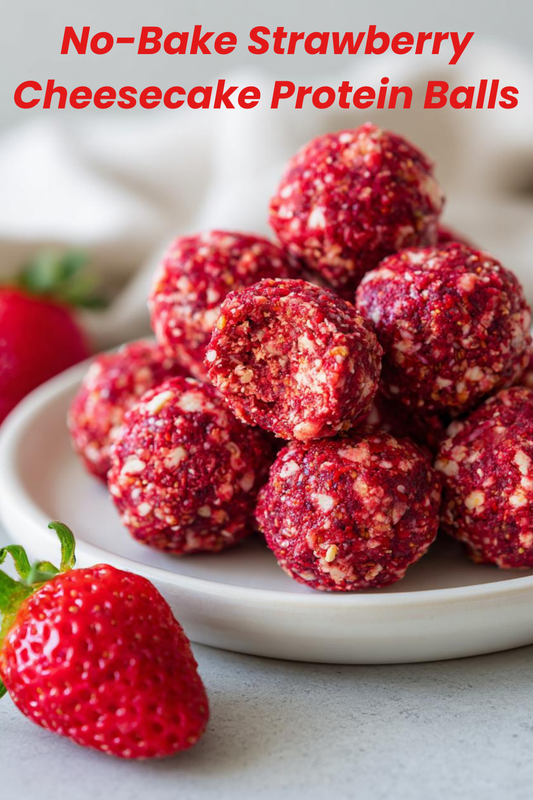
As a busy mom, I know how challenging it can be to find time for healthy snacks. That’s why I absolutely adore these No-Bake Strawberry Cheesecake Protein Balls! They’re not just a quick solution for a hectic day; they’re also a delightful treat that the whole family will love. Imagine indulging in a creamy, strawberry-flavored bite that’s packed with protein and goodness. Plus, they require no baking, making them perfect for those days when you want something sweet without the fuss. Trust me, these little gems will become your go-to snack!
Why You’ll Love This No-Bake Strawberry Cheesecake Protein Balls
These No-Bake Strawberry Cheesecake Protein Balls are a game-changer for busy lifestyles. They come together in just 15 minutes, making them a breeze to whip up. The taste? Oh, it’s like a slice of cheesecake in a bite! Plus, they’re healthy, satisfying, and perfect for a quick snack or dessert. You can feel good about indulging, knowing they’re packed with protein and wholesome ingredients. What’s not to love?
Ingredients for No-Bake Strawberry Cheesecake Protein Balls
Gathering the right ingredients is half the fun! Here’s what you’ll need to create these delightful No-Bake Strawberry Cheesecake Protein Balls:
- Rolled oats: These provide a hearty base and a good source of fiber.
- Protein powder: Choose your favorite flavor to boost the protein content. It’s the secret to making these balls a satisfying snack.
- Almond butter: This creamy nut butter adds healthy fats and a rich flavor. You can swap it for peanut butter if you prefer.
- Honey or maple syrup: Both serve as natural sweeteners. Adjust the amount based on your sweetness preference.
- Crushed freeze-dried strawberries: These give a burst of strawberry flavor without the moisture. Fresh strawberries can be used, but they may alter the texture.
- Cream cheese: Softened cream cheese adds that cheesecake creaminess. For a vegan option, use a plant-based cream cheese alternative.
- Vanilla extract: A splash of vanilla enhances the overall flavor, making each bite even more delicious.
For exact measurements, check the bottom of the article where you can find everything listed for easy printing. Happy cooking!
How to Make No-Bake Strawberry Cheesecake Protein Balls
Making these No-Bake Strawberry Cheesecake Protein Balls is as easy as pie—well, no-bake cheesecake, that is! Follow these simple steps, and you’ll have a delicious snack ready in no time.
Step 1: Combine Dry Ingredients
Start by grabbing a large bowl. Toss in the rolled oats and protein powder. Give them a good stir until they’re well mixed. This step is crucial because it sets the foundation for your protein balls. The oats add texture, while the protein powder packs in the nutrition!
Step 2: Mix in Wet Ingredients
Next, add the almond butter, honey (or maple syrup), and vanilla extract to the dry mixture. Use a spatula or a wooden spoon to mix everything together. You want it to be well combined, so don’t be shy! The almond butter will make it creamy, while the sweetener brings everything to life.
Step 3: Fold in Strawberries and Cream Cheese
Now, it’s time for the star of the show—those crushed freeze-dried strawberries! Gently fold them into the mixture along with the softened cream cheese. This is where the magic happens! The strawberries add a burst of flavor, and the cream cheese gives that cheesecake vibe. Make sure everything is evenly distributed.
Step 4: Form the Balls
With your mixture ready, it’s time to get your hands a little messy! Take a small amount of the mixture and roll it into a ball about 1 inch in diameter. Don’t worry if they’re not perfect; they’ll still taste amazing! Place each ball on a baking sheet lined with parchment paper. This makes cleanup a breeze!
Step 5: Chill and Store
Finally, pop the baking sheet in the refrigerator for at least 30 minutes. This helps the protein balls firm up, making them easier to handle. Once they’re chilled, transfer them to an airtight container. They’ll stay fresh in the fridge for up to a week—if they last that long!
Tips for Success
- Use a cookie scoop for even-sized balls; it makes the process quicker and easier.
- Chill the mixture for 10 minutes before rolling to make it less sticky.
- Experiment with different nut butters for unique flavors.
- Store the protein balls in the freezer for a longer shelf life.
- Feel free to add mini chocolate chips for an extra treat!
Equipment Needed
- Large bowl: Any mixing bowl will do, but a glass bowl is great for visibility.
- Spatula or wooden spoon: Use whatever you have on hand for mixing.
- Baking sheet: A regular sheet works, but a silicone mat can prevent sticking.
- Parchment paper: Optional, but it makes cleanup a breeze!
Variations
- Chocolate Lovers: Add cocoa powder or mini chocolate chips for a chocolatey twist.
- Nut-Free: Substitute almond butter with sunflower seed butter for a nut-free option.
- Fruit Fusion: Swap freeze-dried strawberries for other freeze-dried fruits like raspberries or blueberries.
- Protein Boost: Mix in chia seeds or flaxseeds for added nutrition and crunch.
- Spiced Up: Add a pinch of cinnamon or nutmeg for a warm, cozy flavor.
Serving Suggestions
- Pair these protein balls with a refreshing fruit smoothie for a balanced snack.
- Serve them alongside a cup of herbal tea for a cozy afternoon treat.
- For a fun presentation, arrange them on a colorful platter with fresh strawberries.
- Drizzle with a little extra honey for added sweetness before serving.
FAQs about No-Bake Strawberry Cheesecake Protein Balls
Can I make these No-Bake Strawberry Cheesecake Protein Balls vegan?
Absolutely! To make them vegan, simply use a plant-based protein powder and substitute the cream cheese with a vegan alternative. You can still enjoy that creamy texture without any animal products!
How long do these protein balls last in the fridge?
These delightful No-Bake Strawberry Cheesecake Protein Balls can be stored in an airtight container in the refrigerator for up to a week. If you want them to last longer, consider freezing them!
Can I use fresh strawberries instead of freeze-dried?
While you can use fresh strawberries, keep in mind that they may change the texture of the protein balls. Fresh strawberries contain moisture, which can make the mixture a bit soggy. If you do use them, try to reduce other wet ingredients slightly.
What’s the best way to serve these protein balls?
These protein balls are perfect on their own, but you can also pair them with a smoothie or a cup of tea. For a fun twist, arrange them on a platter with fresh strawberries for a beautiful presentation!
Can I customize the sweetness of the protein balls?
<pDefinitely! You can adjust the amount of honey or maple syrup to suit your taste. If you prefer a less sweet snack, start with a smaller amount and add more as needed. Enjoy experimenting!
Final Thoughts
Creating these No-Bake Strawberry Cheesecake Protein Balls has been a delightful journey for me, and I hope it will be for you too! They’re not just a snack; they’re a little moment of joy in our busy lives. Each bite is a reminder that healthy can be delicious and satisfying. Plus, they’re so easy to make that even the busiest of moms can whip them up in no time. So, gather your ingredients, roll up your sleeves, and enjoy the sweet satisfaction of a homemade treat that everyone will love. Happy snacking!
Print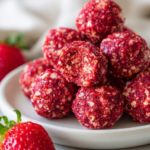
No-Bake Strawberry Cheesecake Protein Balls You’ll Love!
- Total Time: 45 minutes
- Yield: 12 protein balls
- Diet: Vegan
Description
Delicious and healthy no-bake strawberry cheesecake protein balls that are easy to make and perfect for a snack or dessert.
Ingredients
- 1 cup rolled oats
- 1/2 cup protein powder
- 1/2 cup almond butter
- 1/4 cup honey or maple syrup
- 1/2 cup crushed freeze-dried strawberries
- 1/4 cup cream cheese, softened
- 1 teaspoon vanilla extract
Instructions
- In a large bowl, combine the rolled oats and protein powder.
- Add the almond butter, honey (or maple syrup), and vanilla extract. Mix until well combined.
- Fold in the crushed freeze-dried strawberries and softened cream cheese until evenly distributed.
- Using your hands, form the mixture into small balls, about 1 inch in diameter.
- Place the protein balls on a baking sheet lined with parchment paper.
- Refrigerate for at least 30 minutes to firm up.
- Store in an airtight container in the refrigerator for up to a week.
Notes
- Feel free to substitute almond butter with peanut butter or any nut butter of your choice.
- You can add more or less honey/maple syrup depending on your desired sweetness.
- For a vegan version, use a plant-based protein powder and substitute cream cheese with a vegan alternative.
- Prep Time: 15 minutes
- Cook Time: 0 minutes
- Category: Snack
- Method: No-Bake
- Cuisine: American